Do you have a question about the Weller WES51 and is the answer not in the manual?
Details the WES51 as a microprocessor-controlled station for industrial manufacturing and repair.
Highlights features like ESD design, tip temperature offset, lockout, sleep mode, and LED indicators.
Guide for unpacking, connecting the tool, and preparing for soldering.
Advice on using the lowest effective temperature and selecting tip styles.
Warning against removing the ground prong to prevent erratic temperature control.
Lists the WES51, WES51DUK, and PES51 models with their basic descriptions.
Warning about chemicals produced during soldering that may cause cancer or birth defects.
Details on power input, voltage, size, temperature control range, stability, and accuracy.
Details on wattage, tool material, heater type, tip, sensor, and handle design.
Lists UL/CUL listing, ESD compliance, and adherence to various military standards.
Procedure to lock or unlock the tip temperature setting using the Lockout Pencil.
Clarification on temperature adjustment behavior after disabling the lockout feature.
Steps to adjust and calibrate the tip temperature offset using a test kit.
Procedure to reset the station's settings to the nominal factory configuration.
Description of the auto-off feature which shuts power to the tool after inactivity.
Safety warnings regarding AC line voltage and access to internal parts.
Steps to diagnose and resolve issues when the soldering tool fails to heat.
Steps to diagnose and resolve issues when the soldering tool overheats.
Guidance on correct methods and potential errors during tip temperature testing.
Details on the PES51 pencil's Nichrome heating element, ESD plastic, and interchangeable tips.
Caution to disconnect power before repairs and note on ground pin's effect on control.
Diagnostic steps for a PES51 tool that fails to heat, including resistance checks.
Steps to diagnose and resolve issues related to high voltage on the soldering tip.
Guidelines for keeping tips tinned, using appropriate fluxes, and cleaning.
Methods for cleaning unwettable tips and warnings against abrasive materials.
Advice on storing tips with excess solder and avoiding anti-seize materials.
Identifies key replacement parts for the WES51 station and PES51 iron.
Details various Weller soldering tip types, their sizes (TIP), and reach.
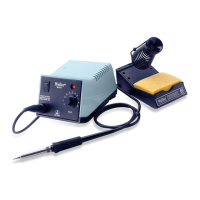
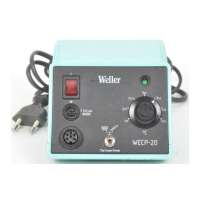
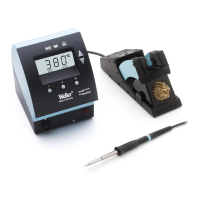
The Weller WES51 Electronic Soldering Station is a microprocessor-controlled device designed for industrial manufacturing, rework, and repair. It offers precise temperature control and ease of use for various soldering tasks.
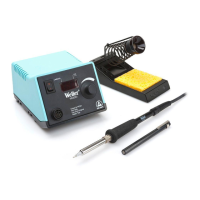
The WES51 Soldering Station provides a grounded soldering iron tip, zero power switching, and an anti-static design, ensuring high-quality soldering performance. It features external tip temperature offset and a lockout feature that allows users to secure the tip temperature setting using the supplied PW50 Probe. This prevents accidental changes to the temperature during operation. For energy efficiency and safety, the station automatically enters a sleep mode and shuts off power to the tool and its indicator LED after 99 minutes of inactivity.
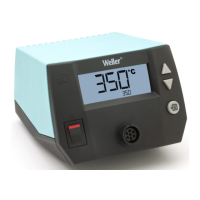
The tip temperature is adjustable within a range of 350°F to 850°F (177°C to 454°C) using a front panel control knob. The LED power indicator provides visual feedback on the station's status: "Green" for normal operation (unlocked mode) and "Red" when the temperature is "Locked." The LED also indicates the station's operational state through different sequences: a full "On" LED signifies that the station is ramping up to the set temperature, while a full "Off" or steadily flashing LED indicates that the station has reached the "Set Point." This visual feedback is consistent whether the station is in "Green" (unlocked) or "Red" (locked) mode.
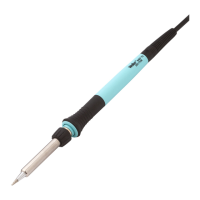
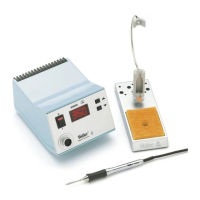
The PES51 50 Watt Soldering Tool, which accompanies the WES51 station, is constructed with a Nichrome-wound, stainless steel heating element. It features a non-burning silicone rubber cord and accepts a wide selection of iron, nickel, and chrome-plated copper tips, including those for surface mount devices. The tool's lightweight, high-impact ESD plastic handle is designed with controlled thermal conductivity via a foam sleeve, ensuring continuous use without discomfort from heat or fatigue. The heating element is designed for fast response and long life, encased in stainless steel to prevent corrosion at high temperatures. The PES51 tools are interchangeable without needing to adjust the station’s "Offset" function, thanks to a precision temperature sensor positioned deep inside the tip for rapid response to soldering load variations. This tool is specifically designed for electrostatic-free workstations and is free from stored static charges, meeting the requirements for Electrostatic Protective Materials.
To begin using the WES51, users should carefully unpack the unit and place the spring and funnel in the slot on top of the tool stand. The sponge should be dampened with distilled or de-ionized water. The tool is then inserted into its holder, and the tool plug is connected to the receptacle on the power unit, rotated clockwise to lock it in place. After plugging the line cord into a properly grounded AC receptacle, the station is turned "On." The temperature control knob is set to the desired tip temperature, and after approximately 30 seconds, the tool can be removed from the holder and the tip tinned with solder. The unit is ready for use once the LED begins to flash, indicating that the operating temperature has been reached.
Users are advised to always use the lowest temperature that can handle the soldering load. The Weller electronic control system ensures maximum power to the heated load even at lower temperature settings, eliminating the need for high temperatures for heavy soldering tasks. By using lower temperatures and selecting appropriate tip styles, sensitive components can be protected from heat damage.
The lockout feature can be activated by adjusting the temperature set knob to the desired tip temperature. Then, the Lockout Pencil is applied to the ESD symbol on the front panel until the LED blinks "Red" slowly (5 Hz). Removing the pencil within 2.5 seconds locks the temperature setting, and the indicator LED remains "Red," making the temperature set knob ineffective. To reverse the lockout, the Lockout Pencil is applied to the ESD symbol again until the LED blinks "Red" slowly. Removing the pencil within 2.5 seconds restores normal function to the temperature set knob, and the indicator LED turns "Green." If the temperature set knob was adjusted during the "Locked Mode," the station will control to the new set point once the lockout feature is disabled.
The station can be reset to factory default settings by turning it "Off," adjusting the temperature set knob to 600°F (315°C), applying the Lockout Pencil to the ESD symbol on the front panel, and then turning the station "On." Removing the Lockout Pencil completes the procedure, and any previously programmed tip temperature offset will be reset to nominal factory settings.
Proper tip maintenance is crucial for optimal performance and longevity. Users should keep the tip tinned and wipe it only before use. Rosin or activated rosin fluxes are recommended, as acid-type fluxes can significantly reduce tip life. The tip should be removed and cleaned regularly with a suitable cleaner, depending on the type of work and usage. For tips in constant use, cleaning at least once a week is advised to prevent corrosion between the tip and sensor, which can cause erratic temperature control. If a tip does not remove easily, it should not be forced, as this can damage the sensor. In such cases, attempting to remove the tip while heated or returning the tool to Weller for service is recommended. New tips should slide freely over the sensor probe when installed.
Abrasive materials and filing should never be used on the tip, as this will greatly reduce its life. Tip wettability can be affected by contact with organic substances like plastic resins, silicone grease, and other chemicals. If a tip becomes unwettable, it can be cleaned hot with a soft steel or brass brush using solder flux as a solvent, or with a Weller WPB1 polishing bar when the tip is cold. Care should be taken not to overdo this to avoid removing the iron plating. The tip should be re-tinned immediately after cleaning to prevent oxidation. Before storing, excess solder should not be removed from the heated tip, as this prevents oxidation of the wettable surface when the tip is reheated. Finally, no compound or anti-seize material should be used on Weller tips or the sensor probe, as this can cause wettability problems and seizing after extended heating periods.
For troubleshooting, if the tool does not heat, checks include verifying continuity of the power switch and line cord, and checking the transformer primary. With the line cord plugged in and power switch on, checks involve verifying 24VAC ±10% between pins #2 and #6 of the tool receptacle and checking the transformer secondary. If the tool overheats, replacing the soldering tool with a known good one and rechecking is advised. For tip temperature testing errors, it is critical to use the K111, Type “K” Thermocoupled Tip temperature test kits, as other methods or heavier thermocouple wire can cause inaccuracies. If high tip voltage is detected, replacing the soldering tool and rechecking the tip voltage is recommended, along with checking continuity from pin #5 of the tool receptacle to the line cord ground pin.
| Type | Soldering Station |
|---|---|
| Temperature Range | 350°F to 850°F (177°C to 454°C) |
| Power | 50 Watts |
| Voltage | 120V |
| Control | Analog |
| ESD Safe | Yes |
| Temperature Stability | ±10°F (±6°C) |
| Warranty | 1 year |
| Tip Compatibility | Weller ET Series |