88
OPERATION
GRINDING TIPS
Make sure the grinding wheel’s water reservoir has been adequately filled. Wear the proper safety clothes including
but not limited to safety goggles and a dust mask.
Grasp the workpiece firmly, making sure it is properly supported by either the universal jig or the work support.
Apply pressure evenly during grinding operations. When grinding, metal objects become heated quickly. Always
move the object back and forth to prevent overheating. Routinely cool the objects using the coolant tray.
POSITIONING THE SUPPORT
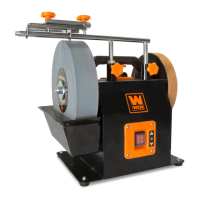
The universal jig support acts as both a work rest and as an attachment point for various jigs. The support can either
be positioned in the horizontal or the vertical position depending on if you prefer the grinding going with or against
the rotation of the wheel.
Slide the universal jig into the mounting brackets and lock it in place using the two onboard thumb screws. Make
sure the support is completely parallel and level with the face of the wheel, whether it be in the vertical or the hori-
zontal position.
Working with the rotation of the blade is preferable for more precise jobs, as this method removes less material.
For finer tools, such as knives or other carving instruments, grind with the rotation of the wheel.
GRINDING AGAINST THE WHEEL ROTATION
For grinding against the wheel rotation, first disconnect the sharpener from the power supply. Position the machine
so that the power switch is facing you. Attach the work support into the vertical position, making sure that everything
has been securely fastened and positioned to prevent unwanted movement during grinding. Rest your workpiece on
the universal support with the sharpened edge pointing away from you.
NOTE: The sharpener has been outfitted with a power switch that allows for the wheels to rotate in either direction.
GRINDING WITH THE WHEEL ROTATION
After disconnecting the sharpener from its power source, position the machine with the ON/OFF switch facing
away from you. Attach the work support into the horizontal mounts. Be sure it is securely positioned and that it will
not move during operation.
Set the rotation of the blade to spin away from you. Rest your workpiece on the universal support with the sharp-
ened edge pointing away from you. Grind your workpiece along the face of the wheel.
GRINDING JIG
The grinding jig provided with the wet sharpener is used for securing a variety of tools. The design of this jig can be
positioned to either grind tools with or against the wheel’s rotation.
To mount the grinding jig:
1. Disconnect the sharpener from the power supply.
2. Position the universal work support into the preferred position (horizontal or vertical orientation), locking it in
place with the included thumb screws.
3. Slide the jig onto the work support, using the lock knobs to secure it into position. Use the angle guide to set the
grinding wheel. Once it is set in place, use the locking knobs to secure the jig in place.

 Loading...