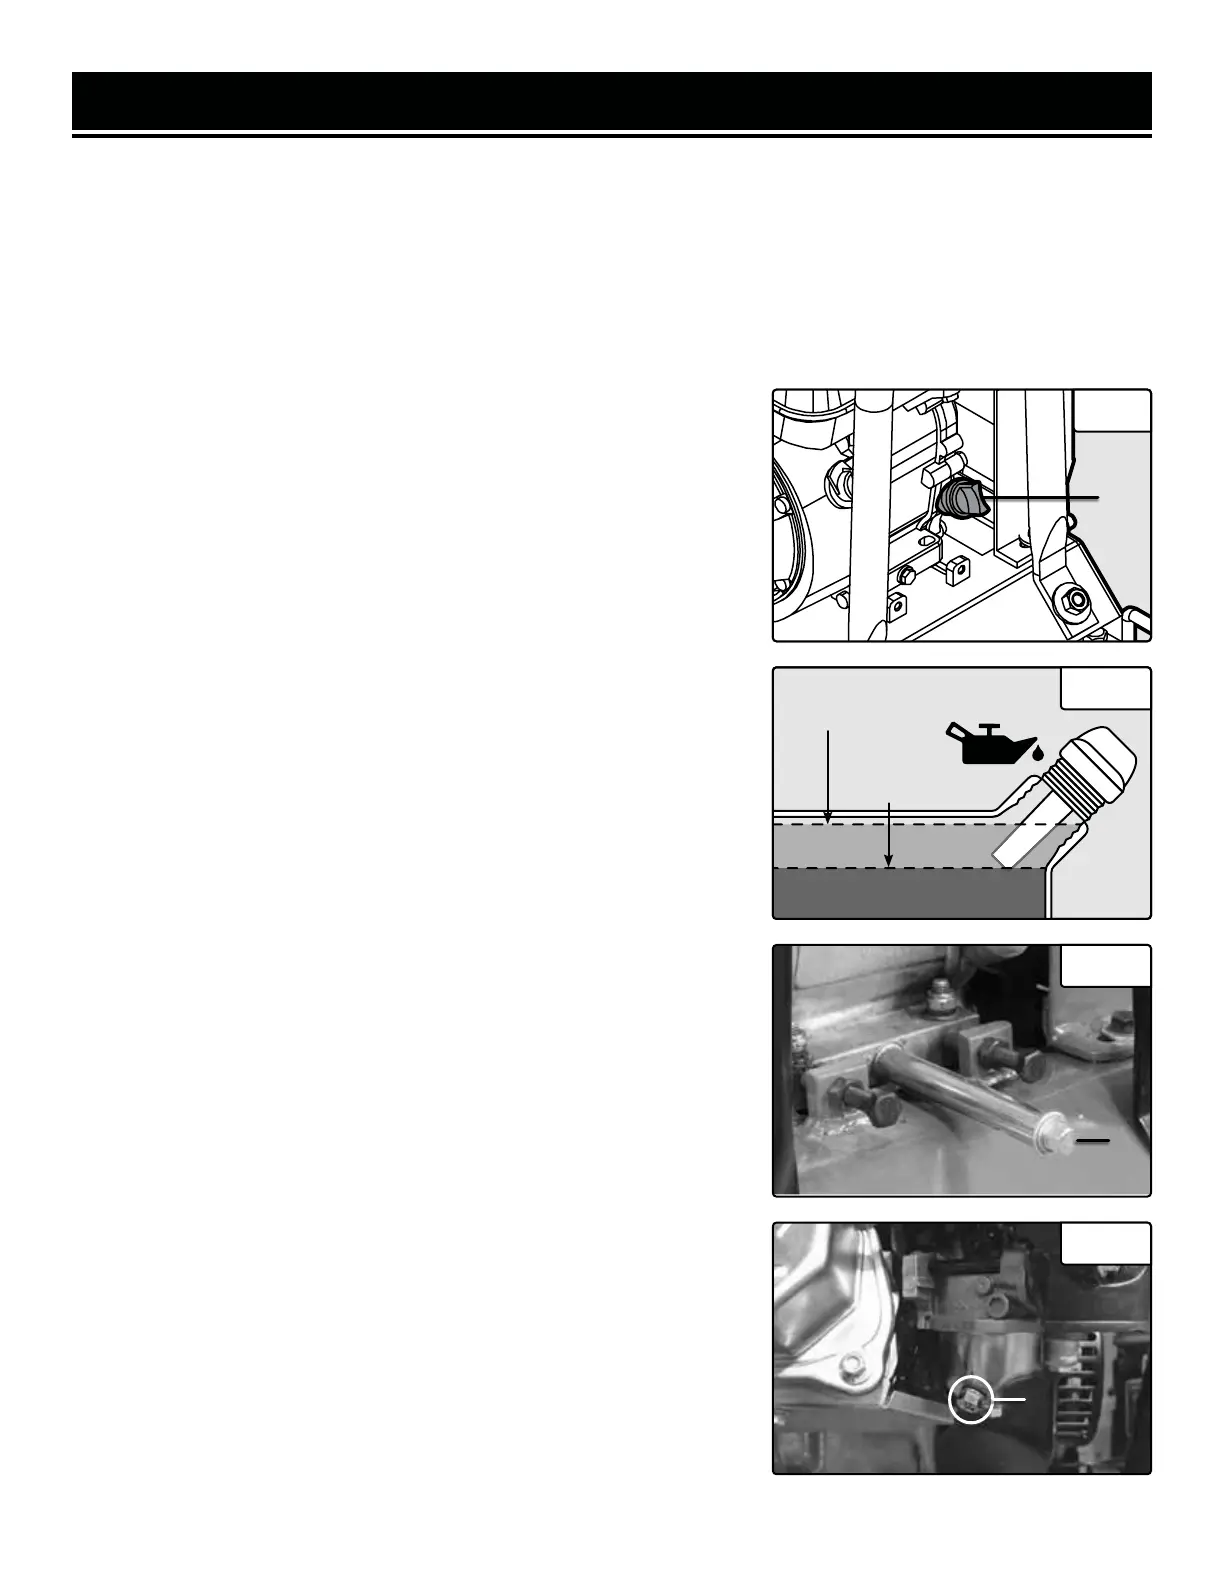
Upper Fill
Line
Lower Fill
Line
1
CLEANING THE PLATE COMPACTOR
Never clean the plate compactor when it is running! If the plate compactor becomes dirty, clean the exterior with a
damp cloth, a soft brush, or a vacuum / pressurized air.
CHECKING THE OIL
Check the oil level of the engine according to the Recommended Maintenance Schedule. The engine is equipped
with an automatic shutoff to protect it from running with low oil pressure. The engine should be checked before each
use for proper oil level. This is a critical step for proper engine maintenance.
MAINTENANCE
FILLING CRANKCASE WITH OIL
1. Make sure the plate compactor is on a sturdy, flat surface. Tilting the
plate compactor to assist in filling the oil will cause oil to flow into engine
areas and may cause damage. Keep the plate compactor level!
2. Remove the oil filler cap or dipstick (Fig. 9 - 1) from the engine.
3. Using a funnel, add the appropriate type and amount of oil into the
crankcase. Fill the crankcase to the upper fill line so you can visually see
the oil coming halfway up the oil fill threads (Fig. 10).
4. Check for oil leaks. Reinstall the oil dipstick before starting the engine.
CHANGING THE OIL
Change the oil when the engine is warm. This will allow for complete
drainage. Change the oil more often if operating under heavy load or
high ambient temperatures. It is also necessary to drain the oil from
the crankcase if it has become contaminated with water or dirt. The oil
capacity of the engine in this plate compactor is 20 fl. oz (0.6 L). Add oil
when the oil level is low.
DRAINING THE OIL FROM THE ENGINE
1. Place a container underneath the engine to catch oil as it drains.
2. Use an adjustable wrench or 12mm combination wrench to hold the
flats on the oil drain extension tube. Use a 10mm wrench or socket to
unscrew the oil drain plug (Fig. 11 - 1). Allow all the oil to drain from the
engine.
3. Reinstall the oil drain plug and tighten with a 10mm socket or wrench.
NOTE: Never dispose of used motor oil in the trash or down a drain.
Please call your local recycling center or auto garage to arrange oil dis-
posal.
DRAINING THE CARBURETOR
1. Turn the fuel valve to “OFF”.
2. Locate the drain screw (Fig. 8 - 1) on the carburetor bowl. Prepare a
pan, jar, or other approved gasoline storage container to catch the fuel
that will leak out.
3. Loosen the drain screw and allow the fuel to drain completely. When
it is done draining, re-tighten the drain screw.
Fig. 9
Fig. 10
Fig. 11
Fig. 12
1
1
15
 Loading...