OPERATION
CAUTION! Always load the fasteners after connecting the tool to its air supply. Unwanted misfires may occur
during connection. Never aim the tip towards yourself or others.
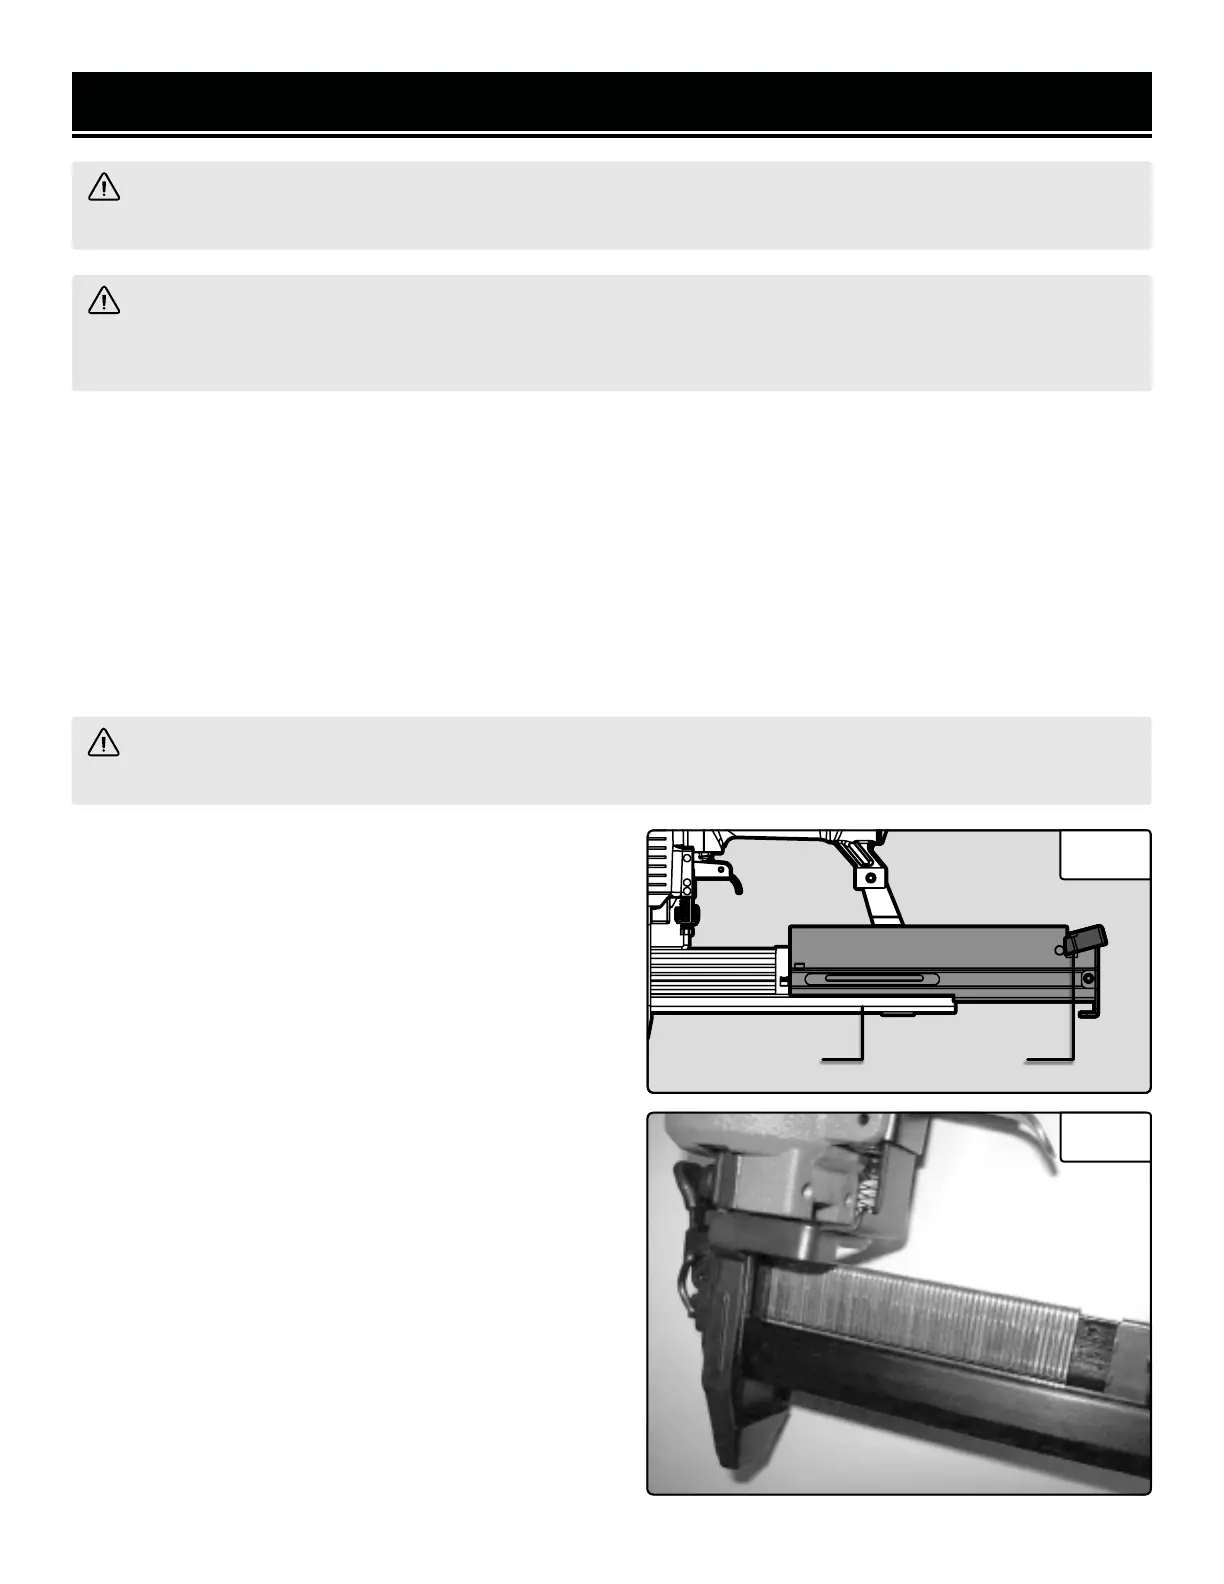
1. Press the lock (Fig. 3 - 1) to release the movable maga-
zine (Fig. 3 - 2) and pull the magazine out fully.
2. Hold the nailer with the magazine at your side. Make
sure the tip is pointed away from yourself or others.
3. Your nailer is designed to work with 18-gauge 1/4” nar-
row-crown staples 3/8” to 1” long. Up to 100 fasteners
may be loaded in the magazine (Fig. 4).
4. Push the movable magazine forward until it clicks shut.
Make sure it is locked in place.
NOTE: Some force may be required to fully close the mag-
azine when fasteners are loaded.
NOTE: Regularly check the fastener gauge window, and
load more fasteners as necessary. Dry-firing the tool can
damage it, and may leave unwanted marks on your work-
piece.
WARNING! Make sure the stapler magazine is empty and the tip of the nailer is pointed away from you when
connecting to the air supply.
WARNING! Use only clean, dry, and regulated air. Do not use bottled gases to power this tool. There is a
risk of explosion, and serious personal injury may result. Do not operate when the air pressure is outside of the
recommended range (60 to 100 PSI).
1. Turn the compressor on and allow it to pressurize. Make sure the tool pressure regulator is set to 0 (Fig. 2).
2. Connect the air hose to the outlet of your air compressor. Connect the other end of the air hose to the air inlet of
the stapler. The connections must click into place audibly. Use appropriate hose tape to prevent leaking.
3. On the air compressor, set the tool pressure regulator to the proper pressure (60 – 100 PSI). The pressure can
be adjusted later depending on firing depth, fastener length, and workpiece hardness.
4. To disconnect the tool from the air hose, pull back the ring on the quick connector to release the connection. Do
the same to disconnect the air hose from the air compressor.
LOADING FASTENERS
Fig. 3
2 1
9
Fig. 4
 Loading...