ASSEMBLY & ADJUSTMENTS
ASSEMBLING THE VACUUM
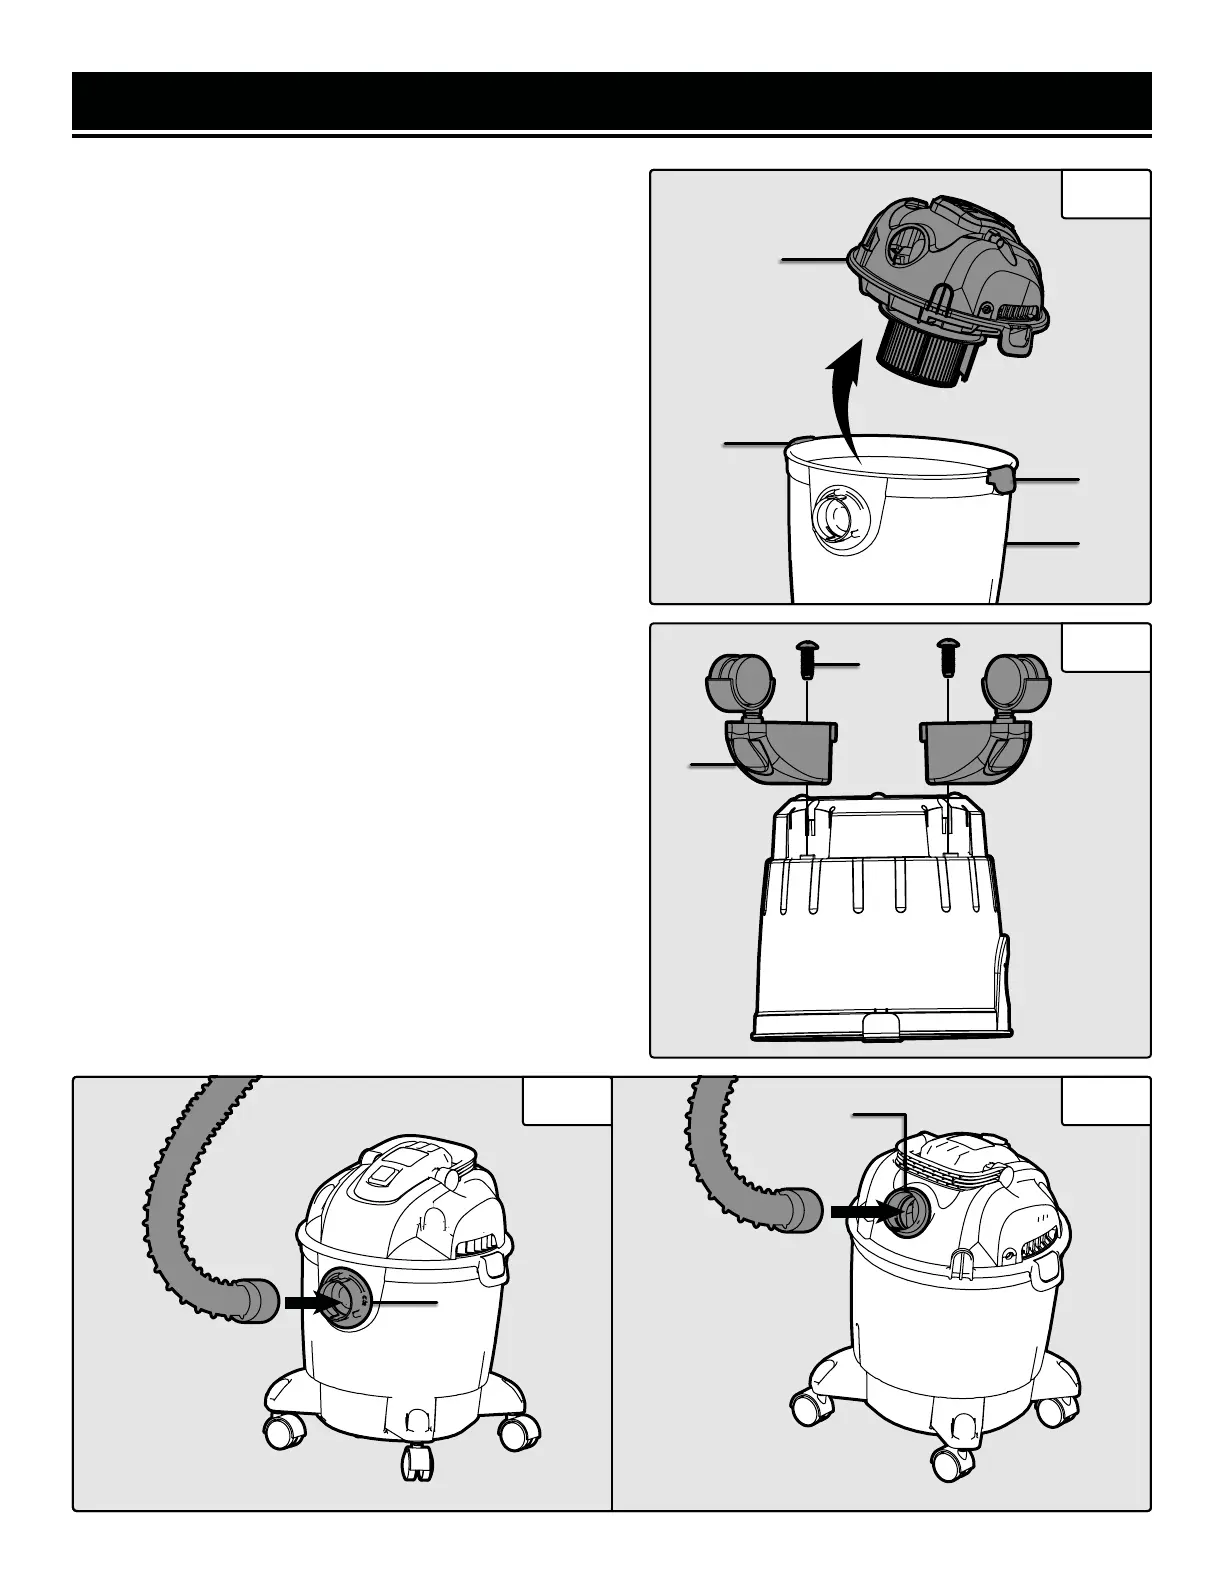
1. Ensure the unit is unplugged from its power source.
2. Pull out on the two side tabs (Fig. 1 - 1) and remove
the top cover of the wet/dry vacuum (Fig. 1 - 2) to find
the additional accessories inside the bucket (Fig. 1 - 3).
Remove and set them aside.
3. Turn the bucket upside down and assemble the four
wheel assemblies (Fig. 2 - 1) onto the bucket by insert-
ing them into the proper slots on the bucket and securing
each of them with a ST3.9x14 screw (Fig. 2 - 2).
4. Replace the top cover and attach the hose to either the
suction inlet (Fig. 3a - 1) or blower outlet (Fig. 3b - 1) de-
pending on your desired use. Lock the hose by inserting
it into the respective port and twisting it about 1/8 turn
clockwise. The suction / blow function can be changed
easily by removing the hose and connecting it to the op-
posite port.
5. Extension tubes or accessories can be easily connected
to the end of the handle by firmly pressing and firmly
twisting the accessory to ensure a secure fit (Fig. 4a - Fig.
4c).
Fig. 1
1
Fig. 2
10
1
2
3
1
2
Fig. 3a Fig. 3b
1
1
 Loading...