19. Attaching Top Shelf (21)
Attach the top shelf (21) to the shelf
beams (17L, 17R) using bolts, wash-
ers and nuts (D). See Figure K.
20. Attaching Light Fixture (23)
Attach the light fixture (23) to the
underside of the top shelf (21) using
M4x16 screws (G).
a. Insert a screw through each of the
light fixture clips.
b. Thread screws through the holes
on the underside of the top shelf.
c. Push the light fixture up into the
clips. See Figure L.
21. Tighten Fasteners
Make sure all shelves are level and
check square. Then, tighten all bolts
and screws securely using the appro-
priate tools, EXCEPT the middle
drawer brackets (7F, 7B).
Check the drawers’ run (you may
have to swap the drawers side to side
to get a better fit). Once everything
runs smoothly, tighten the middle
drawer brackets.
Check that the work station is stable.
22. Light Fixture Power Cord
Attach the light fixture power cord
to the receptacle at the end of the
fixture. It will only connect one way.
Route the cord through the hole in
the pegboard.
ASSEMBLY & ADJUSTMENTS
Page 7
17. Attach Pegboard (18) to Back Upper Posts (15)
using Bolts, Washers and Nuts (C).
(See Figure I.)
Figure I
18. Attach Bench Top (19) to Side Beams (4, 4A) and
Bottom Shelf (20) to Side Beams (4) using Bolts,
Washers and Nuts (D). (See Figure J.)
Figure J
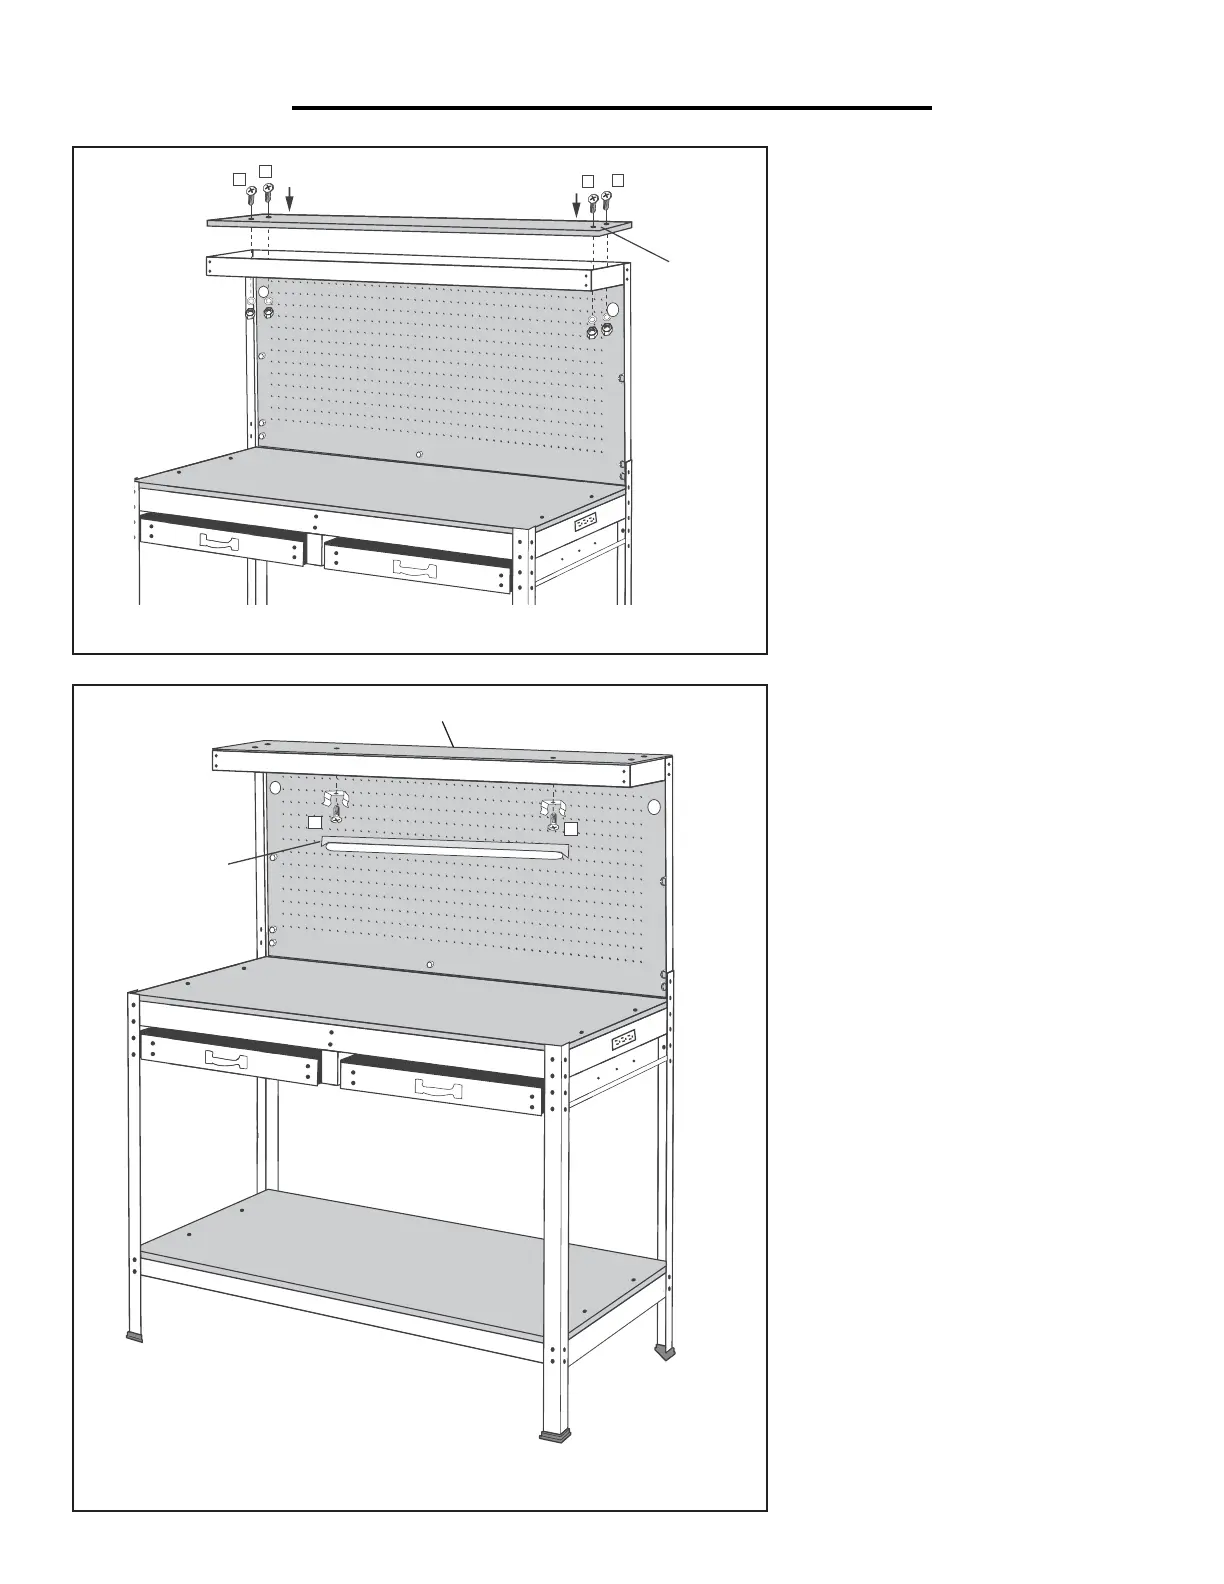
19. Attach Top Shelf (21) to the Shelf Beams (17L, 17R)
using Bolts, Washers and Nuts (D). (See Figure K.)
Figure K
D
D
D
D
21
Page 8
20. Attach Light Fixture (23) to the underside of the Top
Shelf (21) using Bolts (G).
a. Insert a Bolt through each of
the Light Fixture Clips.
b. Thread Bolts through the holes on the
underside of the Top Shelf.
c. Push Light Fixture up into the
Clips. (See Figure L.)
Figure L
21. Attach the Light Fixture power cord to the receptacle
at the end of the fixture. It will only connect one way.
Route the cord through the hole in the Pegboard.
Note: Make sure all Shelves are level. Then,
tighten all Bolts and Screws securely.
23
G
G
21
13
 Loading...