Do you have a question about the Weslo Pursuit CT 5.9 and is the answer not in the manual?
This document is a user manual for the Weslo Pursuit CT 5.9 exercise cycle, model WLEX32709.0. It provides comprehensive information on the assembly, operation, maintenance, and safety guidelines for the device.
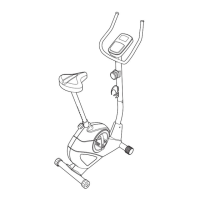
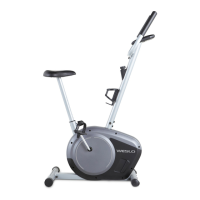
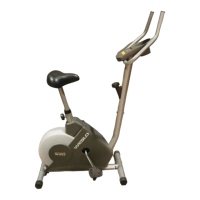
The Weslo Pursuit CT 5.9 is an exercise cycle designed for cardiovascular fitness, building endurance, and toning the entire body. It offers an impressive array of features to provide a healthful exercise experience. The exercise cycle is intended for home use only and is not designed for commercial, rental, or institutional settings. It features a console that allows users to select various workout programs, adjust resistance, and monitor their progress. The console also includes a fan for cooling and can connect to an MP3 player or CD player for audio playback through its speakers.
The exercise cycle is designed to support users weighing up to 275 pounds (124 kg). The console is powered by four 1.5V "D" batteries. An optional AC adapter can be purchased for continuous power. The pulse sensor is a medical device and its accuracy may vary depending on heart rate readings. It is intended only as an exercise aid in determining heart rate trends. The device includes a resistance system that can be adjusted through 15 levels. The console displays time, pulse, speed, and distance, with the option to switch between miles or kilometers.
Before beginning any exercise program, users are advised to consult their physician, especially if they are over 35 or have pre-existing health problems. It is the responsibility of the owner to ensure that all users of the exercise cycle are adequately informed of all precautions.
The manual provides detailed instructions for assembling the exercise cycle, including illustrations for each step. Users will need an adjustable wrench and a Phillips screwdriver for assembly. It is recommended to have two people for assembly.
To adjust the pedal straps, users should first pull the ends of the straps off the tabs on the pedals. Then, adjust the straps to the desired position and press the ends of the straps onto the tabs.
The seat can be adjusted forward or backward to the position that is most comfortable for the user. To adjust the seat, push downward on the adjustment handle, slide the seat to the desired position, and then pull upward on the adjustment handle to lock the seat in place.
To move the exercise cycle, users should lift the rear stabilizer until the exercise cycle can be moved on the front wheels. Care should be taken to move the exercise cycle to the desired location and then lower it to the floor.
The console offers an array of features designed to make workouts more effective and enjoyable. Users can select the manual mode of the console, change the resistance of the pedals with the touch of a button, and view continuous exercise feedback. The console also features a cool-air fan and handgrip pulse sensor. The console offers fourteen preset workouts: four weight loss workouts, five timed workouts, and five performance workouts. Each workout automatically changes the resistance of the pedals and prompts users to increase or decrease their pedaling speed as it guides them through an effective workout. Users can connect an MP3 player or CD player to the console’s sound system and listen to their favorite workout music or audio books while they exercise.
To play music or audio books through the console’s sound system, users should first locate the audio cable in the center of the console above the speakers. Plug the cable into a jack on the MP3 player or CD player. Next, press the play button on the MP3 player or CD player. Adjust the volume of the speakers using the volume control on the MP3 player or CD player. When not in use, insert the audio cable into the storage bracket on the console.
Regular inspection and tightening of all parts of the exercise cycle are recommended. Replace any worn parts immediately. To clean the exercise cycle, use a damp cloth and mild soap. Avoid liquids away from the console and keep the console out of direct sunlight.
If the console display becomes dim, the batteries should be replaced. If most console problems are the result of low batteries, see step 7 on page 9 for replacement instructions. If the handgrip pulse sensor does not function properly, see step 5 on page 16.
If the console does not display correct feedback, the reed switch should be adjusted. To adjust the reed switch, first use an adjustable wrench to turn the left pedal clockwise and remove it. Next, remove the screws from the left and right shields. There are two sizes of screws in the shields—note which size of screw you remove from each hole. Then, gently remove the left shield. Locate the Reed Switch (24). Turn the Crank (17) until a Magnet (50) is aligned with the Reed Switch. Next, loosen, but do not remove, the indicated M4 x 16mm Screw (62). Slide the Reed Switch slightly closer to or away from the Magnet, and then retighten the Screw. Turn the Crank for a moment. Repeat these actions until the console displays correct feedback. When the Reed Switch is correctly adjusted, reattach the left shield and the left pedal.
If users can feel the pedals slip while pedaling, even when the resistance is at the highest level, the belt may need to be adjusted. To adjust the belt, users must first remove the right pedal and the right shield. Using an adjustable wrench, turn the right pedal counterclockwise and remove it. Next, remove the screws from the left and right shields. Then, gently remove the right shield. To tighten the belt, first loosen the M8 x 22mm Flat Head Screw (67). Next, tighten the M10 x 90mm Button Screw (69) until the Belt (18) is tight. Then, retighten the Flat Head Screw. Reattach the right shield and the right pedal.
Before beginning any exercise program, consult your physician. This is especially important for persons over the age of 35 or persons with pre-existing health problems. The pulse sensor is not a medical device. Various factors may affect the accuracy of heart rate readings. The pulse sensor is intended only as an exercise aid in determining heart rate trends in general.
Whether your goal is to burn fat or to strengthen your cardiovascular system, exercising at the proper intensity is the key to achieving results. The manual provides a guide to find the proper intensity level. The chart below shows recommended heart rates for fat burning and aerobic exercise. To find the proper intensity level, users should find their age at the bottom of the chart. The three numbers listed above their age define their training zone. The lowest number is the heart rate for fat burning, the middle number is the heart rate for maximum fat burning, and the highest number is the heart rate for aerobic exercise.
To burn fat effectively, users must exercise at a low intensity level for a sustained period of time. During the first few minutes of exercise, the body uses carbohydrate calories for energy. Only after the first few minutes of exercise does the body begin to use stored fat calories for energy. If the goal is to burn fat, adjust the intensity of the exercise until the heart rate is near the lowest number in the training zone. For maximum fat burning, exercise with the heart rate near the middle number in the training zone.
If the goal is to strengthen the cardiovascular system, users must perform aerobic exercise, which is activity that requires large amounts of oxygen for prolonged periods of time. For aerobic exercise, adjust the intensity of the exercise until the heart rate is near the highest number in the training zone.
Warming Up: Start with 5 to 10 minutes of stretching and light exercise. A warm-up increases body temperature, heart rate, and circulation in preparation for exercise. Training Zone Exercise: Exercise for 20 to 30 minutes with the heart rate in the training zone. (During the first few weeks of your exercise program, do not keep your heart rate in your training zone for longer than 20 minutes.) Breathe regularly and deeply as you exercise—never hold your breath. Cooling Down: Finish with 5 to 10 minutes of stretching. Stretching increases the flexibility of the muscles and helps to prevent post-exercise problems.
To maintain or improve your condition, complete three workouts each week, with at least one day of rest between workouts. After a few months of regular exercise, users may complete up to five workouts each week, if desired. Remember, the key to success is to make exercise a regular and enjoyable part of your everyday life.
| Brand | Weslo |
|---|---|
| Model | Pursuit CT 5.9 |
| Category | Exercise Bike |
| Language | English |