Lower Section Assembly
Upper Section Assembly
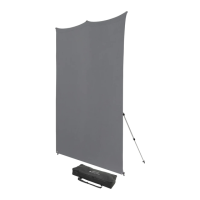
8' x 8' and 8' x 13' Backdrop Assembly
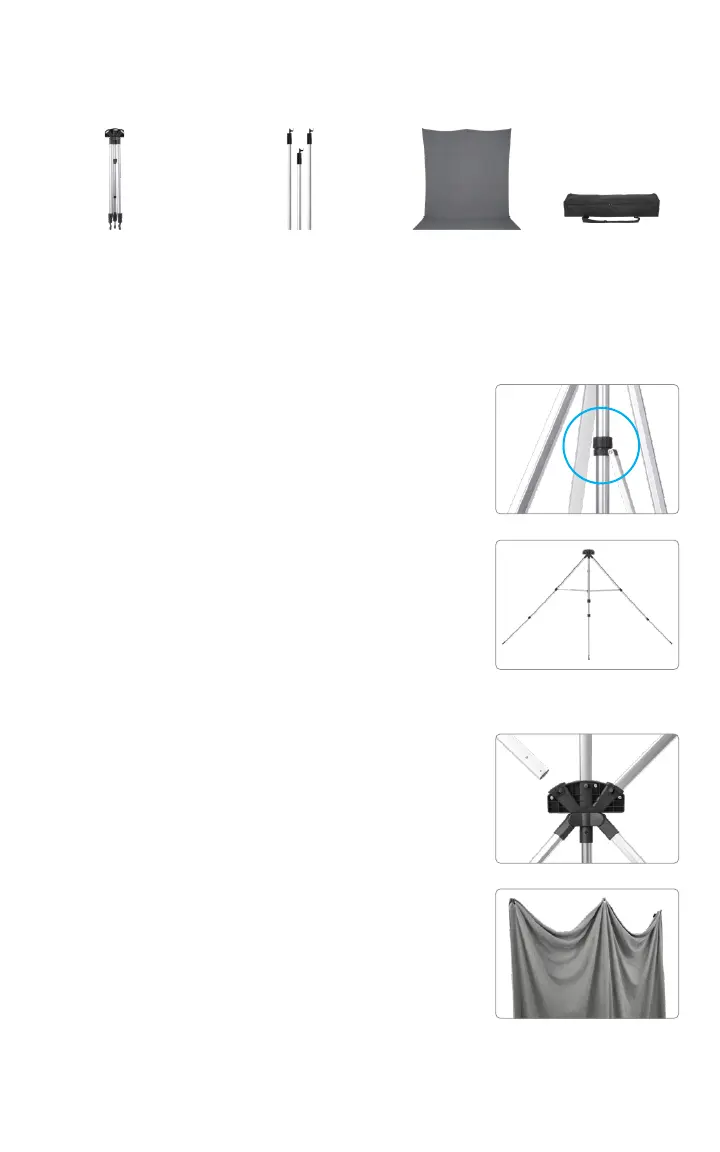
1. Locate the X-drop base. Loosen the dial
on the runner located on the center tube
and slide downward, extending each of
the legs outward similar to a tripod. Once
extended, turn the dial to lock the legs
into place. Do not over tighten.
2. Open all of the clasps on each leg.
3. Fully extend all sections of each leg and
close the clasps to lock them into place.
1. Insert the shortest extension arm into the
middle receptacle of the X-drop’s center
hub with the black hooks facing forward.
2. Slide the 2 remaining extension arms
into the outermost position of the outer
receptacles. (To release the arms, simply
pull the arms out of the center hub.)
3. Open both sets of clasps on each arm.
4. Fully extend the outermost sections and
close the clasps to lock them into place.
5. Attach the top of the backdrop that has 3
grommets to the corresponding arm’s hook.
Step 1, Lower Section
Step 3, Lower Section
Step 2, Upper Section
Step 5, Upper Section
Included Components
Expandable Base (3) Extension Arms Carry CaseBackdrop
Sizes & Colors Vary,
Included in Kits &
Sold Separately