COOLING
SYSTEM
e.
Visually
examine
shaft
(2)
for
wear
in
the
areas
of
the
bearing
journals
and
the
area
of
seal
(9)
contact.
Replace
if
badly
worn
or
damaged.
f.
Visually
examine
pump
housing
(8)
for
any
wear
or
damage
in
the
areas
of
the
shaft
bearing
outer
journals
and
housing
area
where
the
impeller
turns
in.
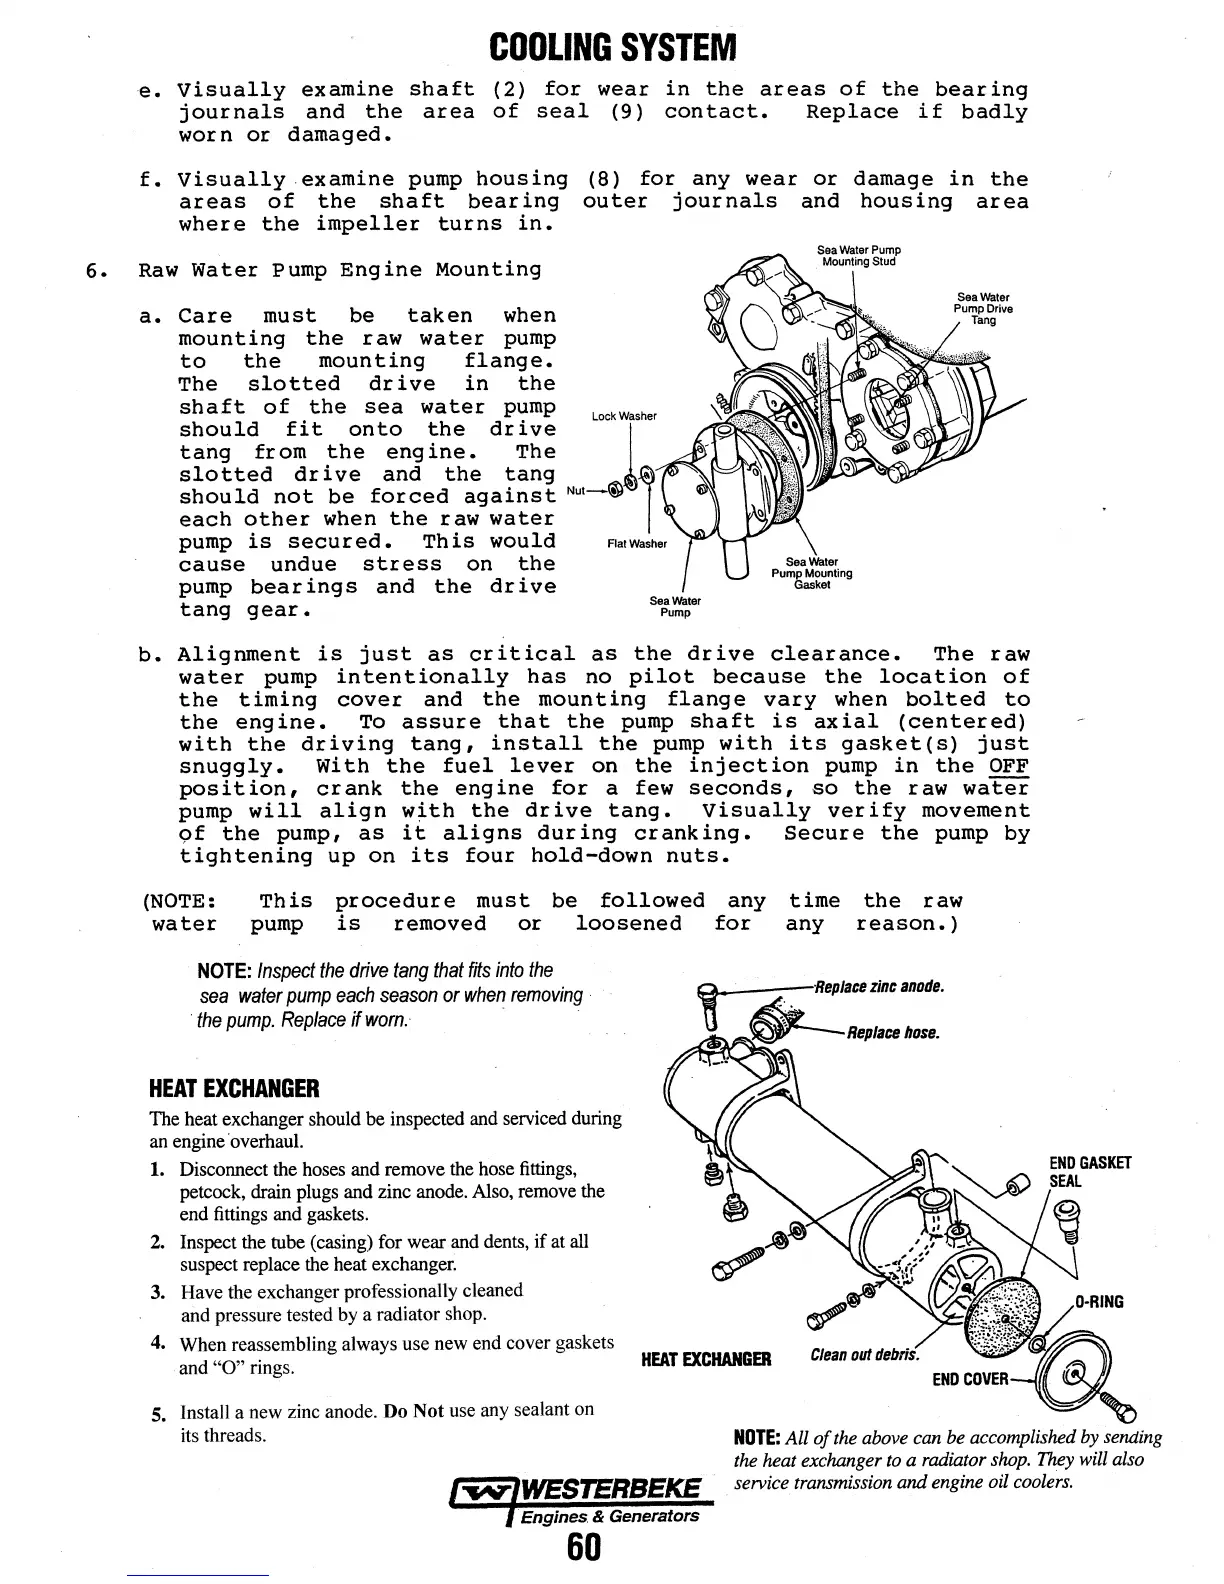
6.
Raw
Water
Pump
Engine
Mounting
a.
Care
must
be
taken
when
mounting
the
raw
water
pump
to
the
mounting
flange.
The
slotted
drive
in
the
shaft
of
the
sea
water
pump
should
fit
onto
the
drive
tang
from
the
engine.
The
slotted
drive
and
the
tang
should
not
be
forced
against
each
other
when
the
raw
water
pump
is
secured.
This
would
cause
undue
stress
on
the
pump
bearings
and
the
drive
tang
gear.
Lock
Washer
SeaWater
Pump
Sea
Water
Pump
Mounting
Stud
b.
Alignment
is
just
as
critical
as
the
drive
clearance.
The
raw
water
pump
intentionally
has
no
pilot
because
the
location
of
the
timing
cover
and
the
mounting
flange
vary
when
bolted
to
the
engine.
To
assure
that
the
pump
shaft
is
axial
(centered)
with
the
driving
tang,
install
the
pump
with
its
gasket(s)
just
snuggly.
With
the
fuel
lever
on
the
injection
pump
in
the
.Q!!
position,
crank
the
engine
for
a few
seconds,
so
the
raw
water
pump
will
align
w~th
the
drive
tang.
Visually
verify
movement
9f
the
pump,
as
it
aligns
during
cranking.
Secure
the
pump
by
tightening
up
on
its
four
hold-down
nuts.
(NOTE:
water
This
procedure
must
be
followed
any
pump
is
removed
or
loosened
for
time
any
the
raw
reason.)
NOTE:
Inspect
the
drive
tang
that
fits
into
the
sea
water
pump
each
season
or
when
removing
·
·the
pump.
Replace
ifwom.-
-
HEAT
EXCHANGER
The heat exchanger should be inspected and serviced during
an
engine 'overhaul.
1.
Disconnect the hoses and remove the hose
fittings,
petcock, drain plugs and zinc anode. Also, remove the
end fittings and gaskets.
2.
Inspect the tube (casing) for wear and dents, if at all
suspect replace the heat exchanger.
3. Have the exchanger professionally cleaned
and pressure tested by a radiator shop.
4. When reassembling always use new end cover gaskets
. and
"0"
rings.
s.
Install a new zinc anode. Do Not use
any
sealant on
its threads.
HEAT
EXCHANGER
NOTE:
All
of
the
above
can
be
accomplished
by
sending
the
heat exchanger to a radiator
shop.
They
will
also
service
transmission
and
engine
oil
coolers.
·Engines. & Generators
60



 To Next Page