EasyManua.ls Logo

Westinghouse WRC914SD - User Manual

Westinghouse WRC914SD
20 pages
Print Icon
To Next Page IconTo Next Page
Loading...
CANOPY RANGEHOOD
WRC914SD
WRC614SD
USER MANUAL
USER MANUAL
CANOPY RANGEHOOD
WRC914SD
WRC614SD
Enjoy peace of mind.
Register your appliance today.
1. Open the camera app on your smartphone and
point at the QR code to scan
Product Registration QR code is located on the
front of your appliance.
2. Tap the notification or link to open the registration from
3. Complete you rdetails and enjoy peace of mind
Stay updated on better living services, safety notices and
shop for accessories.
Question and Answer IconNeed help?

Do you have a question about the Westinghouse WRC914SD and is the answer not in the manual?

Summary

Safety Instructions

Check for Damages or Marks

Check for damages or marks within 7 days for warranty claims.

Unpacking Instructions

Instructions for unpacking and reporting transport damage.

Information on Disposal

Guidelines for recycling packaging and product disposal.

Safety Warnings

Critical warnings for safe installation and use of the appliance.

Electrical and Installation Safety

Electrical Connection Safety

Ensure correct voltage and compliance before connecting the appliance.

Installation Safety Warnings

Adhere to distance, flue, and ventilation requirements for safe installation.

Accessory List

Installation

Recommended Installation Modes

Guidance on choosing between external exhaust and recirculation installation.

External Exhaust Installation Sequence

Step-by-step guide for installing the rangehood with external exhaust.

Recirculation Installation Sequence

Step-by-step guide for installing the rangehood in recirculation mode.

Product Description

Control Panel Overview

Explanation of the rangehood's control panel buttons and indicators.

Daily Use

Using the Hood

Recommended fan speeds and basic operation of the rangehood.

Hob2 Hood Function

Details on the automatic hob-to-hood connection and operation.

Filter Notification Management

How to activate/deactivate and understand filter notifications.

Sound Profile Settings

How to activate/deactivate audible alerts for the appliance.

Filter Alarms and Reset

Understanding filter alarms and procedures for resetting them.

Care and Cleaning

Cleaning the Grease Filter

Instructions for cleaning the grease filter, including dishwasher use.

Replacing the Carbon Filter

Guidance on replacing the non-washable carbon filter.

Replacing the Light

Information on replacing the appliance's LED lights.

Electrolux Warranty

Warranty Terms and Conditions

Details of warranty coverage, exclusions, and conditions.

How to Claim Warranty

Steps to follow when making a warranty claim.

Regional Warranty Information

Specific warranty details for Australia and New Zealand.

Overview

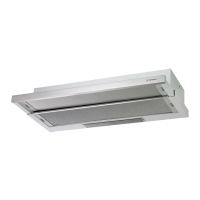
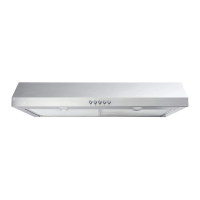
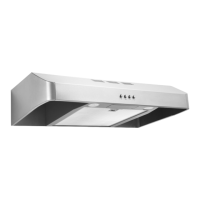
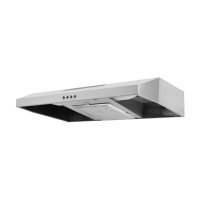
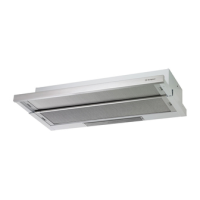
This document is a user manual for Westinghouse canopy rangehoods, specifically models WRC914SD and WRC614SD. It provides comprehensive instructions for installation, daily use, and maintenance, along with important safety information and warranty details.

Function Description:

The Westinghouse canopy rangehood is a domestic appliance designed to extract cooking fumes and odors from the kitchen. It can operate in two modes: external exhaust mode, where air is discharged outside, and recirculation mode, where air is filtered and returned to the kitchen. The rangehood features a control panel with fan speed settings (Fan Speed 1/Off, Fan Speed 2, Fan Speed 3), a light button, a Hob2Hood Indicator, and a Filter Notification Indicator. The Hob2Hood function allows the rangehood to automatically adjust fan speed based on the hob's settings and temperature, communicating via infrared signals.

Important Technical Specifications:

  • Electrical Connection: The appliance must be plugged into its own dedicated 220-240V, 50Hz AC electrical outlet.
  • Minimum/Maximum Installation Heights:
    • Minimum: 600mm for electric hobs, 620mm for gas hobs.
    • Maximum: 800mm.
    • If the hob instructions specify a greater distance than the minimum, that distance becomes the minimum height for installation.
  • Ducting: Exhaust flue should be short and straight, with minimal bends, and its size should not be reduced or restricted for optimal air extraction. Semi-rigid flues should be installed taut to minimize pressure loss.
  • Lighting: The appliance is supplied with two LED Lights, which are replaceable by a technician only. The recommended replacement is a Square LED 700mA MAX 2.4W 3V 3000K, size 53mm x 53mm.
  • Safety Cutout Device: The product is fitted with a safety cutout device that may activate if the hood is installed too close to the cooktop, during flambe cooking, when operating the cooktop without utensils covering hot plates, or if filters are blocked.

Usage Features:

  • Fan Speed Control: Three fan speeds are available for different cooking intensities:
    • Fan Speed 1: Recommended for heating up food, cooking with covered pots, light frying, and light boiling.
    • Fan Speed 2: Recommended for cooking with covered pots on multiple cooking zones/burners, frying, and boiling.
    • Fan Speed 3: Recommended for boiling, frying large quantities of food without a lid, cooking on multiple cooking zones/burners, grilling, intensive frying, and wok cooking.
  • Light Function: A dedicated button illuminates the cooking surface.
  • Hob2Hood Function (Applicable Models Only): An automatic function that connects the hob with the hood. The fan speed is automatically defined based on the hob's mode setting and the temperature of the hottest cookware. The function can also be activated manually from the hob panel. Users are advised to protect the hood panel from direct sunlight and halogen light, avoid covering the hob panel, and not interrupt the signal between the hob and the hood.
  • Filter Notification Indicator: This indicator reminds users to clean the grease filter or replace the carbon filter.
  • Sound Profile: The sound profile can be activated or deactivated by pressing the 'Light' button for 2 seconds.

Maintenance Features:

  • Grease Filter Cleaning:
    • Each filter should be cleaned at least once a month.
    • To remove, press the handle of the mounting clip, slightly tilt the front downwards, and pull.
    • Clean filters with a sponge and nonabrasive detergents or in a dishwasher (low temperature, short cycle).
    • Grease filters may discolour in the dishwasher, but this does not affect performance.
    • To remount, follow the removal steps in reverse order.
  • Carbon Filter Replacement:
    • The carbon filter is non-washable and must be replaced at least every 4 months.
    • To access, remove the grease filters.
    • To remove, press the tab and slightly tilt the front of the filter.
    • To install a new filter, perform the steps in reverse order.
  • Filter Alarm Reset:
    • To reset the grease filter alarm, press 'Fan Speed 3' for 2 seconds.
    • To reset the carbon filter alarm, press 'Fan Speed 2' and 'Fan Speed 3' at the same time for 2 seconds.
    • The indicator flashes once for correct reset.
  • Light Replacement: LED lights are replaceable by a technician only.

The manual emphasizes the importance of reading all instructions carefully before installation and use to ensure personal safety, prevent damage to the appliance, and maintain warranty validity. It also provides contact information for customer care and service in Australia and New Zealand.

Westinghouse WRC914SD Specifications

General IconGeneral
BrandWestinghouse
ModelWRC914SD
CategoryVentilation Hood
LanguageEnglish

Related product manuals