EasyManua.ls Logo

Westinghouse WRI514BB - User Manual

Westinghouse WRI514BB
8 pages
Print Icon
To Next Page IconTo Next Page
Loading...
INSTALLATION & USER MANUAL
WRI514BB, WRI814BB
INTEGRATED RANGEHOOD
Question and Answer IconNeed help?

Do you have a question about the Westinghouse WRI514BB and is the answer not in the manual?

Summary

Safety Instructions

Cleaning

Instructions for cleaning the rangehood body, flue, and grease filters.

Electrical Connection

Guidelines for connecting the rangehood to the mains power supply.

Accessories

Information on recommended ducting accessories for performance.

Installation

Standard Ducting Installation

Recommended clearances and positioning for standard ducting.

Fixing Point Dimensions

Technical dimensions for mounting WRI814BB and WRI514BB models.

Fixing the Rangehood

Instructions for securely mounting the rangehood to the cabinet.

Fixing the Flue Pipe

Steps for connecting the exhaust flue pipe to the rangehood.

Operation and Maintenance

Control Operation

Explanation of the rangehood's control panel functions and buttons.

Speeds and Fan Control

Details on fan speeds, turning the fan on/off, and delay end function.

Cleaning Grease Filters

Procedure for cleaning grease filters to prevent fire hazards.

Replacing the Lamp

Instructions for safely replacing the rangehood light bulb.

Warranty Terms

Warranty Application and Period

Defines warranty scope, duration, and conditions for Australia/NZ.

Exclusions

Lists conditions and damages not covered by the manufacturer's warranty.

How to Claim Under Warranty

Steps required to make a warranty claim, including proof of purchase.

Overview

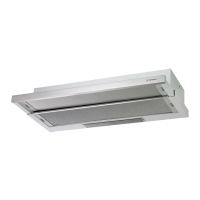
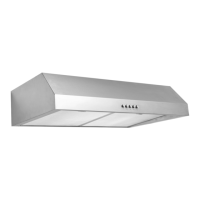
This document serves as an installation and user manual for the Westinghouse Integrated Rangehood models WRI514BB and WRI814BB. It provides essential information for safe and effective use, installation, and maintenance of the appliance.

Function Description

The Westinghouse Integrated Rangehood is an indoor domestic appliance designed to extract cooking fumes, odors, and steam from the kitchen environment. It operates by drawing air from above the cooking surface, filtering it, and then either expelling it outside (ducted installation) or recirculating it back into the kitchen after purification (recirculating installation). The rangehood features multiple fan speeds to accommodate different cooking intensities, from light frying to intensive grilling, ensuring adequate ventilation for various culinary tasks. It also includes integrated lighting to illuminate the cooking area. The appliance is designed to be discreetly integrated into kitchen cabinetry, providing a sleek and modern aesthetic.

Usage Features

The rangehood offers straightforward control through a set of buttons located on its fascia panel. Users can easily turn the lamp on or off to illuminate the cooktop. The fan operation is controlled by dedicated buttons for different speed levels: Speed 1 for light frying/boiling, Speed 2 for frying/wok cooking/heavy boiling, and Speed 3 for grilling, intensive frying, and wok cooking. This allows users to select the appropriate extraction power based on their cooking needs.

A convenient "Delay End" function is available, which, when activated, keeps the fan running for 5 minutes after cooking to ensure all lingering odors are removed before automatically switching off. This function is specifically for the fan motor, and the lamp needs to be turned off manually.

The rangehood is equipped with a filter check indicator. After 50 hours of motor operation, the lamp control button will flash to remind the user to check and clean the grease filters. This ensures optimal performance and safety. The indicator can be reset by pressing and holding the lamp control button for 3 seconds.

For optimal performance, it is recommended to position the rangehood at a minimum of 600mm for an electric cooktop and 650mm for a gas cooktop, and no further than 800mm from the cooking surface. Adhering to these distances ensures effective capture of cooking effluents. If the cooktop manufacturer specifies a greater clearance, that distance must be used.

The appliance is intended for household and similar applications, including staff kitchen areas, farm houses, hotels, motels, residential environments, bed and breakfast establishments, and catering applications.

Maintenance Features

Regular maintenance is crucial for the rangehood's efficiency and longevity, as well as for safety. Before any maintenance or cleaning, the rangehood must be disconnected from the main power supply by switching it off at the wall socket and removing the plug to prevent electric shock.

Cleaning:

  • External Surfaces: The rangehood body and flue should be wiped with a sponge or soft cloth soaked in warm soapy water, then dried with a soft cloth. For stainless steel models, a stainless steel protector should be applied. Abrasive materials and oven cleaners should not be used to avoid damage. Care should be taken to avoid scratching external surfaces.
  • Grease Filters: The mesh grease filters are designed to be removed and cleaned every four weeks (maximum) to reduce the risk of fire. They can be cleaned by hand in warm soapy water, soaking them with some washing-up liquid. For stubborn grease stains, a soft nylon brush can be used. After cleaning, the filters must be completely dry before refitting. It is important to use both hands when removing and refitting the filters to prevent accidental dropping onto the cooktop or kitchen bench.
  • Fire Risk: Failure to carry out cleaning in accordance with these instructions poses a fire risk.

Lamp Replacement:

  • The lamp should be cool before removal. To remove, apply pressure to the lamp and turn anti-clockwise to unscrew it. The replacement lamp should be of a similar type and voltage. Only self-shielded tungsten halogen lamps or self-shielded metal halide lamps should be used. The suitable lamp for replacement is GU10 3.5W -> DBR-3.5-H-GU10-50/53.
  • Users are warned not to change the light bulb or carry out maintenance immediately after use, as the bulb and rangehood may be hot. It should be allowed to cool first.

Safety Precautions during Maintenance:

  • Users should wear gloves for protection when removing filters, light covers, or fascia panels, as sharp edges may be present.

Ducting Accessories and Carbon Filters:

  • For ducted installations, 150mm round exhaust ducting is recommended for best performance, though 125mm ducting can be used with a reduction in airflow. Flexible ducts should always be installed with the wire helix pulled taut to minimize pressure and noise. Keeping the exhaust duct short, straight, and with minimal bends will optimize airflow.
  • For recirculating installations, optional carbon filters can be used to diminish cooking odors. The expected life of carbon filters is approximately 3 months, depending on usage frequency and cooking type. It's important to note that using carbon filters will reduce the airflow of the rangehood.

The manual emphasizes that adherence to these instructions is crucial for health and safety, and failure to do so may impact the manufacturer's warranty.

Westinghouse WRI514BB Specifications

General IconGeneral
TypeUnder Cabinet
Width30 inches
CFM400 CFM
Number of speeds3
Lighting TypeLED
ColorBlack
Number of Fan Speeds3
Noise Level65 dB
Filter TypeAluminum Mesh
MaterialStainless Steel
Venting Size6 inches

Related product manuals