13X032A and 13X037A
2
Westward Operating Instructions and Parts Manual
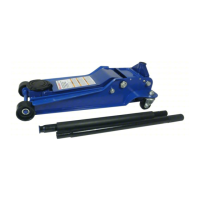
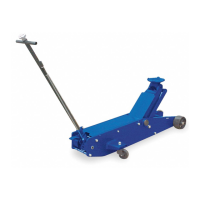
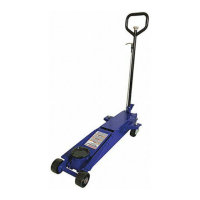
Hydraulic Quick Lift Service Jacks
Study, understand, and follow all
instructions before operating this device. Do not
exceed rated capacity. Use only on hard, level
surface. Lifting device only. Immediately after
lifting, support vehicle with appropriate means.
Do not move or dolly the vehicle while on the jack.
Ensure that the lift point is properly centered on
the jack saddle. Lift only on areas of the vehicle
as specified by the vehicle manufacturer. No
alteration of this product is allowed. Failure to
heed any one or combination of these warnings
may result in severe personal injury and/or
property damage.
Assembly
1. Assemble the 2-piece handle with provided bolt.
2. Insert handle into the handle fork. Tighten the bolt
on handle fork to prevent accidental removal of
handle while in use.
Do not lift or carry jack by handle.
Handle could dislodge and jack fall, resulting in
possible injury or property damage.
Before Use
1. Before using this product, read the operator's
manual completely and familiarize yourself
thoroughly with the product, its components and
recognize the hazards associated with its use.
2. Verify that the product and application are
compatible.
3. To familiarize yourself with basic operation, locate
and turn the release valve (handle):
a.Clockwiseuntilrmresistanceisfelttofurther
turning. This is the ‘CLOSED’ release valve
position used to raise the saddle.
b. Counter-clockwise, but no more than 1/2 turn
from the closed position. This is the ‘OPEN’
release valve position used to lower the saddle.
4. With saddle fully lowered, and release valve closed,
pump the operating handle. If lift arm responds
immediately, jack is ready for use. If jack does
not respond, follow Bleeding/Venting Trapped Air
procedure below.
5. Ensure that jack rolls freely. Raise and lower the
unloaded saddle throughout the lifting range before
putting into service to ensure the pump operates
smoothly. Replace worn or damaged parts and
assemblies with authorized replacement parts only.
Bleeding/Venting Trapped Air
With the Release Valve in the OPEN position (3b
above) and Saddle fully lowered, locate and remove
the Vent Screw. Pump Handle 6 to 8 full strokes.
This will help release any pressurized air which may
be trapped within the reservoir. Check oil level and
reinstall Vent Screw.
LIFTING
1. Follow the vehicle manufacturer’s recommended
guidelines for lifting. Engage the emergency brake
and chock each unlifted wheel in both directions to
prevent inadvertent vehicle movement.
2. Close the release valve by turning the handle
clockwiseuntilrmresistanceisfelt.
3. Refer to the vehicle manufacturer owner’s manual
to locate approved lifting points on the vehicle.
Center jack saddle under lift point.
4. Verify lift point, pump handle to contact lift point. To
lift, pump handle until load reaches desired height.
5. Transfer the load to appropriately rated jack
stands.
LOWERING
Clear all tools and personnel
before lowering load. Open release valve
slowly. The further you turn the handle counter-
clockwise, the faster the load will descend.
Maintain control of the load at all times.
1. Raise load high enough to clear the jack stands.
2. Remove jack stands.
3. Turn the handle counter-clockwise, but no more
than 1/2 full turn. If the load fails to lower:
a. Use a functioning jack to raise the vehicle high
enough to reinstall jack stands.
b. Remove the malfunctioning jack and then remove
the jack stands.
c. Use the functioning jack to lower the vehicle.
4. After removing jack from under the vehicle, fully
lower the saddle to reduce ram exposure to rust
and contamination.
Maintenance
NOTICE: Use only good quality hydraulic jack oil.
AvoidmixingdifferenttypesofuidandNEVER
usebrakeuid,turbineoil,transmissionuid,motor
oilorglycerin.Improperuidcancausepremature
failure of the jack and the potential for sudden and
immediate loss of load. Premium quality hydraulic oil
is recommended.
ADDING OIL
1. With saddle fully lowered set jack in its upright, level
position. Remove vent screw.
2. Fill with oil until 3/16" (.48 cm) above the inner cylinder
asseenfromtheoilllerhole.Reinstallventscrew.
CHANGING OIL
For best performance and longest life, replace the
completeuidsupplyatleastonceperyear.
1. With saddle fully lowered, remove vent screw.
2.Laythejackonitssideanddraintheuidintoa
suitable container.
NOTICE:Disposeofhydraulicuidinaccordance
with local environmental regulations.
3. Fill with oil until 3/16" (.48 cm) above the inner
cylinderasseenfromtheoilllerhole.Reinstall
vent screw.
4. Follow Bleeding/Venting Trapped Air procedure.
LUBRICATION
A periodic coating of light lubricating oil to pivot
points, axles and hinges will help to prevent rust and
assure that wheels, casters and pump assemblies
move freely.
 Loading...