6
11. INSTALLATION - ANGLED HOUSING
STEP 1. Choose a suitable location for the
shower to be installed. The unique
design allows the shower to be fi tted
on a vertical or angled fl at or curved
surface.
Note Maximum curvature = 1 m (3ft 3”) radius.
Ensure there is suffi cient space to
allow for the handset and hose when
stowed. (See Fig. 7).Ensure that the
plumbing connections and p clamp are
mounted as close as possible to the
handset housing to ensure maximum
usable hose length.
Please note: Before installing, ensure that suffi cient space is allowed for the shower
hose when stowed. Also ensure that it is free from obstructions when pulled out.
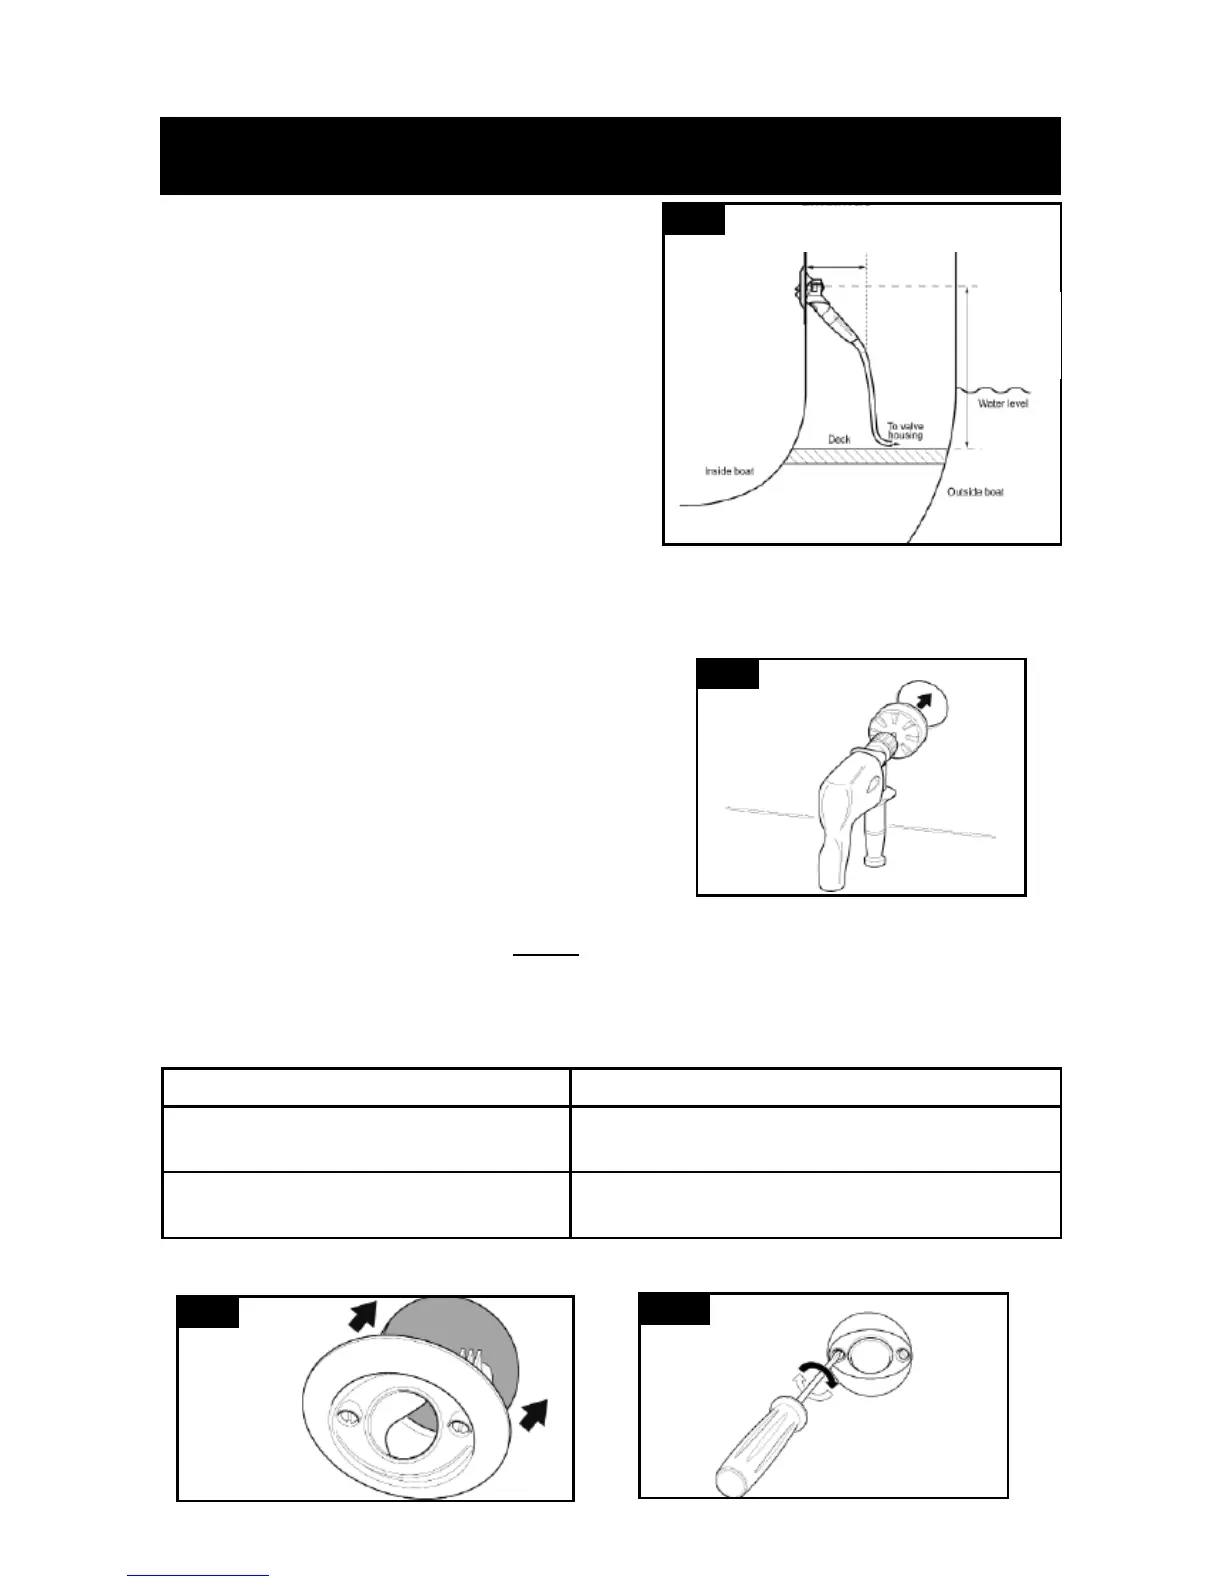
STEP 2, Drill one 89mm (3 1/2”) diameter circular
hole in the fi breglass bulkhead (above the
water line).
Minimum bulkhead thickness = 6mm (1/4”)
Maximum bulkhead thickness = 12mm (1/2”)
(See Fig. 8)
STEP 3. To enable ease of fi tting of the holder and support rings, the two screws
should be loosened until almost disengaged from the threaded part.
STEP 4. Ensure the black coloured support ring is in place behind the housing. If the
housing is to be placed on a curved surface replace this with the appropriate
support ring as outlined below:
Note If replacing the support ring with the blue or red rings; ensure that the ring is
installed with the fl at surface uppermost.
Fig. 7
Please allow a
minimum width of
250 mm (10”) for
hose stowage
Fig. 8
Fig. 9
On a Flat Surface Use black ring attached to Angled Housing
On a Slightly Curved Surface - radius
greater than 10 metres (33 ft)
Use the blue support ring
On a Very Curved Surface Between
10m (33 ft) and 1m (3 ft 3”) radius
Use the red support ring
In Front of
the Bulkhead
In Front of
the Bulkhead
In Front of
the Bulkhead
Fig. 10
Recommended minimum width
allowance 350mm (14”)
Recommended
minimum
height
allowance
700mm (28”)
 Loading...