Installation Manual: GM LT1_A1R13E
Last Updated: February 12th, 2019
Page 15 of 36
www.whipplesuperchargers.com
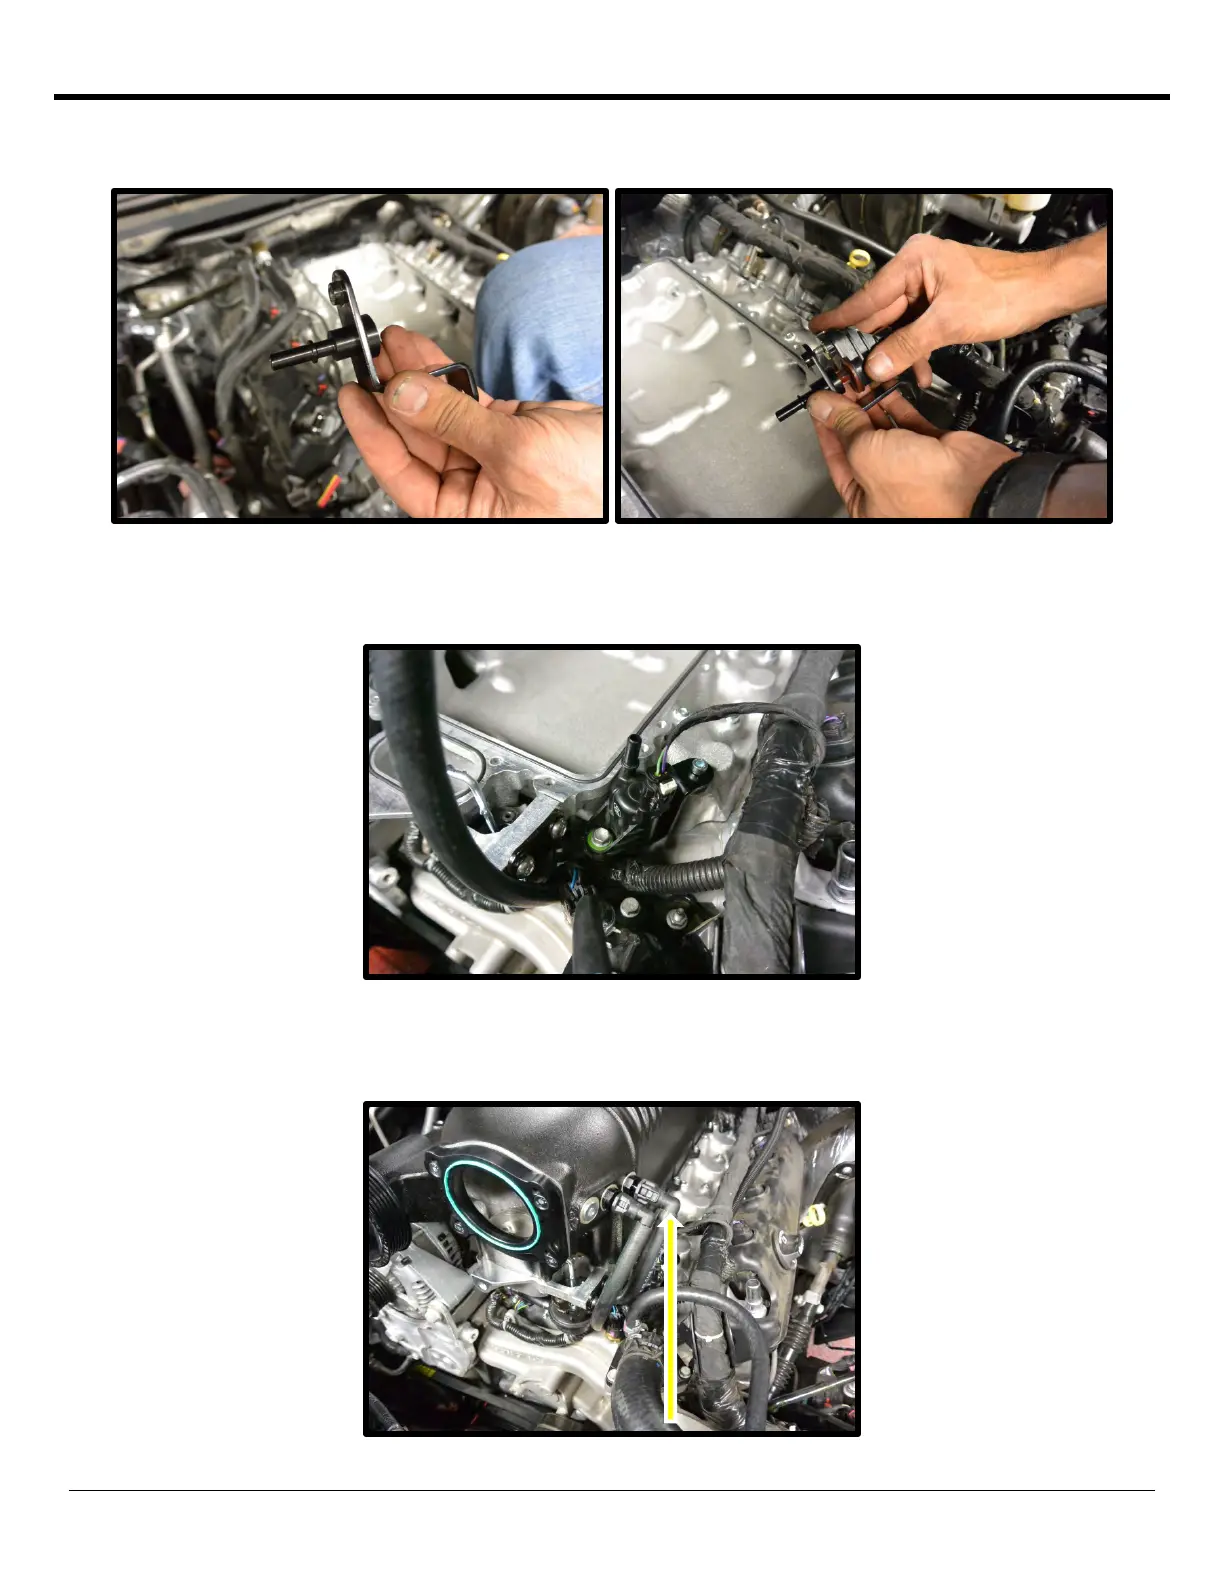
41. Install the supplied aluminum EVAP quick connect fitting through the supplied EVAP solenoid bracket. Follow by
installing the EVAP solenoid to the bracket, securing with the factory fastener previous removed (10mm socket).
42. Install the supplied 3/8” ID EVAP hose with dual 90deg quick connect fittings to bottom fitting on the EVAP
solenoid. Install solenoid just in front of cylinder #1 on driver side, using the first manifold to cylinder head bolt to
secure (1) 6mm x 65mm SHCS (5mm allen socket). Torque to 130 in/lbs.
43. Install the supplied 3/8” ID valley tray cover vent hose with the 90deg and straight quick connect fittings to the
valley tray quick connect fitting (straight end). Route the hose and the 90deg up towards driver side. Connect
90deg fitting to driver’s side rear fitting on inlet of SC. Push until it clicks and locks in place.
 Loading...