Installation Manual: GM LT1_A1R13E
Last Updated: February 12th, 2019
Page 28 of 36
www.whipplesuperchargers.com
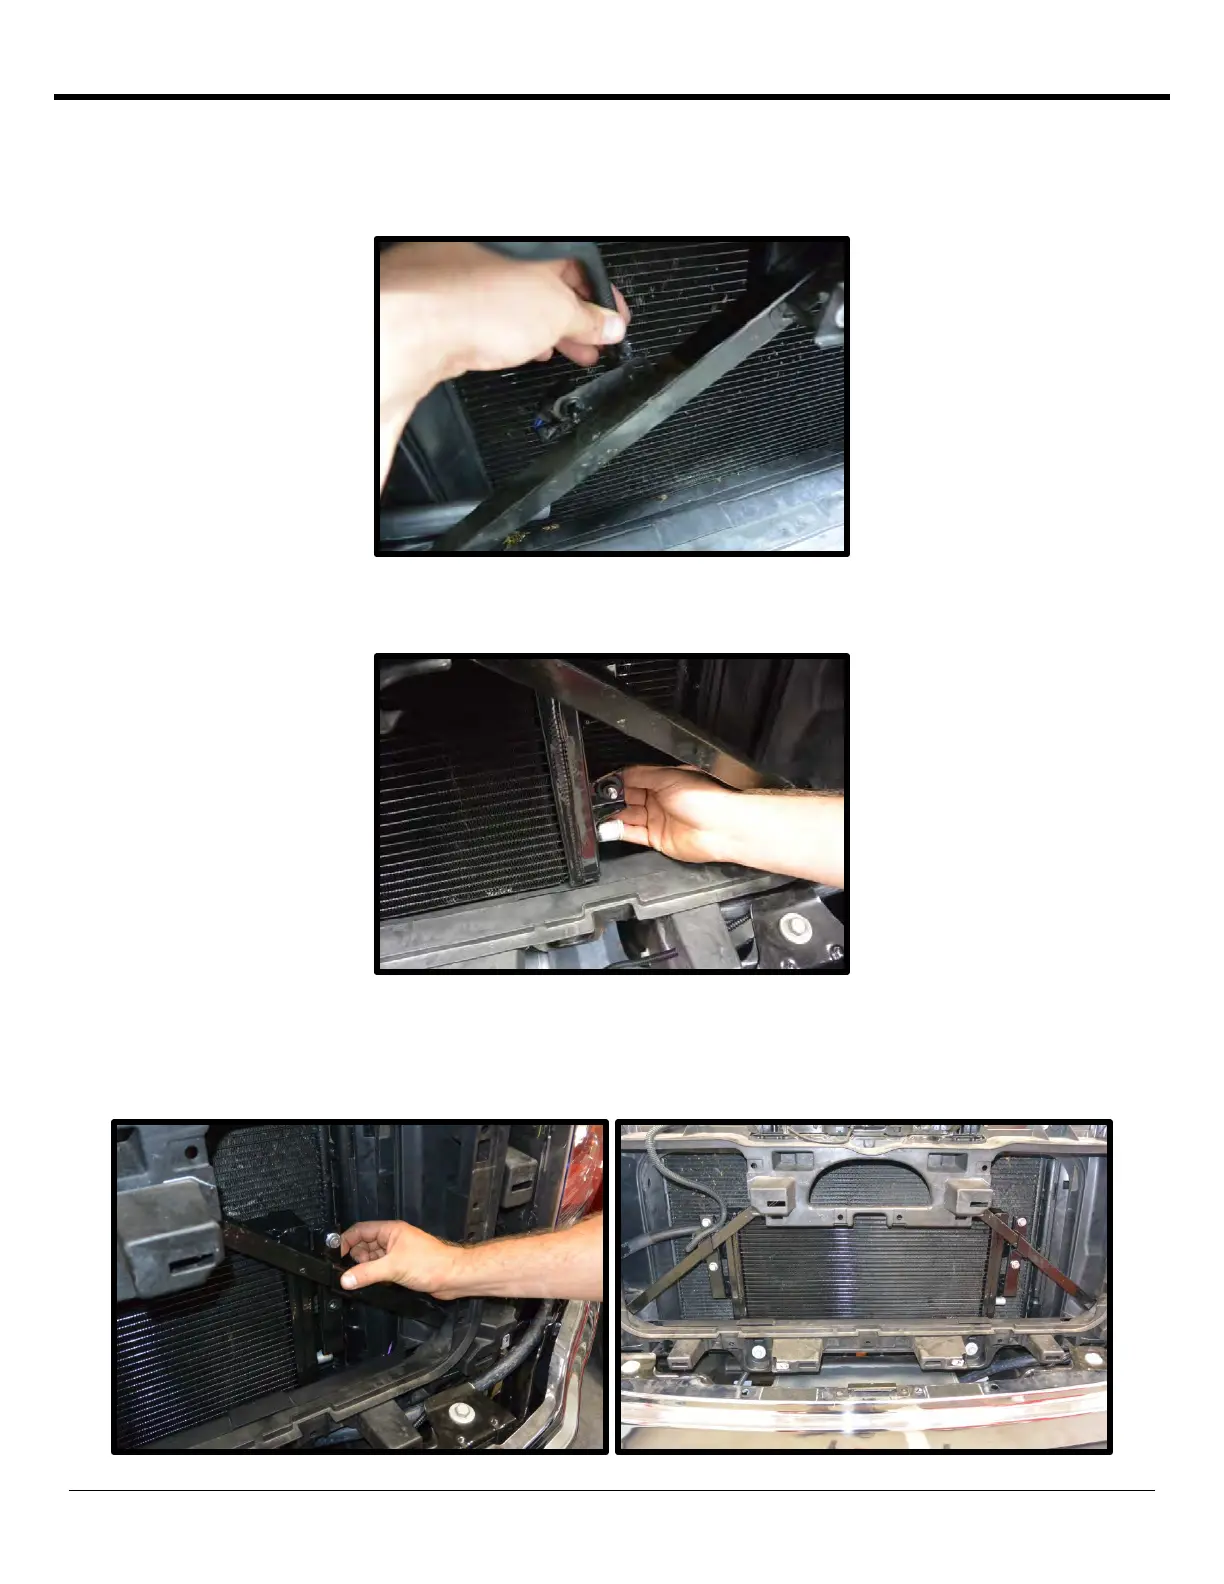
86. Carefully set the heat exchanger behind the front grille support (do not mount yet).
87. Remove the factory ambient air temp sensor from factory location for ease of heat exchanger installation. Remove
the plastic harness support tab.
88. Install the (4) 8mm x 35mm FHSCS from the back side and connect to the heat exchanger bracket (bracket goes
behind the core support. Use a 5mm 90deg allen to secure 8mm x 35mm FHSCS to bracket.
89. From the front of the core support, install the heat exchanger saddle brackets to mount the heat exchanger and
heat exchanger brackets using the supplied (4) 8mm x 20mm hex head flanged bolts (13mm socket). Torque to 15
ft/lbs. NOTE: Align the heat exchanger off the core support, make sure there is zero interference. The heat
exchanger should mount straight.
 Loading...