Installation Manual: GM LT1_A1R13E
Last Updated: February 12th, 2019
Page 30 of 36
www.whipplesuperchargers.com
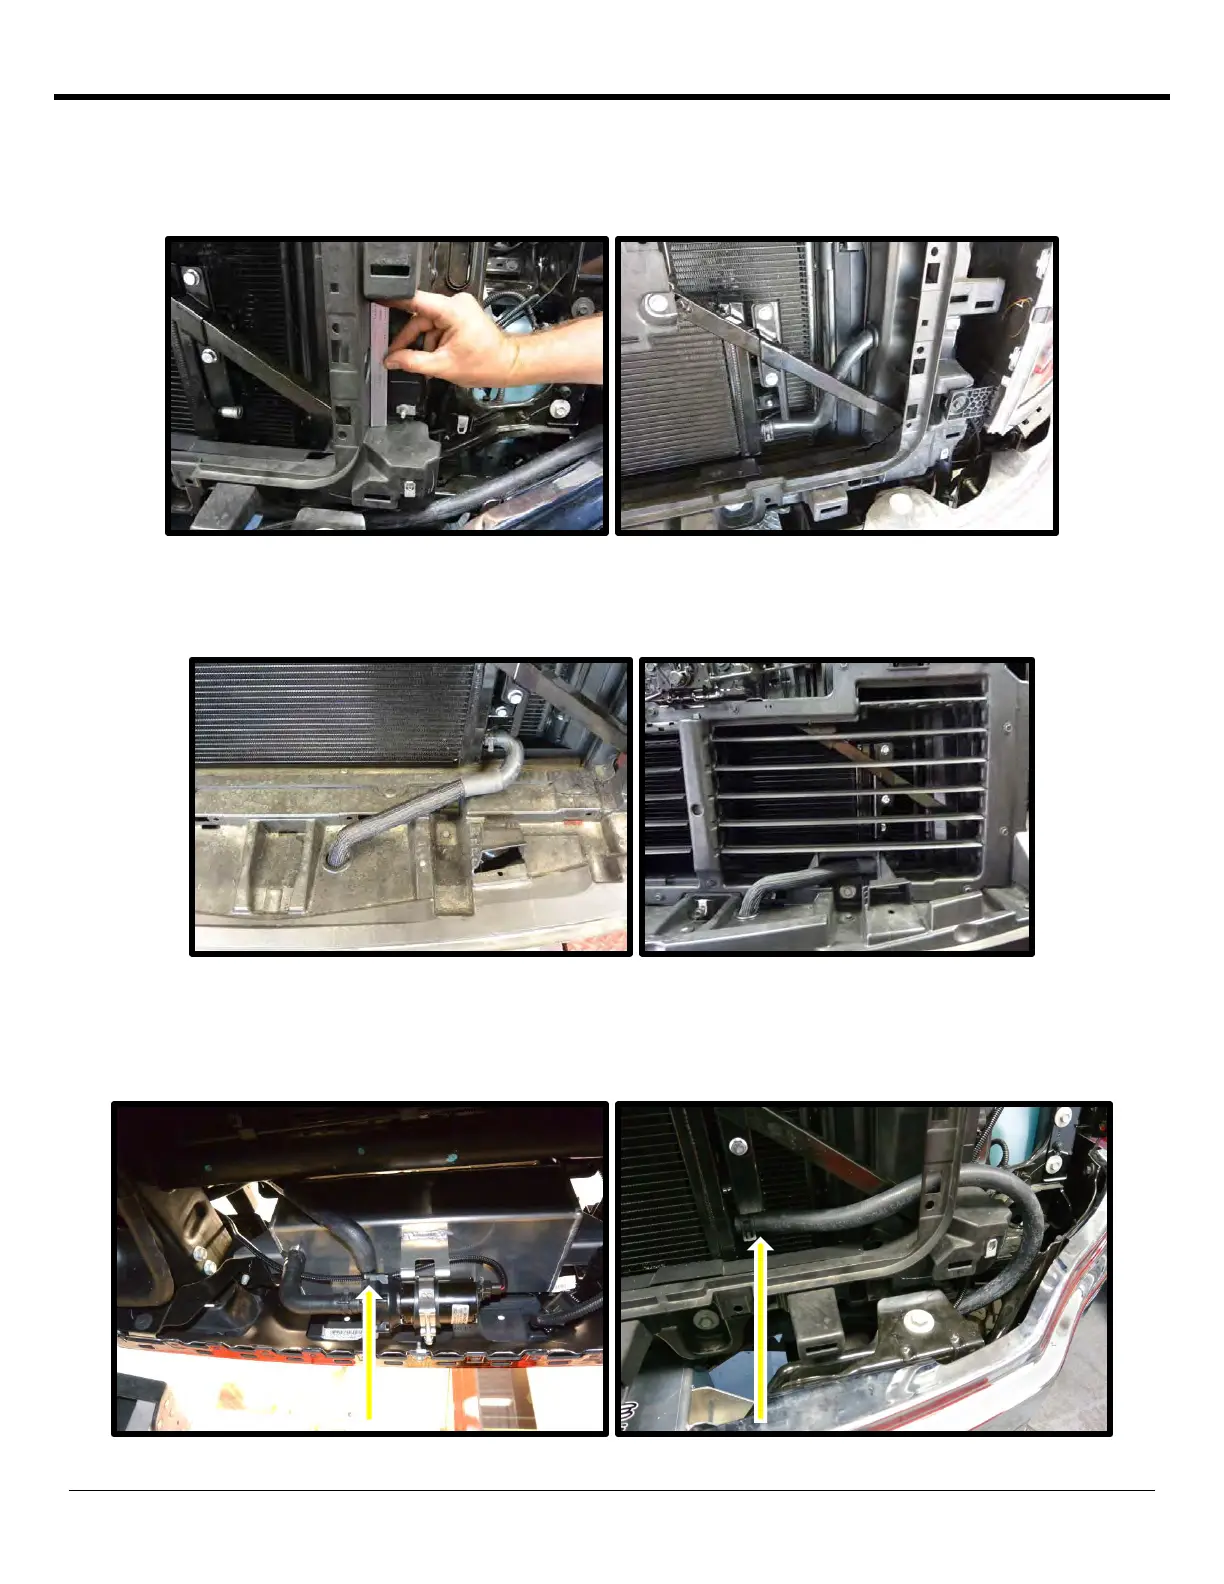
93. (Chevrolet/GMC Trucks) Use a 1 ½” hole saw and drill an access hole through the radiator sealing shroud. This
should be approximately 1” up as shown an image (for hole saw center) ON GMC models. Chevrolet models should
pre-install the supplied 90deg hose end and measure for proper place (must be higher on Chevrolet models/bottom
right image). NOTE: DO NOT LET THIS HOSE KINK!!
94. (Denali/Escalade/SUV) Using a 1 ½” hole saw, drill a hole in the lower plastic shrouding for the IC pump outlet
to heat exchanger hose routing. Install supplied hose and secure with pinch clamps. NOTE: If vehicle has active
shutters, this hose will route through the bottom section. Leave this hose loose until you reinstall shutters.
95. (Chevrolet/GMC Trucks) Install the supplied rubber grommet into the 1 ½” hole.
96. (Chevrolet/GMC Trucks) Route the IC pump outlet hose through this hold and connect to the driver side heat
exchanger barb. Secure with supplied pinch clamp.
 Loading...