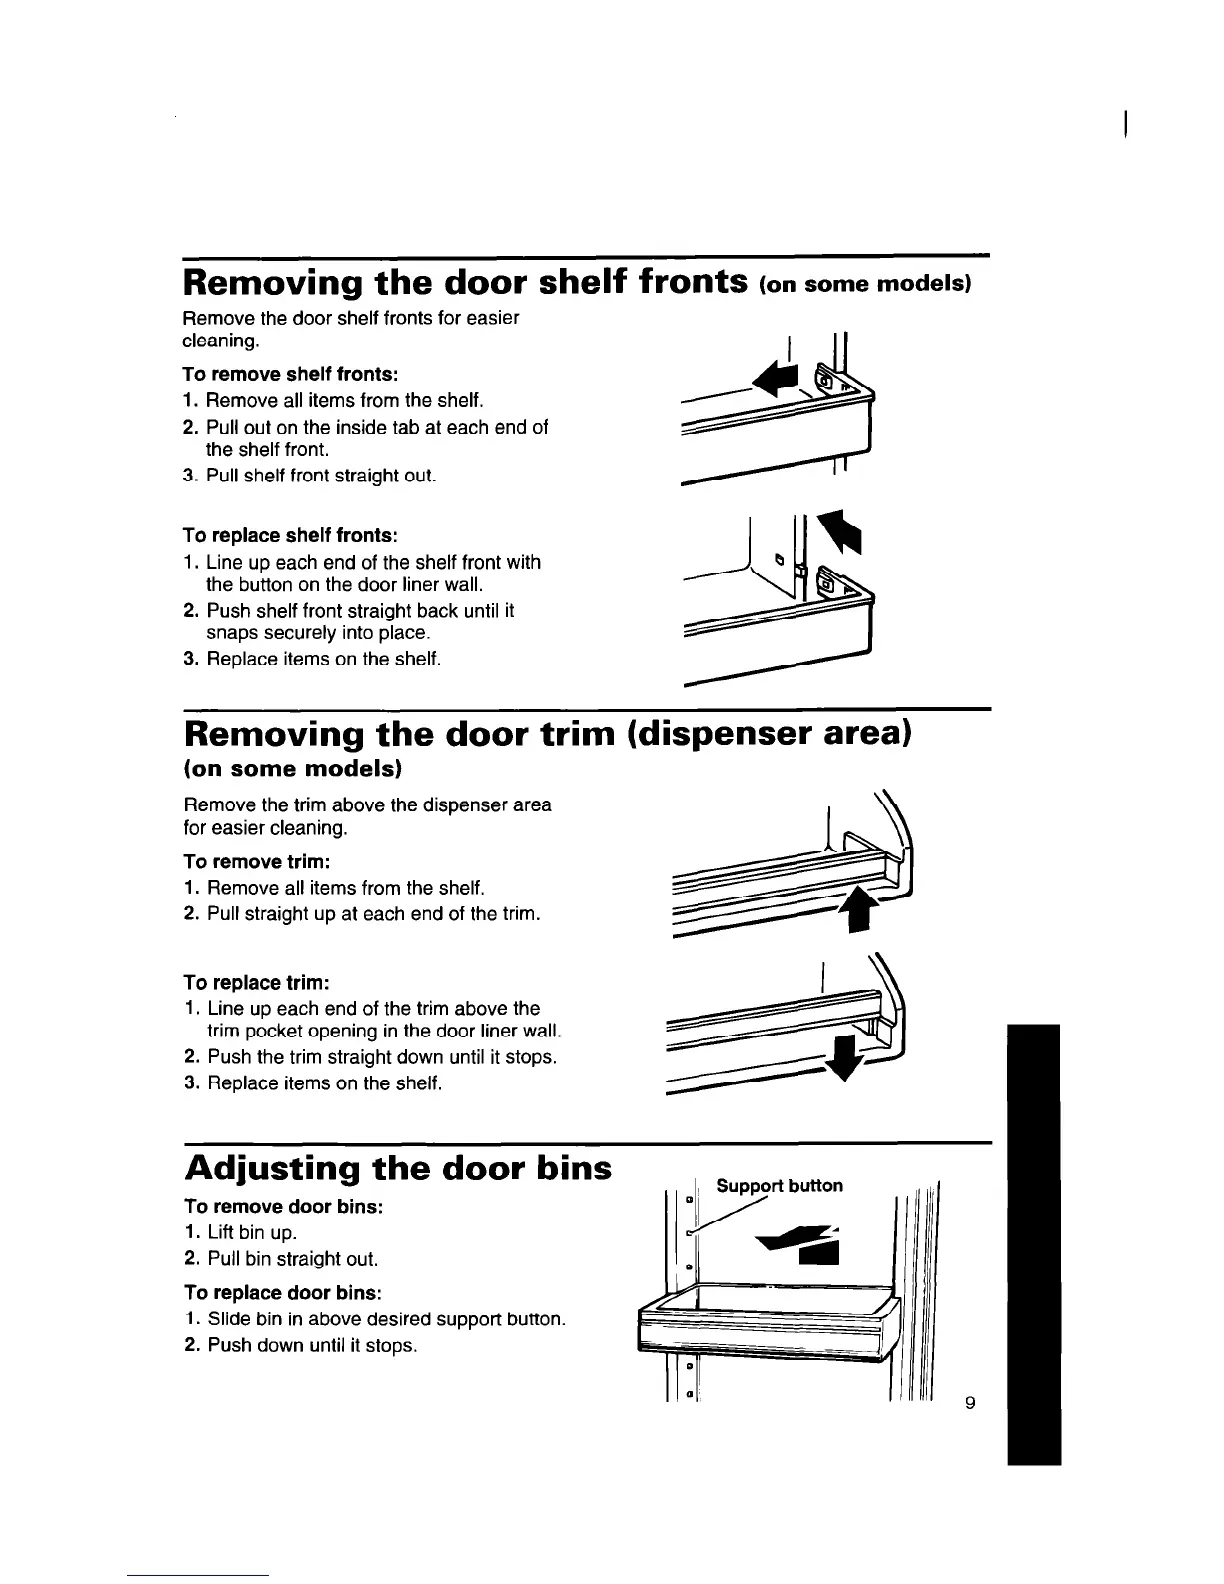
Remove the door shelf fronts for easier
cleaning.
To remove shelf fronts:
Remove all items from the shelf.
Pull out on the inside tab at each end of
1.
2.
3.
the shelf front.
Pull shelf front straight out.
Removing the door shelf fronts
(on some models)
To replace shelf fronts:
1. Line up each end of the shelf front with
the button on the door liner wall.
2. Push shelf front straight back until it
snaps securely into place.
3. Replace items on the shelf.
Removing the door trim (dispenser area)
(on some models)
Remove the trim above the dispenser area
for easier cleaning.
To remove trim:
1. Remove all items from the shelf.
2. Pull straight up at each end of the trim.
To replace trim:
1. Line up each end of the trim above the
trim pocket opening in the door liner wall.
2. Push the trim straight down until it stops.
3. Replace items on the shelf.
Adjusting the door bins
To remove door bins:
1. Lift bin up.
2. Pull bin straight out.
To replace door bins:
1. Slide bin in above desired support button.
2. Push down until it stops.
9




 To Next Page