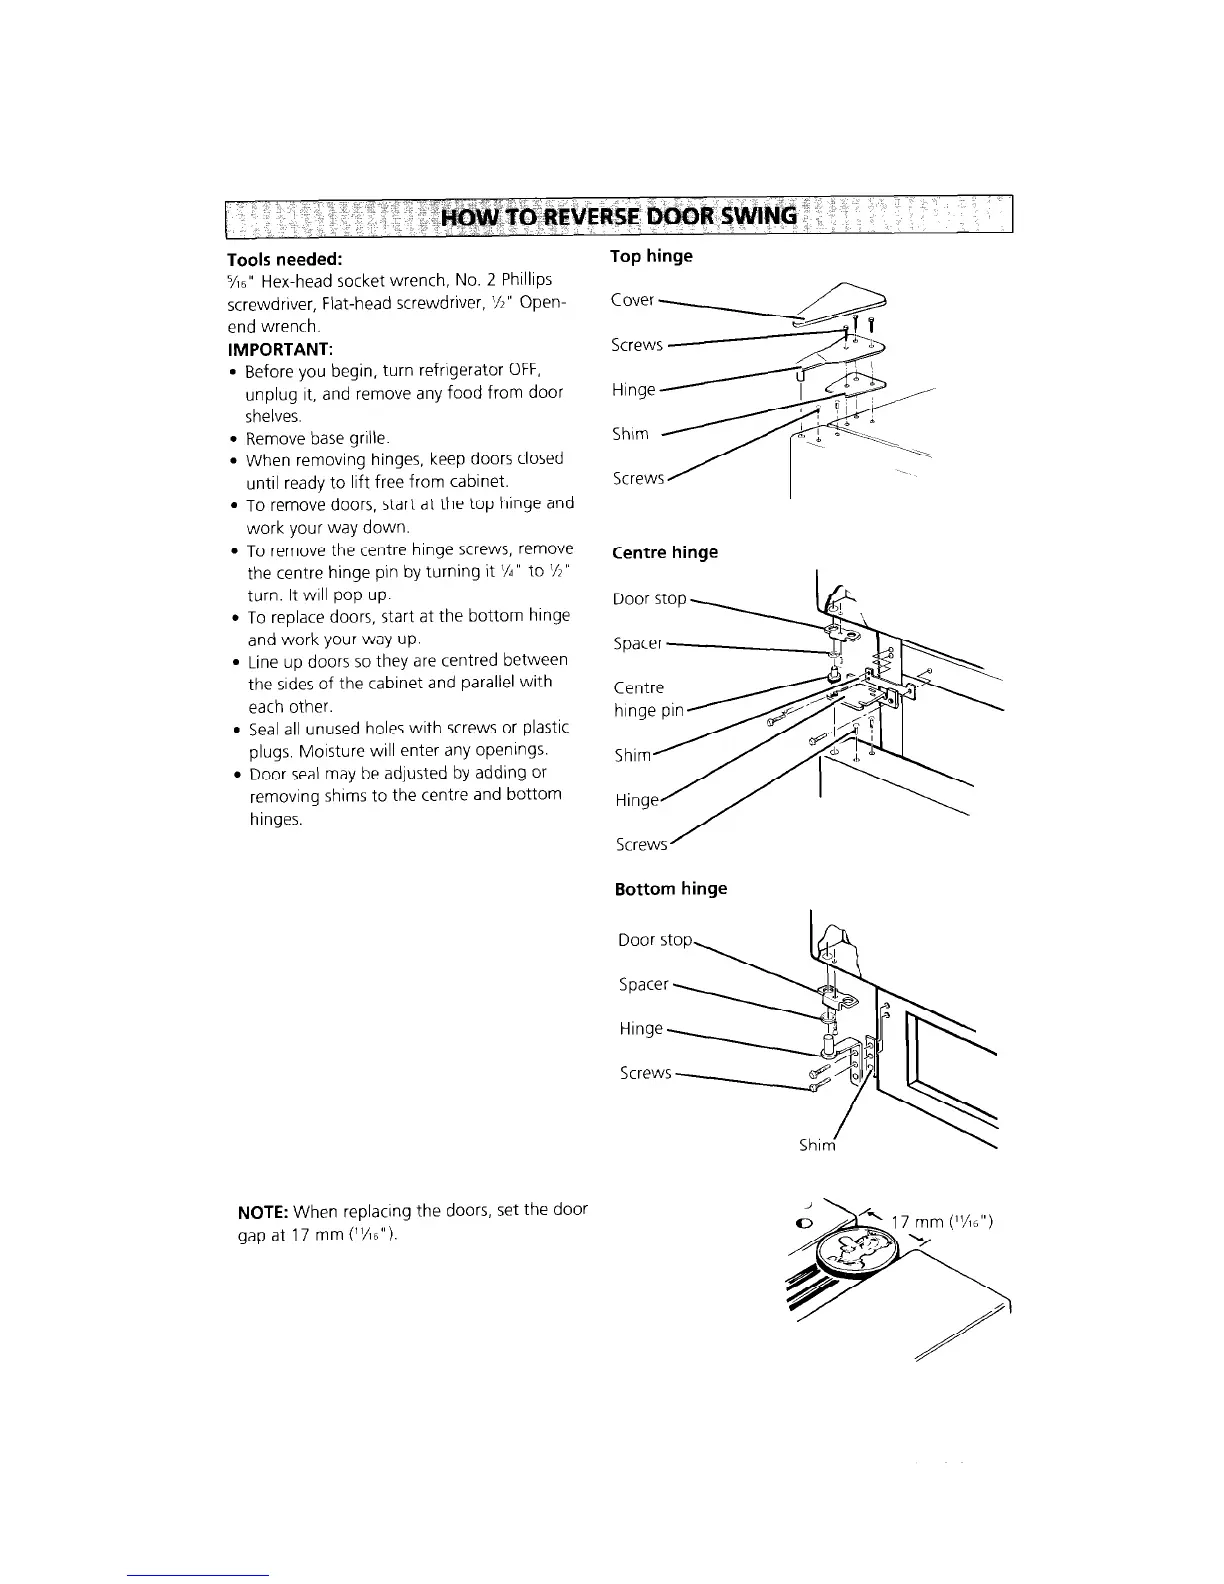
Tools needed:
X6” Hex-head socket wrench, No. 2 Phillips
screwdriver, Flat-head screwdriver, %” Open-
end wrench.
IMPORTANT:
Before you begin, turn refrigerator OFF,
unplug It, and remove any food from door
shelves.
Remove base grille.
When removing hinges, keep doors closed
until ready to lift free from cabinet.
To remove doors, start at the top hinge and
work your way down.
To remove the centre hinge screws, remove
the centre hinge pin by turning it %” to %”
turn. It will pop up.
To replace doors, start at the bottom hinge
and work your way up.
Line up doors so they are centred between
the sides of the cabinet and parallel with
each other.
Seal all unused holes with screws or plastic
plugs. Moisture will enter any openings.
Door seal may be adjusted by adding or
removing shims to the centre and bottom
hinges.
NOTE: When replacing the doors, set the door
gap at 17 mm (‘36”).
Top hinge
Screws/
I
Centre hinge
Bottom hinge