6AKZ 167 PRODUCT DESCRIPTION SHEET
AU
5019 310 54411
First-Last...
shelf positions
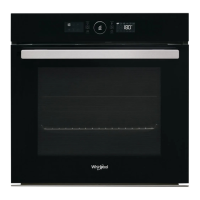
1.Control panel
2.Top oven cooling fan* (not visible)
3.Top oven light
4.Top oven grill heating element
5.Top oven bottom heating element (not visible)
6.Top oven door hinges
7.Top oven door
8.Cooling fan (not visible)
9.Lower oven top heating element
10.Lower oven light
11.Lower oven round heating element
12.Lower oven fan
13.Lower oven bottom heating element
(not visible)
14.Lower oven door hinges
15.Lower oven cool door
*N.B.:
The cooling fan switches on only when the oven has reached a
certain temperature.
After the oven switches off, the cooling fan may, however, continue to
run for a certain time to ensure proper cooling.
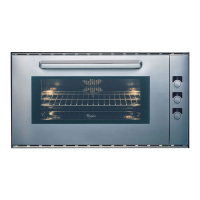
ACCESSORIES
• Grid •Meat tray • Roof shield
• Fat pan •Pan set kit • Catalytic panels
PRE-HEATING YOUR OVEN
Your Whirlpool oven has a special pre-heating programme to ensure a speedy heat up time.
To pre-heat your oven:
1. Select the
P1
feature on the functions selector knob.
2. Set the required temperature on the temperature selector knob.
3. The temperature is indicated by the lights at the top of the control panel.
4. When the lights are fully lit, the pre-set temperature has been achieved.
5. As a guide, the temperature you select will normally be achieved within 12 minutes.
6. Now select the function and set the time you require, then continue the cooking process.
FOR A DESCRIPTION ON HOW TO USE THE OVEN, PLEASE REFER TO THE PROGRAMMER DESCRIPTION SHEET.
LOWER OVEN FUNCTIONS TABLE
Function
symbol
Function
Preset
temperature/level
Function description
(see details in the user’s manual)
0OVEN OFF --
OVEN LIGHT - To switch on the oven light.
MLTF
(Heat Maintenance)
35C
To keep a constant temperature, either 35°C or
60°C.
STATIC 200C To cook food at one shelf level. Preheating.
PASTRY
(Static + Fan)
175C
To cook on two shelf levels, at the same
temperature.
GRILL 3 To grill small pieces of meat, toasts, etc.
TURBOGRILL
(Grill + Fan)
3 To grill large pieces of meat.
FAN 160C
To cook on more than one shelf level, at the same
temperature.
TURBOFAN 160C
To cook: large fruitcakes, stuffed vegetables,
timbales, poultry.
PROGRAMME P1 To bake pizza, bread, focaccia.
Untere
Obere
TOP OVEN FUNCTIONS TABLE
Function
symbol
Function
Function description
(see details in the user’s manual)
0OVEN OFF-
OVEN LIGHT To switch on the oven light.
BOTTOM HEATING To use the last 10-15 minutes of cooking time.
STATIC To cook food at one shelf level. Preheating.
DUAL VARIABLE GRILL
To grill meat, toasts, etc.
Single grill position: for small quantities of food.
Dual variable grill position: for large quantities of food.
STARTING THE TOP OVEN
• Turn the
functions selector knob
to the required symbol ( ). The oven light switches on.
• Turn the
thermostat knob
clockwise to the required temperature. The red thermostat indicator light switches on.
When the required temperature is reached the red thermostat indicator light switches off.
End of cooking cycle:
• Return the knobs to the OFF position
(0 -
•
).
To operate the single grill
(left zone only)
:
•Turn the
grill knob
to the required grilling power (
1234
).
To operate the dual variable grill :
• Turn the
grill knob
to the required grilling power (
•1•2•3•4
).
STARTING THE LOWER OVEN
When the oven is connected to the power supply for the first time, or re-connected after a power failure, the display shows
“”.
To start the oven:
•turn
knob 1
to
“0”
.
•press
button 2
. The display shows “--:--”.
1. Lower oven selector knob: to choose the oven functions.
2. Lower oven button to select and confirm the different operations (operate by single presses only).
3. Lower oven knob to set: time of day, cooking time, the time at which cooking should terminate, the temperatures and the
power levels (Function
P
).
4. Top oven grill knob
5. Top oven thermostat knob
6. Top oven functions selector knob
7. Top oven red thermostat knob
Untere
Obere