Do you have a question about the Whirlpool ADG 7470 and is the answer not in the manual?
Details on different wash programmes including loading, consumption, and detergents.
Steps to resolve common issues like spray arm blockages.
Checks and solutions for faults related to power, door, or delayed start.
Troubleshooting specific error codes (F1, F4, F6, F7, F8) and flashing indicators.
Solutions for problems like dishes not being clean or having food residues.
Important safety instructions for operating the appliance.
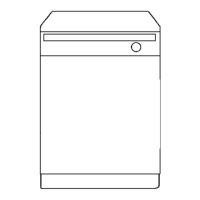
This document provides a comprehensive guide for operating and maintaining your Whirlpool dishwasher, ensuring optimal performance and longevity. It covers everything from initial setup and program selection to loading instructions, daily checks, and troubleshooting.
The Whirlpool dishwasher is designed to efficiently clean various types of crockery and cutlery. It offers a range of programs tailored to different levels of soiling and specific needs, such as energy saving or intensive cleaning for heavily soiled items. The appliance features intuitive controls, including an ON button, a PROGRAMME SELECTION button (P), an OFF button, and a START button. The START button also serves as a RESET function, allowing you to cancel selected programs or clear fault displays. Indicators on the control panel provide feedback on the appliance's status, such as when a program is running, when a fault occurs, or when salt or rinse aid needs to be added.
Initial Setup: Before the first use, it is crucial to set the detergent type (powder/gel/tablet) and water hardness. For detergent type, select the 3rd program, press the START button for 7 seconds, and then adjust the setting using the START button according to the provided table. For water hardness, select the 2nd program, press the START button for at least 5 seconds until the indicator flashes, and then adjust the setting based on your local water supply company's information. Remember to switch the appliance off and on again to save these settings.
Filling the Salt Reservoir: The salt reservoir should be filled with water before the first wash only. Add salt (never detergent) up to 2 kg. The salt indicator on the control panel will light up when salt needs to be added. Note that if your water hardness level is set to "soft," salt may not be required.
Adding Rinse Aid: The rinse aid dispenser should be filled to the maximum line (approximately 150 ml). The rinse aid dosage can be adjusted using a regulator, with position 4 being the factory setting. Lower settings dispense less rinse aid, while higher settings dispense more. Adjust as needed to prevent streaks or ensure crockery is perfectly dry. The rinse aid indicator will light up when it needs to be refilled. Only use rinse aids recommended for domestic dishwashers and wipe away any spills.
Adding Detergent: Always fill the detergent dispenser just before starting a wash program. If using tablets, place only one tablet per cycle in the dispenser. For 2-in-1 tablets, adding salt is still mandatory.
Filters: Regularly check and clean the filters to ensure optimal performance. Unscrew the filter cylinder, remove it and the fine sieve, rinse them under running water, and then reinsert and screw the filter cylinder back tightly, aligning the mark.
Spray Arms: Remove blockages or deposits from the spray arms. Unscrew and remove both the lower and upper spray arms. Clean the spray nozzles under running water, using toothpicks if necessary. Reinsert and screw both arms back tightly.
Troubleshooting: The manual provides a detailed "What to do if..." section to help diagnose and resolve common issues. This includes solutions for problems like the appliance not starting, error codes (F1, F4, F6, F7, F8), crockery not being perfectly clean, salt indicator remaining lit, crockery not drying, discolored plastic parts, opaque glasses, and other marks or streaks. In most cases, resetting the appliance by pressing the START button for approximately 2 seconds will clear fault messages. If a fault persists after following the troubleshooting steps, disconnect the mains plug, turn off the water tap, and contact After-sales Service.
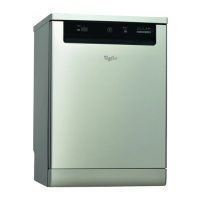
| Type | Freestanding |
|---|---|
| Capacity | 12 place settings |
| Number of programs | 6 |
| Energy efficiency class | A |
| Washing class | A |
| Drying class | A |
| Water consumption per cycle | 12 liters |
| Noise level | 49 dB |
| Delay Start | Yes |
| Half Load Option | Yes |
| Child Lock | No |
| Dimensions (H x W x D) | 850 x 600 x 600 mm |