Do you have a question about the Whirlpool AKG668 and is the answer not in the manual?
Guidance on positioning the oven within a housing unit or between base units.
Instructions for connecting the appliance to the mains supply by a qualified electrician.
Steps to follow after an electricity supply interruption, including resetting the programmer.
How to clean painted surfaces like the door frame and handles.
Recommended cleaning agents for vitreous enamel components.
Instructions for cleaning glass components like the fascia and door panels.
Procedure for removing and refitting the inner oven door glass for cleaning.
How to clean the oven compartment's self-clean surfaces carefully.
Methods for cleaning oven shelves and shelf runners.
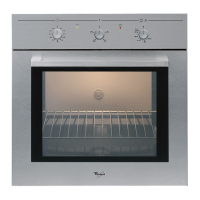
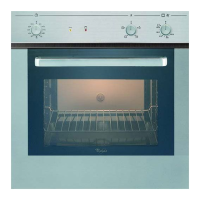
Overview of the programmer's capabilities and display symbols.
Instructions for setting time, minute minder, and cooking modes.
Diagram illustrating the timer display and control buttons.
Guide to setting the current time of day on the programmer.
How to set and use the minute minder feature for timed alerts.
Setting the oven to switch off automatically after a set duration.
Setting the oven to switch off at a specific end time.
Guide to setting up delayed cooking with start and end times.
How to identify and correct setting errors on the programmer.
Procedure to revert the display back to showing the time of day.
Importance of setting the time of day before using the oven or grill.
How the automatic cooking facility works for meals cooked while out.
Do's for selecting and preparing food for automatic cooking.
Don'ts for automatic cooking, including unsuitable food types.
Additional precautions to avoid food poisoning with automatic cooking.
Important note on food safety when using automatic cooking in warm weather.
Helpful tips for using the automatic cooking facility effectively.
Chart for converting conventional oven temperatures to fan oven temperatures.
Disclaimer regarding the approximate nature of the conversion chart.
Explanation of how the fan circulates air for even cooking.
Tips for positioning dishes to ensure free air circulation.
Warning against placing items on the oven base to maintain air circulation.
Note on how fan ovens prevent flavour transfer between foods.
How to operate the fan oven manually by setting temperature.
Using the programmer for automatic fan oven operation.
Information on cooking times based on preheated oven.
Recommendations for preheating the oven for specific foods.
Step-by-step guide for replacing the oven light bulb.
Temperatures and cooking times for various cakes and pastries.
Temperatures and cooking times for biscuits and bread loaves.
Temperatures and cooking times for sponge and milk puddings.
Factors influencing cooking times, like dish size and preference.
Ensuring frozen foods are thoroughly thawed before cooking.
Restrictions and guidelines for slow cooking meat and poultry.
Preheating and temperature advice for roasting meat and poultry.
Approximate duration for slow cooking compared to conventional methods.
How to use the oven's defrost setting for cooling and thawing.
Warnings regarding defrosting stuffed poultry and large joints.
Estimated times for defrosting fish, meat, and chickens.
Cooking times for beef based on desired doneness (rare, medium, well done).
Cooking times for lamb based on desired doneness (medium, well done).
Cooking times for pork.
Cooking times for fowl.
Notes on thawing frozen meat, cooking stuffed items, and foil use.
Details on how dish size, shape, and bone affect cooking times.
Instructions for turning on and operating the grill function.
Requirement for the grill door to be open during use.
Warnings about hot parts, keeping children away, and fire hazards.
Note on the fan operating to cool the appliance during grilling.
How to correctly attach and use handles with the grill pan.
Advisories to keep children away from the hot top oven.
Warning about the extreme heat of the top oven element.
Do not place items directly on the oven base to prevent overheating.
How to use bottom heat only or top heat only functions.
How to operate the top oven by setting the temperature control.
Note on the cooling fan operating for the top oven.
Guidance on adjusting temperatures for the compact top oven.
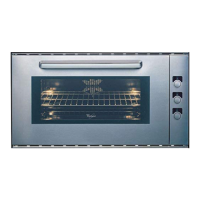
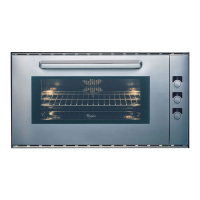
Explanation of the 4 available shelf positions.
Information on approximate cooking times for the top oven.
Recommendations for preheating the top oven before use.
Temperatures and cooking times for cakes in the top oven.
Temperatures and cooking times for biscuits and puddings in the top oven.
Factors affecting pastry cooking times in the top oven.
Details on voltage and maximum load for the appliance.
Wattage ratings for the grill, top oven, and main oven elements.
General advice on the appliance's design for low-level installation.
Introduction to the three different methods for installing the appliance.
Description of the screws provided in the fixing kit for installation.
Instructions for installing the appliance between two base units.
Checking space, obstructions, and depth requirements for installation.
Details of the side trims and runners included in the fixing kit.
Step-by-step guide for fitting runners, side trims, and securing the appliance.
Reference to the electrical connection details on page 3.
Guidance on carefully inserting the appliance between base units.
Steps to secure the appliance using screws into side trims.
Diagram illustrating the installation process for Method 1.
Instructions for installing into a housing unit with less than 710mm internal height.
Specific information regarding side trims and runners for this method.
Ensuring cabinet structural soundness before making modifications.
Modifying the housing to achieve required height and depth.
Steps for attaching runners to the housing unit side walls.
Reference to the electrical connection details on page 3.
How to insert and secure the appliance into the housing unit.
Diagram illustrating the installation process for Method 2.
Instructions for installing into a housing unit with 710mm or more internal height.
Information on not needing runners/trims and removing fixings.
Importance of securing cabinetry to adjacent units, floor, or worktop.
Removing the false back of the housing unit for installation depth.
Diagram illustrating the installation process for Method 3.
Shortening the shelf to create a minimum 30mm gap behind the unit.
Steps to insert and secure the appliance into the housing unit.
Reference to installation instructions for hobs placed above the oven.
Disclaimer on liability if instructions are not followed.
| Type | Built-in |
|---|---|
| Energy Efficiency Class | A |
| Number of Functions | 8 |
| Fuel Type | Electric |
| Number of Ovens | 1 |
| Voltage | 220-240 V |
| Installation Type | Built-in |
| Color | Stainless Steel |
| Frequency | 50 Hz |