Do you have a question about the Whirlpool FWEB90021G and is the answer not in the manual?
This document serves as an installation guide for a front-load washer, providing essential information for its proper setup, use, and maintenance. The guide emphasizes safety and environmental responsibility throughout the process.
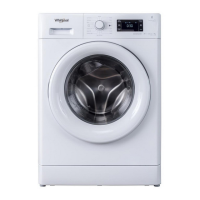
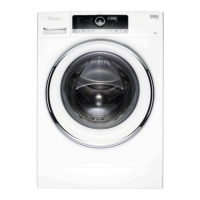
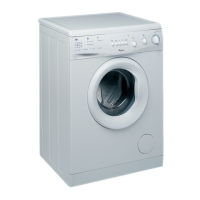
This appliance is a front-load washing machine designed to clean clothes. It operates by tumbling laundry in a drum with water and detergent. The machine is equipped with various features to ensure efficient and effective washing, including spin cycles to remove excess water from clothes. Its design focuses on stability and quiet operation, provided it is installed correctly.
The washing machine requires careful handling during transport, which should be done by two persons, each holding opposite sides of the machine with both hands. It must be installed on a firm, flat, and slip-proof surface to prevent abnormal noises, vibrations, or malfunction. It is crucial not to place the washing machine on carpeted or wood-covered floors, or on a ground platform or rack. A minimum distance of 10 cm from the wall or hard surfaces on three sides is recommended to ensure proper ventilation and operation.
To ensure stable and quiet operation, the washing machine's four adjustable feet must be properly leveled. If the machine is installed on an uneven surface, it can generate excessive noise and vibrations. To adjust the level:
The washing machine is secured with four transport bolts to protect its internal structure during shipping. These bolts must be removed before the first use. Failure to remove them will cause the machine to vibrate vigorously, generate loud noises, and function improperly during the spin cycle. To remove the bolts:
Connecting the water supply hose involves several steps to ensure a leak-free connection:
The drain hose needs to be managed differently depending on whether the machine is in use:
The packaging materials are 100% recyclable and marked with the recycle symbol. These materials must be disposed of responsibly and in compliance with local regulations governing waste disposal.
This appliance is manufactured with recyclable or reusable materials. It should be disposed of in accordance with local waste disposal regulations. For information on the treatment, recovery, and recycling of household electrical appliances, contact your local authority, the household waste collection service, or the store where the appliance was purchased. Proper disposal helps prevent negative environmental and health consequences. The symbol on the product or accompanying documentation indicates that it should not be treated as domestic waste but taken to an appropriate collection center for the recycling of electrical and electronic equipment.
To ensure the washing machine continues to work normally, the filter in the pump should be cleaned periodically. This helps prevent blockages and maintains optimal drainage performance.
| Brand | Whirlpool |
|---|---|
| Model | FWEB90021G |
| Loading Type | Front Load |
| Capacity | 9 kg |
| Energy Efficiency Class | A+++ |
| Spin Speed | 1200 RPM |
| Noise Level (Washing) | 52 dB |
| Noise Level (Spinning) | 75 dB |
| Color | White |
| Programs | Cotton, Synthetics, Delicates, Wool, Quick |
| Water Consumption | 50 liters per cycle |