Do you have a question about the Whirlpool GMW 6422/IXL and is the answer not in the manual?
This document describes a Whirlpool gas hob, providing safety instructions, installation guidelines, product features, daily use advice, maintenance procedures, and troubleshooting information.
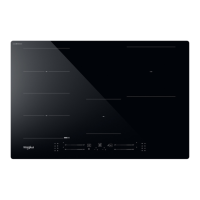
The Whirlpool gas hob is a cooking appliance designed for household and similar applications. It features multiple gas burners for cooking, controlled by knobs on the front panel. The appliance is intended for preparing food and is not suitable for professional use or heating rooms. It incorporates safety features such as a device that shuts off the gas supply if the flame accidentally goes out.
The hob is designed to operate with different types of gas, including Natural Gas (Methane) G20, Liquefied Petroleum Gas (Butane) G30, and Liquefied Petroleum Gas (Propane) G31. The document includes an "INJECTORS TABLE" detailing the rated thermal flow rate, rated consumption, reduced heat capacity, and gas pressure for each burner type (Auxiliary, Semi-rapid, 2 Ring) across different gas types.
For a 4-burner model configuration (2 SR - 1 AUX - 1DC):
The electrical supply required is 220-240 V ~ 50-60 Hz, with a power consumption of 0.6W. The hob can be embedded in a worktop 20-60 mm thick. Dimensions for installation include a width of 590 mm, depth of 510 mm, and a cut-out of 560+2 mm by 480+2 mm. Minimum distances to cabinets and hoods are specified.
The hob features removable panstand grids, an auxiliary burner, two semi-rapid burners, and a 2-ring burner, each with a corresponding control knob. To use, turn the knob anti-clockwise to the maximum flame setting and press it against the control panel to ignite the burner. Hold the knob for 5-10 seconds after ignition to allow the safety device to operate correctly. If the burner does not remain lit after 15 seconds, wait at least one minute before trying again. The document provides symbols for tap closed, maximum opening/delivery and electric ignition, and minimum opening or reduced delivery. Users are advised to use pots and pans with bottoms the same width as or slightly larger than the burners, use flat-bottomed cookware, and keep pots covered to conserve energy. Pots should not protrude beyond the edge of the hob. For WOK pans, a support grille (not provided) should be used on the multi-ring burner. The appliance is not intended to be operated by external switching devices like timers or remote controls.
Before any maintenance, the appliance must be switched off and disconnected from the power supply. Steam cleaning equipment, abrasive or corrosive products, chlorine-based cleaners, and pan scourers should not be used. Cleaning the hob surface: All enamelled and glass parts should be cleaned with warm water and a neutral solution. Stainless steel surfaces should be cleaned with warm water and neutral detergent, then dried with a soft cloth or chamois. Specific cleaners for stainless steel surfaces can be used for baked-on dirt. Avoid leaving calcareous water, aggressive detergents, or food spills on stainless steel surfaces for too long. Do not use acid or alkaline substances like vinegar, mustard, salt, sugar, or lemon juice on the hob. Cleaning the hob parts: Grids, burner caps, and burners can be removed for cleaning. They should be cleaned by hand with warm water and non-abrasive detergent, ensuring burner openings are not clogged. Rinse and dry thoroughly. When re-fitting, ensure burners and caps are correctly placed in their housings and panstand areas are aligned with the burner. Electrical ignition plugs and safety devices require frequent cleaning with a damp cloth to ensure correct operation; a toothpick or needle can be used for baked-on food. Do not use the electric ignition device if the burners are not in their housing.
Adaptation to different gas types: This operation must be performed by a qualified technician. It involves changing the injectors and adjusting the minimum setting of the taps. The document provides instructions for replacing injectors using a socket spanner and adjusting the minimum gas setting by tightening or loosening a screw on the tap. After adjustment, the setting should be sealed.