Do you have a question about the Whirlpool WED7800XW0 and is the answer not in the manual?
Gather required tools and parts before starting installation.
Check local codes, electrical supply, and venting before purchasing parts.
Refer to Use and Care guide for information about available accessories.
Ensure location allows dryer door to open fully and provides adequate space.
Specific requirements for mobile home installations, including exhaust system hardware.
Ensure electrical connection is adequate and conforms to national and local codes.
Determine and follow instructions for the type of electrical connection to be used.
Instructions for proper grounding of the dryer for electrical safety.
Instructions for installing a power supply cord strain relief.
Instructions for installing a direct wire strain relief.
Instructions for a 4-wire power supply cord connection.
Instructions for a 3-wire power supply cord connection.
Instructions for a 4-wire direct wire connection.
Instructions for a 3-wire power supply cord connection.
Instructions for a 3-wire direct wire connection.
Instructions for an optional 3-wire connection where codes permit.
Guidelines for using flexible metal vents, including limitations and best practices.
Details on exhaust hoods, including recommended and acceptable styles.
Typical installations venting the dryer from the rear, with side and bottom options.
Options for installations with limited space, like over-the-top or periscope.
Securely fastening vent to noncombustible portion of mobile home structure.
Select the best route and determine vent length and elbows needed.
Chart showing exhaust length requirements based on vent type and number of elbows.
Step-by-step instructions for installing the exhaust hood and vent.
Check and adjust dryer levelness using a level on the top and side.
Connect the vent to the dryer exhaust outlet using a clamp.
Connect the cold water faucet to the dryer using new inlet hoses.
Final checks of parts, tools, location, and dryer operation.
Step-by-step guide to change the dryer door swing from right to left.
Solutions for when the dryer will not run or has no heat.
Solutions for when the dryer runs but does not produce heat.
Explains troubleshooting for error codes like "PF" and "L2".
Checks for clogged lint screens or improper venting affecting drying.
Reviewing installation requirements, clearances, and environmental conditions.
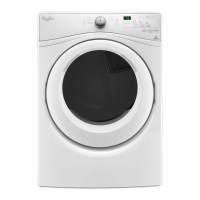
| Brand | Whirlpool |
|---|---|
| Model Number | WED7800XW0 |
| Appliance Category | Dryer |
| Type | Electric |
| Fuel Type | Electric |
| Capacity | 7.4 cu. ft. |
| Color | White |
| Weight | 120 lbs |
| Control Type | Electronic |
| Moisture Sensor | Yes |
| Wrinkle Control Option | Yes |
| Energy Star Certified | Yes |
| Width | 27 inches |
| Drying Cycles | Normal, Heavy Duty, Delicate, Quick Dry |
| Temperature Settings | High, Medium, Low |
| Features | End of Cycle Signal |
| Depth | 29 inches |