EasyManua.ls Logo

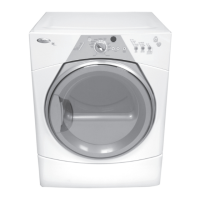
Whirlpool WED8500DC User Manual

Whirlpool WED8500DC
9 pages
To Next Page IconTo Next Page
Page #1 background imageLoading...
Page #1 background image
1
DDRRYYEERR DDOOOORR RREEVVEERRSSAALL IINNSSTTRRUUCCTTIIOONNSS
You can change your door swing from a right-side opening to a left-side opening, if desired. The following instructions are applicable for
models with a side-opening door.
Tools Needed
Flat-blade screwdriver Plastic putty knife Minimum 8" long TORX
®
T25
®
star driver
#2 Phillips screwdriver
WARNING
Electrical Shock Hazard
Disconnect power before removing doors.
Failure to do so could result in death or electrical shock.
3. Remove and transfer plastic hinge plugs
Use a small, flat-blade screwdriver to gently remove 4 hinge hole
plugs (A) on left side of dryer cabinet. Transfer plugs into hinge
holes on opposite side of dryer cabinet (where hinges were
removed in Step 2).
1. Place towel on dryer
Place towel on top of dryer to avoid damaging the surface.
4. Reverse the strike
Remove the door strike (A) from the dryer door opening. Remove
the cosmetic screw (B) opposite the door strike (A). Reinstall the
door strike and cosmetic screw on the opposite side of dryer door
opening from where they were removed.
NOTE: Door strike and plugs must be on the same side of the
dryer door opening.
2. Remove door from dryer cabinet
Open dryer door. Using a T25
®
screwdriver, remove screws (A)
and then (B) screws from each of the two hinges that attach dryer
door to front panel of dryer. Set the hinge screws off to the side for
reinstalling the door.
Remove the dryer door by lifting upward and out to lift the door off
the cabinet. Lay the door on a flat, covered surface, with the inside
of the door facing up.
5. Remove the door assembly
Lay the door on a flat, covered surface with the inside of the door
facing up. Remove the 3 plugs with a plastic putty knife. There is
a cut out to stick the putty knife under to pop out.
TORX and T25 are trademarks of Acument Intellectual Property, LLC.
Other manuals for Whirlpool WED8500DC

Questions and Answers:

Whirlpool WED8500DC Specifications

General IconGeneral
Colorblack, chrome
Dryer Capactity8.8 cubic feet
Number of Cycles23
Cycle Selectionswhat to dry: mixed, casuals, towels, delicates, bulky/sheets how to dry: normal, sanitize, gentle, heavy duty, timed dry
Optionsautomatic dry control, moisture sensor, quad baffles, steam refresh, wrinkle shield plus option with steam, ecoboost option, static reduce, sanitize
Stackableno
Temperature Settings5
Temperature Selectionsno heat, low, medium, high, hot
Control Typedigital
Cycle Signalyes
Interior Lightyes
Drying Rackno
Moisture Sensor Optionyes
Steamyes
Voltage240 volts
Weight and Dimensions IconWeight and Dimensions
Depth32 1/4 inches
Height42 1/4 inches
Width29 inches
Net Weight159 pounds

Summary

Dryer Door Reversal Instructions

Place Towel on Dryer

Place a towel on the top of the dryer to prevent damage to the surface during the procedure.

Remove Door from Dryer Cabinet

Open the dryer door and use a T25 screwdriver to remove screws attaching the hinges to the front panel.

Remove and Transfer Plastic Hinge Plugs

Gently remove hinge hole plugs from one side of the cabinet and transfer them to the opposite side.

Reverse the Strike

Remove and reinstall the door strike and cosmetic screw on the opposite side of the dryer door opening.

Remove Door Assembly

Lay the door on a flat surface, remove plugs with a putty knife, and then pop out the cut-out section.

Remove Screws from Dryer Door

Remove the 10 screws from the dryer door panel and set them aside for reassembly.

Remove Inner Door

Use a plastic putty knife to separate the inner door from the trim, releasing snaps on the sides and bottom.

Pull Door from Frame

With the door separated, use a putty knife on the center tab to pull the door away from the frame.

Transfer Door Strike

Pinch clips to remove the door strike from the inside, rotate, push out, then insert on the other side.

Remove Door Hinges and Trim Screws

Remove the door hinges and then remove three screws on each side to detach the outer trim pieces.

Rotate Trim Pieces

Lift the door and rotate the trim pieces to the opposite side, then reattach them with screws.

Add Hinges

Attach the hinges to the right side of the door, ensuring correct orientation for top and bottom placement.

Add Inside Panel

Slide the top of the inside door panel into the top trim, lower the door, and press corners to snap into place.

Reinstall Door Screws

Install the 6 hinge screws and the remaining 4 screws to secure the door components.

Install Hinge Covers and Plugs

Insert hinge covers sideways and rotate them 90 degrees to snap securely into place.

Hang Door

Place the set pin into the dryer cabinet hole, slide the door down, and secure with T25 screws.

Related product manuals