4
TOOLS AND PARTS
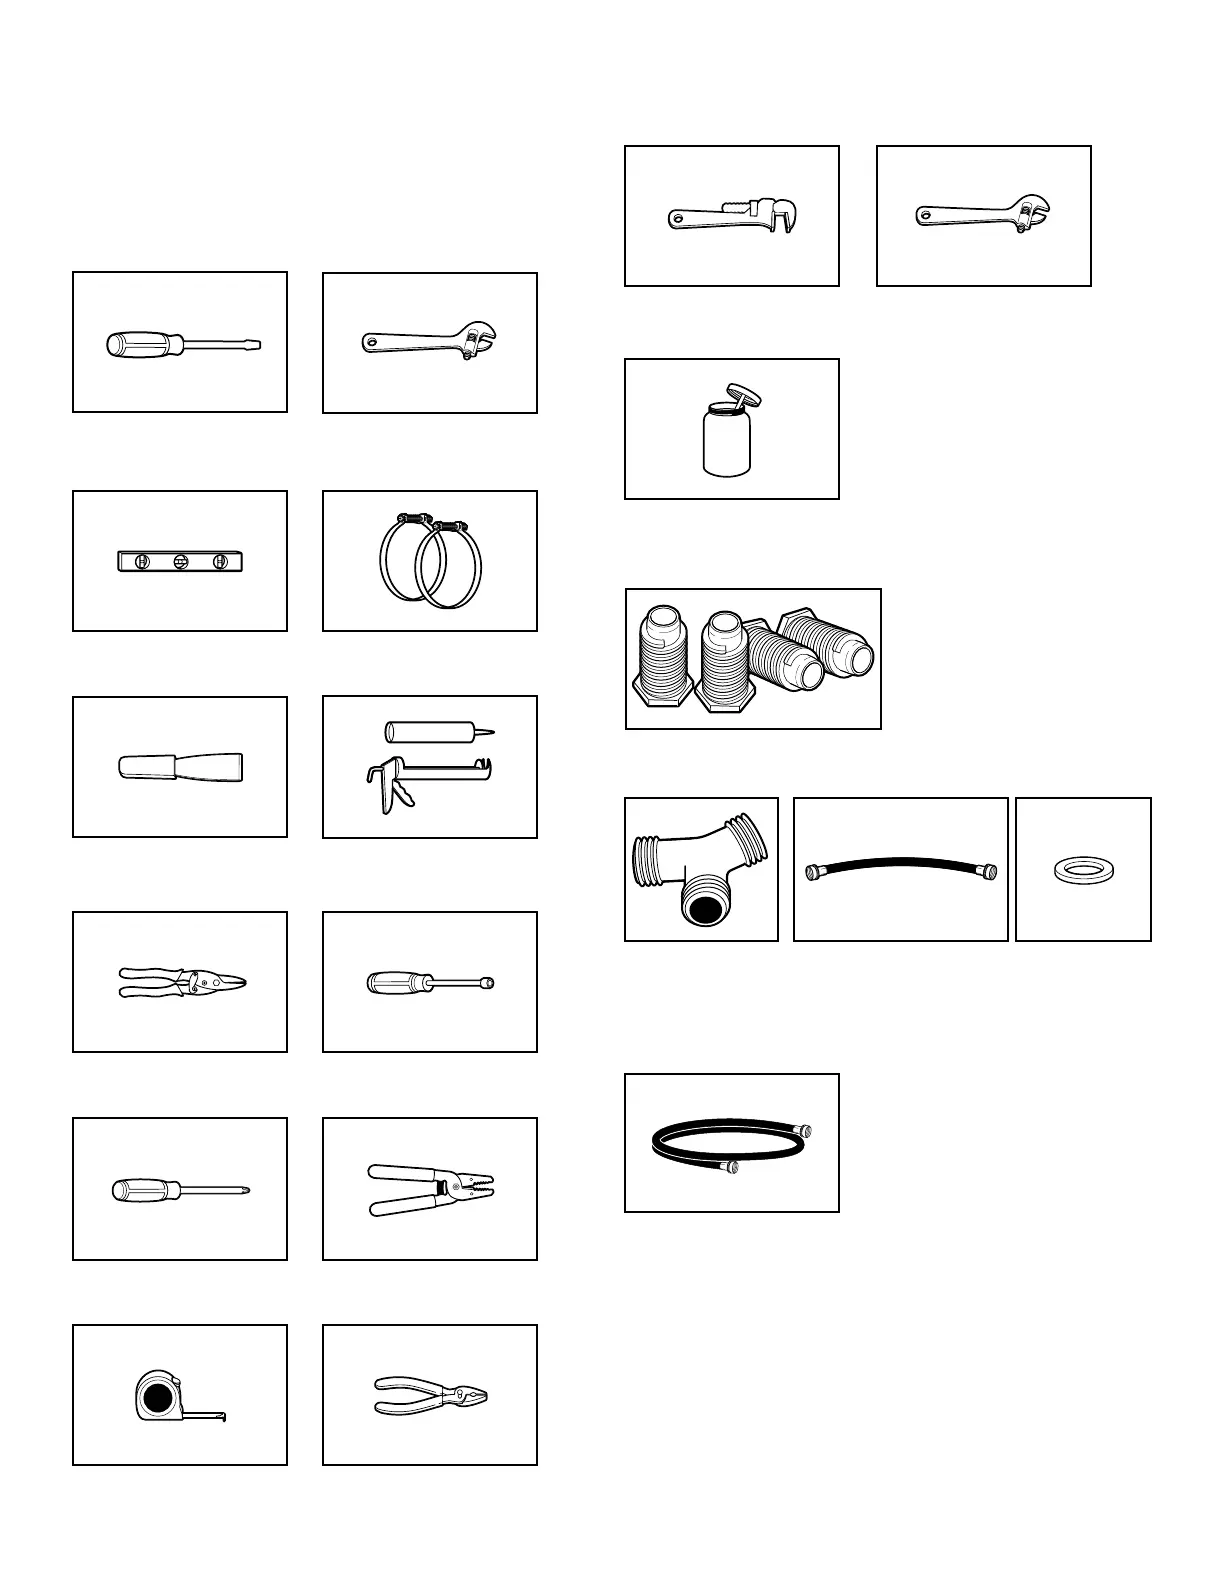
Gather the required tools and parts before starting installation.
Read and follow the instructions provided with any tools listed
here.
Tools needed for all installations:
Level
#2 Phillips screwdriver
Wire stripper (direct wire
installations)
Parts supplied (all models):
Flat-blade screwdriver
Adjustable wrench that
opens to 1" (25 mm) or
hex-head socket wrench
Tin snips (new vent
installations)
Caulking gun and compound
(for installing new exhaust vent)
Vent clamps
1/4" ( 6 mm) nut driver
(recommended)
Tools needed for gas installations:
8" (203 mm) or 10"
(254 mm) pipe wrench
8" (203 mm) or 10"
(254 mm) adjustable wrench
(for gas connections)
Pipe-joint compound
resistant to LP gas
Plastic putty knife
INSTALLATION REQUIREMENTS
Leveling legs (4)
Tape measure
Pliers
Parts supplied (steam models):
“Y” connector
Short inlet hose
5' (1.52 m) inlet hose
Rubber washer (4)
Parts needed (steam models):
Parts package is located in dryer drum. Check that all parts
are included.
If using a power supply cord:
Use a UL listed power supply cord kit marked for use with
clothes dryers. The kit should contain:
■ A UL listed 30-amp power supply cord, rated 120/240
volt minimum, with a temperature rating of 140° F (60° C)
minimum. The cord should be type SRD or SRDT and be
at least 4 ft. (1.22 m) long. The wires that connect to
the dryer must end in ring terminals or spade terminals
with upturned ends.
■ A UL listed strain relief.



 To Next Page