13
Your tool is equipped with a forward, reverse rotation
and lock control located above the on/off switch. It was
designed for changing rotation of the chuck and for
locking the on/off switch in the center position to help
prevent accidental start and accidental battery discharge.
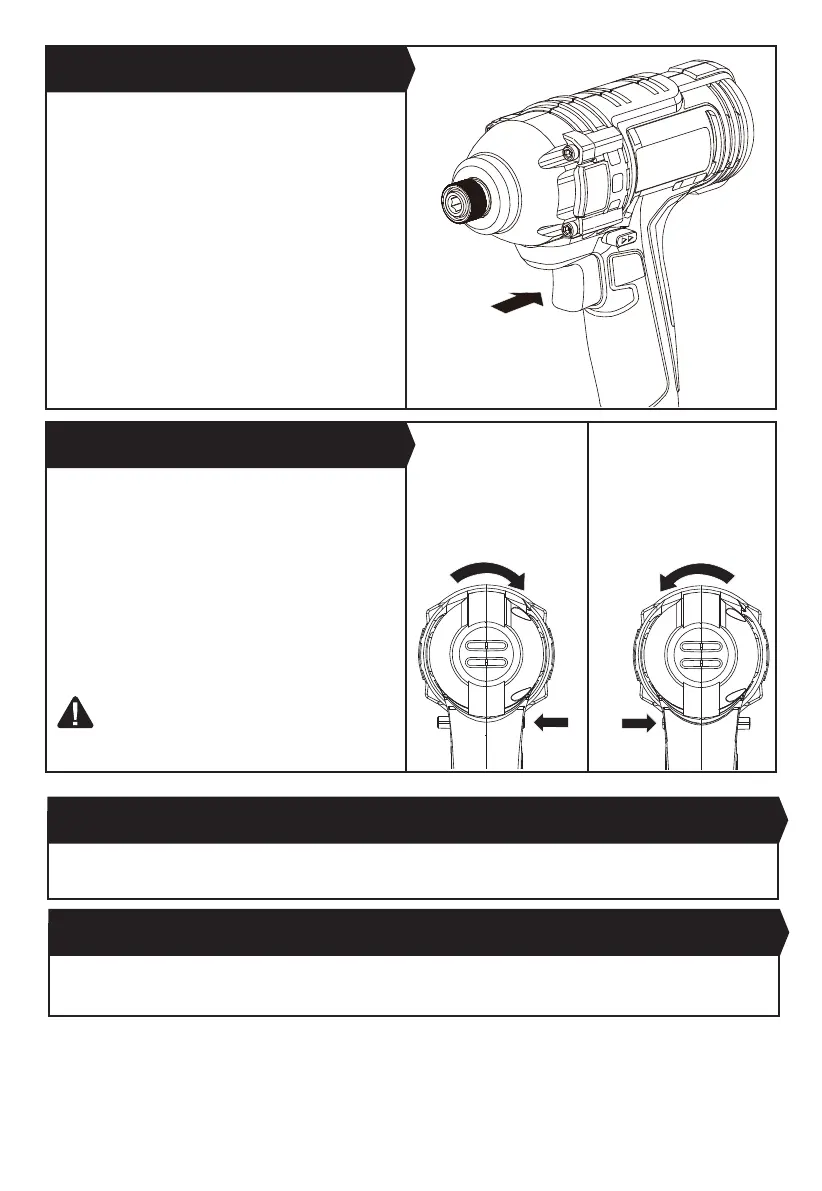
FIG.D1: For driving a bit in clockwise, push the forward/
reverse rotating control on the right hand side to the
stop.
FIG.D2:
For driving a bit in anticlockwise, push the forward/
reverse rotating control on the left hand side to the stop.
WARNING! Do not change direction of rotation
until the tool comes to a complete stop.
Shifting
during rotation of the chuck can cause damage to the tool.
Depress to start and release to stop your driver. The On/
OffSwitchisttedwithabrakefunction
which stops your chuck immediately when you quickly
release the switch.
It is also a variable speed switch that delivers higher
speed and torque with increased trigger
pressure. Speed is controlled by the amount of switch
trigger depression.
3. ON/OFF SWITCH (See Fig. C)
4. FORWARD, REVERSE ROTATION AND LOCK
CONTROL(See Fig. D1, D2)
Fig. C
Fig. D1
5. USING THE WORK LIGHT
The work light will illuminate whenever the trigger is pressed. LED lighting increases visibility, great for dark or enclosed
areas.
6. BELT CLIP
Screw the Belt Clip on the tool with the screw provided in the plastic bag. The Belt Clip can be hooked on your belt or
pocket, etc.
Fig. D2