31
5 32 14
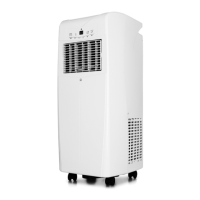
OPERATION
Window foam tting
If necessary, cut the foam to the height or width of the window.
• Pass the adapter (11) through the opening in the foam (16)
and put the exhaust hose (12) into the hose adapter (11) (g. 1).
• Place the foam with the hole (16) – if needed together with the foam extension (15) – in the window
and close this as far as possible to refrain the warm air from re-entering the room.
Depending on how the window opens, vertically (g. 2a) or horizontally (g. 2b).
• Connect the exhaust hose to the air conditioner (g. 3a).
Permanent wall tting
Make sure that no pipes or wires run through the chosen spot.
• Drill a hole to t the outer diameter of the adapter (11).
• Connect the exhaust hose (12) to the air conditioner (g. 3a).
• Connect the exhaust hose to the adapter (g. 3b).
• Place the adapter with hose in the hole (g. 4) and x with plugs and screws.
Use the cap (10) to close the hole when the air conditioner is not placed (g. 5).
Important
The exible exhaust hose can be extended from 300 to 1500 mm for mounting. This length has been
designed especially according to the specications of the air conditioner. Do not use an extension or
exchange for a different hose as that may lead to malfunctioning.
The exhaust air must ow freely, any blockage can lead to overheating of the air conditioner. Take care to
prevent any kink or bend in the exhaust hose.
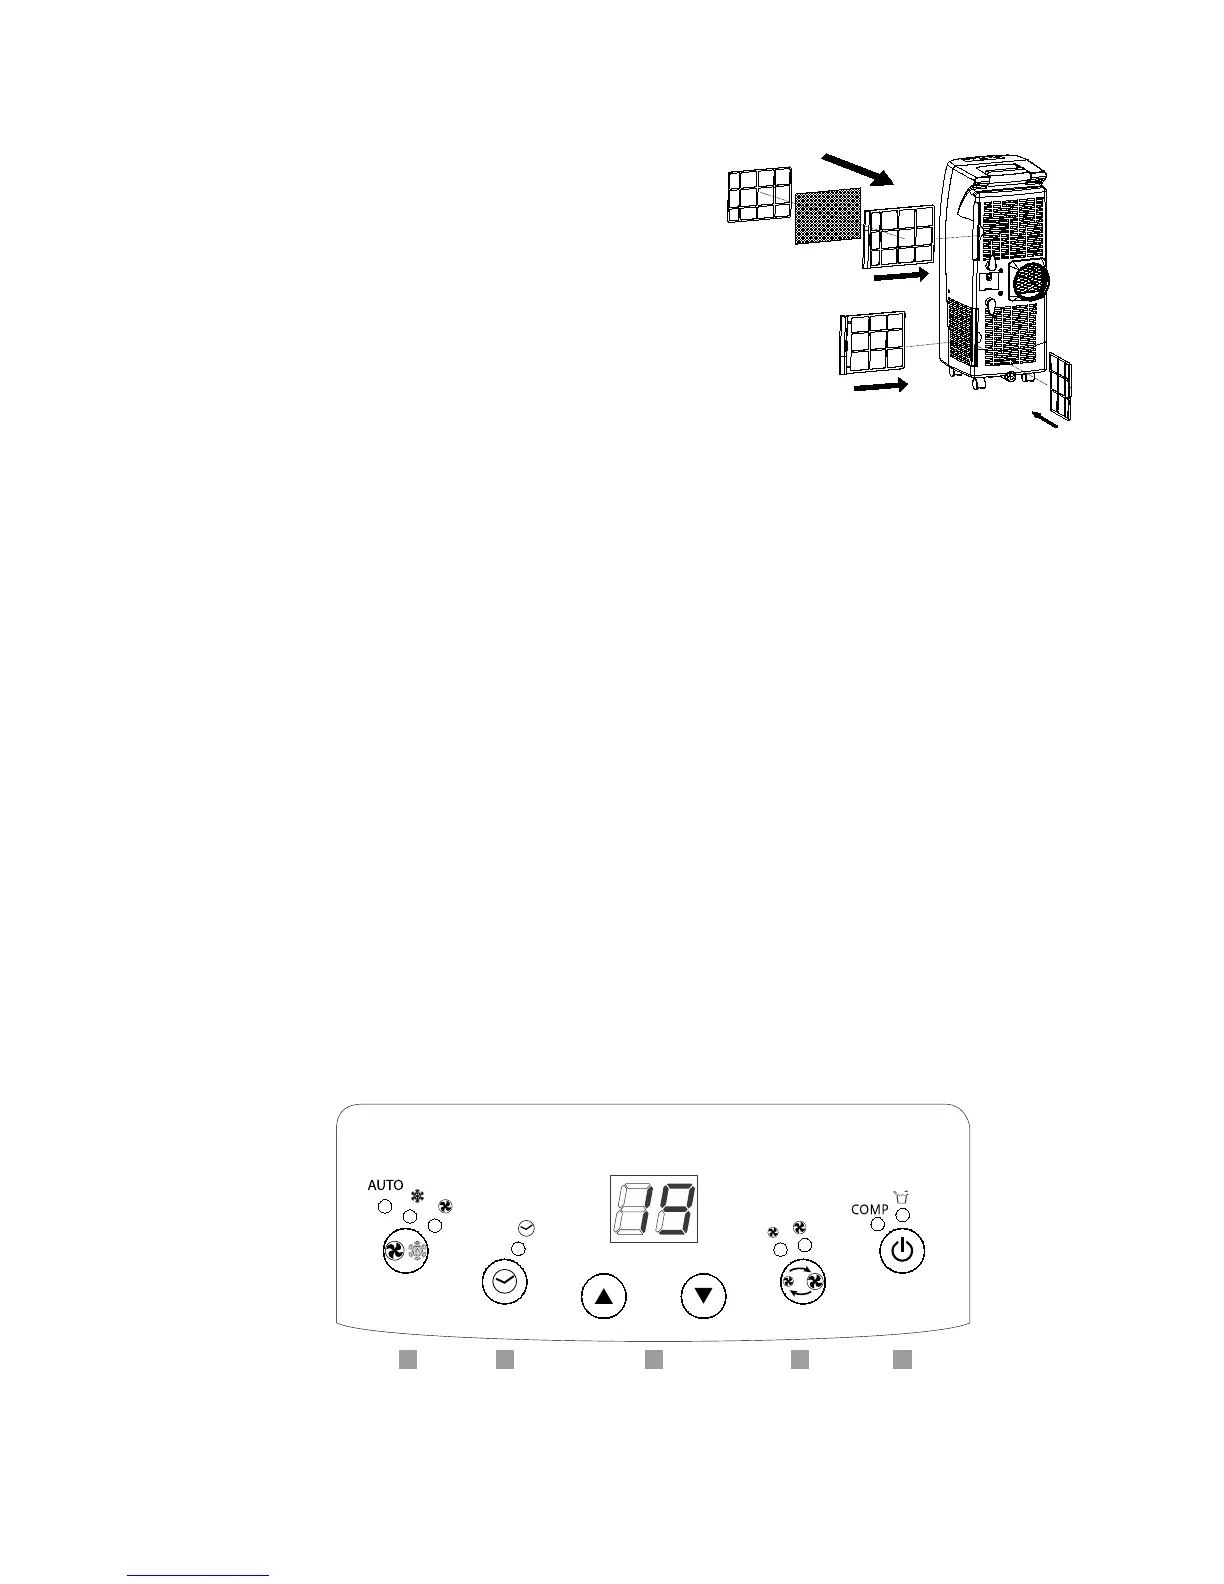
It is recommended to replace an active carbon lter every 3 to
6 months.
• Remove the lter frames from the unit by pulling them out.
• Separate the xer from the lter frame.
• Remove the active carbon lter from its plastic bag.
• Insert the active carbon lter into the lter frame.
• Fix the lter by reassembling the xer onto the lter frame.
• Re-t the lter frames inside the unit.
INSTALLATION OF CARBON FILTER(S)