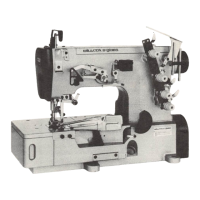
This document provides instructions for the Willcox & Gibbs W562-W542 Flatbed Interlock Stitch Machines, a series of industrial sewing machines designed for interlock stitching. The manual covers operation, maintenance, and various adjustments to ensure optimal performance.
Function Description
The W562-W542 machines are flatbed interlock stitch machines primarily used for producing interlock stitches. The manual details how to set up, operate, and maintain these machines for various sewing conditions, including different fabric types, stitch lengths, and thread tensions. Specific models within the series may also be equipped with additional features such as an under fabric trimmer (FT140), a metering device (MD230), and a lace guide (LG210), expanding their functionality for specialized applications like sewing elastic or lace.
Important Technical Specifications
Machine Speed:
The maximum speed varies by machine type and needle configuration.
- W562-01, W562-02, W562-03, W562-06:
- 2-needle: 6,000 s.p.m.
- 3-needle: 6,500 s.p.m.
- W542-01, W542-02, W542-03, W542-06:
- 2-needle: 7,000 s.p.m.
- 3-needle: 6,000 s.p.m.
- W562-05, W542-05:
- 2-needle: 5,500 s.p.m.
- 3-needle: 5,500 s.p.m.
- W562-07, W542-07:
- 2-needle: 5,000 s.p.m.
- 3-needle: 5,000 s.p.m.
- W562-21: 5,000 s.p.m.
- Note: If equipped with a metering device, the maximum speed is 5,000 s.p.m.
Motor and Belt:
- Motor: Clutch motor, 3 phase, 2 pole, 400 watts.
- Belt: V belt, Type M.
- Motor Pulley Outer Diameter (mm) (for 60 Hz / 50 Hz):
- 6,500 s.p.m.: 110 / 135
- 6,000 s.p.m.: 105 / 125
- 5,500 s.p.m.: 95 / 115
- 5,000 s.p.m.: 85 / 105
- 4,500 s.p.m.: 80 / 95
- 4,000 s.p.m.: 70 / 85
Needles:
- Standard Needle System: Schmetz UY128GAS or Organ UY128GAS.
- Needle Size:
- 2-needle: Schmetz #70, Organ #10
- 3-needle: Schmetz #75, Organ #11
- Note: Needle size varies depending on the number of needles in the machine.
Stitch Length Adjustment:
- Adjustable via a handwheel and push button.
- The figures on the handwheel indicate approximate stitch length.
Differential Feed Ratio:
- Standard range: 1:0.7 to 1:1.3.
- For W562-05-W542-05 models, the diff. feed ratio is 1:0.7 to 1:1.
- Special setting (for W562-01, -02, -03, -06, -07 and W542-01, -02, -03, -06, -07 subclasses): 1:0.7 to 1:2. When using this special feed ratio, the stitch length should be 3.2mm or shorter.
Needle and Looper Settings:
- Looper Point behind Left Needle Centerline: 1.2-1.5mm above the top of the left needle eye.
- Clearance from Needle: 0.1-0.2mm.
- Distance between Looper Eye Center and Left Needle Centerline (when left needle point is flush with top of looper blade): 5.0-6.0mm.
- Looper Thread Takeup:
- 2-needle machines: Looper thread released at 2/3 down the looper.
- 3-needle machines: Looper thread released level with the looper's lower edge.
- Looper Thread Guard Distance from Bracket:
- 2-needle machines: 5.0-6.0mm.
- 3-needle machines: 6.0-7.0mm.
- Needle Height (distance from left needle point to needle plate surface when needle bar is highest):
- 2.4mm space: 10.2-10.7mm
- 3.2mm space: 9.8-10.3mm
- 4.0mm space: 9.3-9.8mm
- 4.8mm space: 8.9-9.4mm
- 5.6mm space: 8.5-9.0mm
- 6.4mm space: 8.1-8.6mm
- Distance between Needle and Looper (a) (from right needle centerline to looper point when looper is at right dead point):
- 2.4mm space: 4.6-4.9mm
- 3.2mm space: 4.2-4.5mm
- 4.0mm space: 3.8-4.1mm
- 4.8mm space: 3.4-3.7mm
- 5.6mm space: 3.0-3.3mm
- 6.4mm space: 2.6-2.9mm
- Clearance between Left Needle and Looper Point: 0.1-0.2mm (when looper point is behind left needle centerline).
- Clearance between Middle Needle and Looper Point (for 3-needle machines): 0-0.5mm (when looper point is behind middle needle centerline).
- Needle Guard Clearance (right/middle needle to looper point): 0-0.05mm.
- Feed Height (main feed dog in highest position): 0.8-1.0mm.
Presser Foot Lift:
- 2-needle machines: 6.0-7.0mm (depending on model).
- 3-needle machines: 5.0-7.0mm (depending on model).
Metering Device (MD230) Elastic Feeding Rate:
- Standard setting: 0.9-2.2mm per stitch.
- Special setting: 1.4-3.5mm per stitch.
Usage Features
- Threading: Detailed instructions are provided for correct threading to prevent thread breakage, skip stitches, or uneven stitch formation. Specific threading paths are shown for stretchy threads, fine stitch length/narrow seam width, and coarse stitch length/wide seam width.
- Thread Tension Regulation: Individual thread tension can be adjusted by turning nuts clockwise (increase) or counter-clockwise (decrease) to accommodate changes in threads, seam width, and stitch length.
- Needle Thread Takeup Adjustment: Ensures the top edge of the bracket is horizontal when the needle bar is in its lowest position, with a specified distance (87mm) between lines (a) and (b) of the bracket and needle thread takeup.
- Spreader Thread Takeup Adjustment: Ensures the eye of the thread guide meets the corner of the spreader thread takeup when in its highest position.
- Needle Thread Guard Adjustment: Positions the guard at the center of its elongated hole, ensuring smooth thread passage.
- Thread Guide Adjustment: Positions the thread guide according to the type of thread used, with standard positions specified in a table.
- Needle Guard (Front) Adjustment: Positions the guard as close as possible to the needle, allowing only one piece of thread to pass smoothly through the gap.
- Presser Foot Pressure Adjustment: Allows for light pressure while ensuring proper fabric feeding and stitch formation.
- Differential Feed Ratio Adjustment: Enables stretching or gathering fabric by moving a lever up or down.
- Under Fabric Trimmer (FT140): A continuous type trimmer synchronized with the feed dog motion, trimming excess fabric before sewing. Includes adjustments for fabric guide and presser foot tilt.
- Metering Device (MD230): Feeds elastic or lace (width up to 40mm) accurately, with a feeding range of 0.9-3.5mm per stitch. Includes settings for lace guides and elastic feeding rate.
- Lace Guide (LG210): Helps control the flow of lace, with options to pass it through many or fewer guide pins depending on flow regularity.
- Tape Binder Setting: Instructions for attaching and setting the tape binder for specific machine models.
Maintenance Features
- Daily Maintenance (Before Morning Start):
- Check needles for damage or bends, and ensure correct setting.
- Verify correct threading.
- Ensure about 30mm of thread chain remains behind the presser foot.
- Check oil jets in the oil sight window and oil level.
- Lubricate hand-oiled parts.
- Daily Maintenance (After Close of Work):
- Remove dust and lint deposits.
- Report any trouble or disorder to a mechanic.
- Place a dust cover over the machine.
- Lubrication:
- Use Mobil Velocite oil No. 10 (ISO VG22) or equivalent.
- Fill oil until the upper line 'H' of the oil level sight window is reached.
- Maintain oil level between 'H' and 'L' lines.
- Manually lubricate the needle bar if the machine is idle for more than a couple of weeks.
- Check oil circulation by observing splashing in the window.
- Drain oil by removing a screw.
- Oil Change:
- Change oil after the first month of operation.
- Subsequently, change oil every 6 months.
- Note: Dirty oil can cause excess wear and shorten machine life.
- Oil Filter:
- Check and clean the oil filter every 6 months during oil change.
- Replace if necessary, especially if oil jet is restricted, weak, or contains bubbles.
- Silicone Oil for H.R. Device:
- Keep reservoirs filled with factory-supplied silicone oil or equivalent.
- Warning: Never use this oil to lubricate any other machine parts.
- Replacing Needles: Loosen a screw, insert a new needle with the long groove facing you, and tighten the screw.
- Replacing Upper and Lower Knives (for FT140): Detailed steps for replacing knives, ensuring proper overlap (0.5mm) and cutting sharpness.
- Replacing Timing Belt: Instructions for replacing the timing belt, ensuring the correct type (B, C, or D) is used and proper synchronization between the needle bar and looper. Includes steps for aligning marks on the belt gear and bearing.