Maintenance and repair en
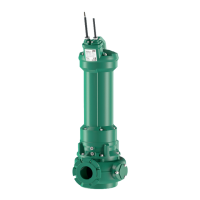
Installation and operating instructions Wilo Motor T 12 ... 72 + EMU FA, Rexa SUPRA, Rexa SOLID 47
9.6.6 Drain the leakage chamber
Motors T 20.1
Fig.17: Drain the leakage chamber: T 20.1
- Drain off the leakage
‡ Protective equipment has been put on!
‡ Pump has been dismantled and cleaned (decontaminated if required).
1. Place the pump upright on a firm surface.WARNING!Risk of hands being crushed.
Ensure that the pump cannot fall over or slip away!
2. Place a suitable tank to collect the operating fluid.
3. Unscrew the screw plug slowly (-) but do not unscrew it completely. WARN-
ING!Overpressure in the motor! Stop turning the screw plug further if hissing
or whistling is audible! Wait until the pressure has completely dissipated.
4. After the pressure has dissipated, fully unscrew the screw plug (-) and drain the
operating fluid.
5. Clean the screw plug (-), replace the seal ring and screw it back in. Max. tightening
torque: 8Nm (5.9ft·lb)!
Motors T 50.1, T57, T63.1
Fig.18: Drain the leakage chamber: T 50.1,
T57, T63.1
E Venting
- Drain off the leakage
‡ Protective equipment has been put on!
‡ Pump has been dismantled and cleaned (decontaminated if required).
1. Place the pump upright on a firm surface.WARNING!Risk of hands being crushed.
Ensure that the pump cannot fall over or slip away!
2. Place a suitable tank to collect the operating fluid.
3. Unscrew the screw plug (E) slowly, but do not unscrew it completely. WARN-
ING!Overpressure in the motor! Stop turning the screw plug further if hissing
or whistling is audible! Wait until the pressure has completely dissipated.
4. After the pressure has dissipated, fully unscrew the screw plug (E).
5. Unscrew screw plug (-) and drain the operating fluid.
6. Clean screw plug (E) and (-), replace the seal ring and screw it back in. Max. tight-
ening torque: 8Nm (5.9ft·lb)!
 Loading...