Step 4
Thread the tonearm lead through the hole
in the arm hub. This can only be achieved by
threadingoneplugatame.
Be very careful not to damage the arm hub with
the phono plugs on the end of the lead.
Step 5
Insert the tonearm into the arm hub. Take note
of the groove around the barrel of the stem. For
the correct height, this groove should be just
about visible when viewed from the side, in the
plane of the surface of the arm hub. The arm
clampingscrewcannowbeghtenedusingthe
supplied 2.0mm allen wrench inserted through
the access hole to the rear of the arm hub.
Ifyouarengthetonearmtoanother
turntable then the supplied arm collar will need
tobeedtothearmhuboftheturntable
using the alignment gauge and geometry
supplied with this manual.
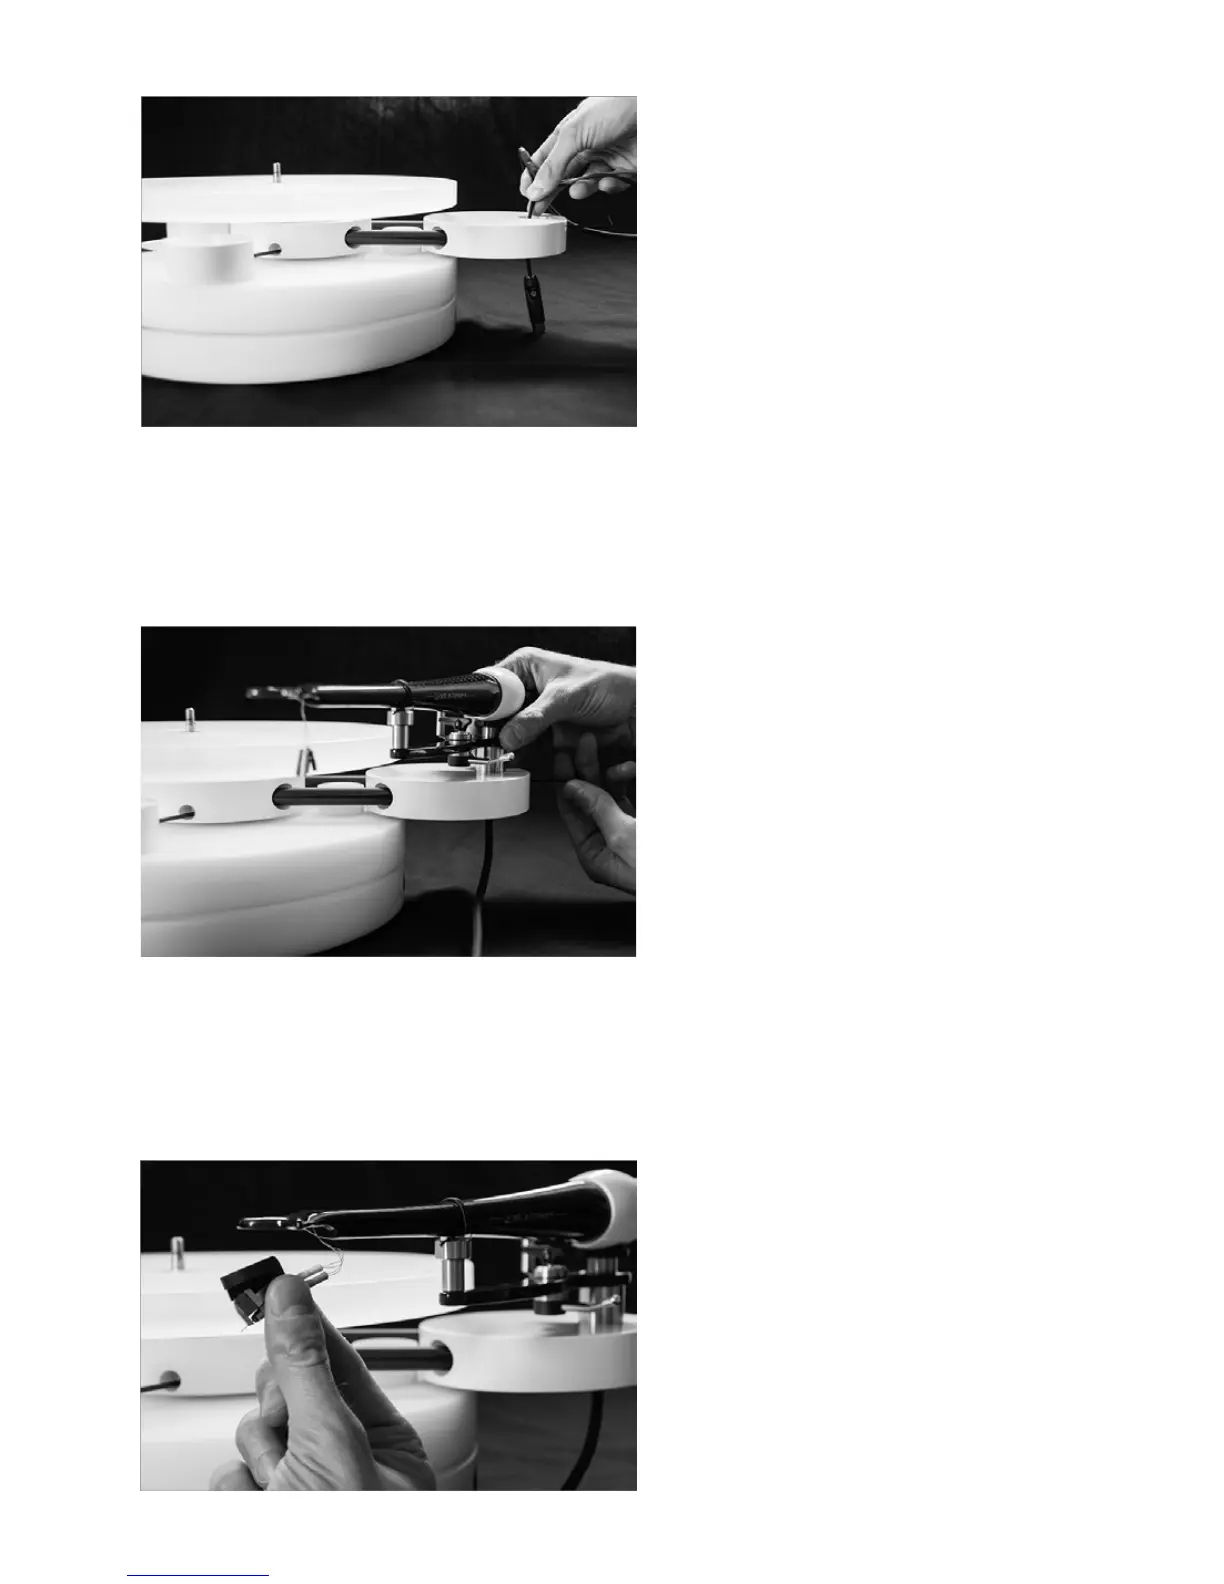
Step 6
Carefully remove the cartridge from it’s
packaging.Youarenowreadytoaachittothe
tonearm. Ensure the tonearm is secured using
the clip.
Holdingthecartridgebyitsbody,oerit
up to the four coloured plugs at the end of
thetonearm.Simplysloteachplugtoit’s
corresponding coloured pin. The pins are
usuallyaghtt,sogreatcaremustbetaken
not to damage delicate pins or the wire. A slip
at this stage could easily damage the cartridge.
 Loading...