Do you have a question about the Wincor Nixdorf ND77 and is the answer not in the manual?
Device compliance with EEC directives for electromagnetic compatibility and low voltage.
Equipment tested for Class A digital device FCC rules, protecting against harmful radio frequency interference.
Key operational and safety advice for using the ND77 printer, including handling condensation and cable placement.
Guidance on how to use the manual to ensure the ND77 printer operates correctly.
Instructions for cleaning the ND77 printer using commercially available cleaners, avoiding acidic solvents.
Information on the ND77 printer's environmentally friendly manufacturing and recycling process.
Details exclusions from the warranty, including improper maintenance, use, or modifications.
Steps for unpacking, checking, and setting up the ND77 printer in its operating environment.
Procedure to unpack the printer and verify its contents against the packing list for any damage or discrepancies.
Guidelines for placing the printer on a level area, away from extreme environmental conditions.
Instructions for connecting the data communication and power supply cables to the ND77 printer.
Information about changing printer settings using DIP switches, referring to a later section for details.
Overview of the available interfaces on the ND77 printer, including connectors for cash drawer and customer display.
Methods for securing data communication interface connectors, distinguishing between metal and plastic screws.
Details on connecting the ND77 printer to the power supply, either via the printer housing or an external unit.
Procedure for safely disconnecting cables, emphasizing holding the plug body and switching off power.
Information on connecting the ND77 printer to a POS system using the V.24 serial interface.
Instructions for connecting external devices like cash drawers and customer displays to the ND77 printer.
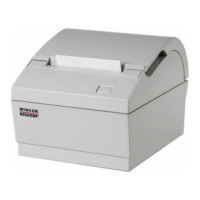
Description of the printer's control panel, including power switch, LEDs, and feed buttons.
How to use the power switch and receipt feed button for printer operation and paper feeding.
Instructions for using the journal feed button to advance journal paper one line or continuously.
Explanation of the different LEDs (POWER, ERROR, DOCUMENT, PAPER END) and their indicators.
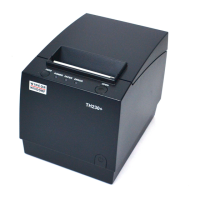
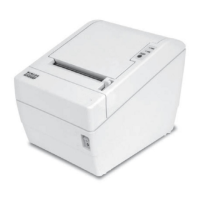
Overview of ND77 printer capabilities including printing stations, firmware updates, logo, and stamp printing.
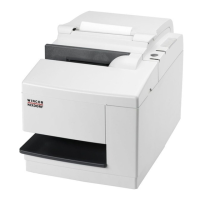
Instructions for inserting and processing documents up to DIN A5 size, including alignment and perforation guidelines.
Detailed guide on how to replace receipt paper rolls when they run out.
Steps for removing the old receipt roll and inserting a new one, ensuring correct paper path.
Procedure for replacing the journal paper roll, including removal and insertion steps.
Step-by-step instructions for removing the old ribbon cassette and installing a new one.
Detailed explanation of the two banks of DIP switches and their functions for configuring printer settings.
How to start and interpret the printer's self-test routine to verify functionality.
Instructions for safely removing and replacing the printer's print head, including cooling precautions.
Guide on how to adjust the paper end detectors to change the remaining paper amount before stopping print.
Explanation of available printing options: software stamp, logo printing, and graphics printing.
Key specifications of the ND77 printer including footprint, weight, power, print method, and interfaces.
Diagram showing the physical dimensions of the ND77 printer when its covers are open.
Details on receipt, journal, and document paper types, including roll diameter, width, weight, and thickness.
Illustrations showing the print area layout for different paper roll widths (69.5 mm and 57.5 mm).
Information on cash drawer connector pin usage and serial interface connections for customer display and system.
Details on connecting the ND77 to a PC or BEETLE system via serial interface, including cable specifications.
Illustration showing the pin assignment of the power supply cable between the ND77 and the BEETLE system.
Explanation of recoverable and unrecoverable errors indicated by blinking red LED 'ERROR' codes.
List of ESC/POS control sequences supported by the ND77 printer for various functions.
Instructions for inserting a spacer to accommodate paper rolls with a smaller width (57.5 mm).
| Printing Method | Direct thermal |
|---|---|
| Power Supply | 24 V DC |
| Type | Thermal Printer |
| Resolution | 203 dpi |
| Print Width | 72 mm |
| Paper Width | 80 mm |
| Interfaces | USB, Serial (RS-232), Ethernet |