EasyManua.ls Logo

Wincor Nixdorf TH320 - User Manual

Wincor Nixdorf TH320
55 pages
Print Icon
To Next Page IconTo Next Page
Loading...
TH320
Thermal Printer
Users Gui de
Edi ti on May 2010

Table of Contents

Other manuals for Wincor Nixdorf TH320

Questions and Answers

  • W
    whiteamberAug 19, 2025
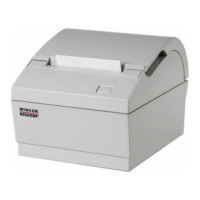
    What to do if the on-line, paper status, error light is blinking and the Wincor Nixdorf Printer won’t print?
    • R
      Robert HughesAug 19, 2025
      If the on-line, paper status, error light is blinking and the Wincor Nixdorf printer won’t print, it could be due to several reasons. First, ensure the receipt paper is properly loaded and all covers are closed. If the problem continues, contact a service representative.
  • T
    Teresa WalkerAug 21, 2025
    What to do if the on-line, paper status, error light is blinking and the Wincor Nixdorf TH320 Printer won’t print because of temperature issues?
    • J
      joseph20Aug 22, 2025
      If the on-line, paper status, error light is blinking and the Wincor Nixdorf Printer won’t print due to temperature issues, the thermal print head temperature may be out of range, or the AC supply voltage may be out of range. If the print head is too hot, adjust the room temperature or move the printer to a cooler location. If overheating is due to printing high-density graphics continuously, reduce the demand on the printer. If paper is not low and no conditions indicate that the thermal print head is too hot, the power supply voltage is out of range. In that case, contact a service representative.
  • D
    Dennis BurkeAug 25, 2025
    What to do if my Wincor Nixdorf Printer has power but doesn't print?
    • C
      Crystal RobinsonAug 25, 2025
      If your Wincor Nixdorf Printer has power but isn't printing, first check all cable connections to ensure they are properly connected. Make sure both the host computer and the power supply are turned on. Also, verify the DIP switch setting; DIP switch one should be off (up) for normal operation. If problems continue, contact a service representative.
  • J
    James GrahamAug 26, 2025
    How to fix Wincor Nixdorf Printer when receipt is not cut?
    • T
      Tyler TorresAug 26, 2025
      If the receipt is not being cut by your Wincor Nixdorf Printer, open the receipt cover and inspect the knife for any jammed paper. Clear any jammed paper that you find. If the problem persists, contact a service representative.
  • R
    Richard AveryAug 28, 2025
    Why is the print light or spotty on my Wincor Nixdorf TH320 Printer?
    • J
      John SnyderAug 28, 2025
      If the print on your Wincor Nixdorf Printer is light or spotty, it could be due to a few reasons. First, check that the paper is loaded properly and that you are using recommended thermal receipt paper. You can also try cleaning the thermal printhead with an alcohol pen. Avoid using household cleaners as they can damage the printhead and electronics.
  • A
    Amanda ObrienAug 30, 2025
    What to do if Wincor Nixdorf TH320 Printer starts to print, but stops while the receipt is being printed?
    • W
      Wayne GarciaAug 30, 2025
      If your Wincor Nixdorf Printer starts printing a receipt but then stops, it's likely due to a paper jam. Open the receipt cover, inspect the knife, and clear any jammed paper.
  • A
    alexanderjustinSep 1, 2025
    Why are the forms printing light or spotty on my Wincor Nixdorf TH320?
    • C
      Christian MendezSep 1, 2025
      If forms are printing light or spotty on your Wincor Nixdorf Printer, the form may not be inserted correctly. In this case, check 'Printing on forms or checks'. Other possible causes are a dirty or defective impact print head or improper platen gap. In these cases, contact a service representative. Another potential cause is a defective ribbon cassette. If so, see 'Installing or replacing the ribbon cassette'.
  • R
    ramirezdaisySep 3, 2025
    What to do if the receipt does not come out all the way from Wincor Nixdorf TH320 Printer?
    • S
      Samantha MillerSep 4, 2025
      If the receipt does not come out all the way from your Wincor Nixdorf Printer, it is likely due to a paper jam. Open the receipt cover, inspect the knife, and clear any jammed paper.
  • P
    Pamela AllenSep 5, 2025
    Why does my Wincor Nixdorf TH320 start to print, but stop while a form is being printed?
    • M
      Matthew AlvarezSep 5, 2025
      If your Wincor Nixdorf Printer starts to print but stops while a form is being printed, it could be due to a communication or software error. Check the interface cable and ensure the software is working properly.
  • K
    Kelly BaileySep 7, 2025
    Why do forms or checks skew or catch in the slip station of my Wincor Nixdorf TH320 Printer?
    • R
      Randall WilsonSep 8, 2025
      If forms or checks skew or catch in the slip station of your Wincor Nixdorf Printer, there may be an obstruction or paper jam in the slip station. Open the front cover and check for paper jams or other obstructions. Clear any jammed paper or obstructions.

Summary

Manufacturers Declaration and Approval

General Authorization

Device complies with EU directives for electromagnetic compatibility and low voltage.

FCC-Class A Declaration

Equipment tested to FCC Class A limits for commercial environments, potential for residential interference.

User Information and Responsibility

Company not responsible for interference from unauthorized modifications.

Safety Information

General Safety Precautions

Device conforms to safety regulations; connect only approved power supplies.

Environmental and Handling Precautions

Avoid condensation, protect from damage during transport, keep dry and clean.

Instructions for Maintenance

Cleaning Procedure

Clean TH320 regularly with appropriate product, ensure device is off and unplugged.

Warranty Information

Warranty Coverage

12 months from delivery, covers damages despite normal use.

Warranty Exclusions

Improper maintenance, use, modifications, or location are not covered.

Recycling and Disposal

Environmental Design Principles

Product designed to internal norm 'Environmental conscious product design and development'.

Radio Frequency Interference Statement

VCCI Class B Compliance

Class B product based on VCCI standard; radio disturbance may arise in domestic environment.

About This Guide

Guide Content Overview

Four chapters cover printer setup, operation, testing, and servicing.

About the Printer

Printer Features and Capabilities

Low-cost, high-efficiency POS printer with smallest footprint, two-color thermal & impact slip printing.

Thermal vs. Impact Printing

Features two-color thermal printer for receipts and impact slip printer for forms/checks.

Printer Connectivity and Interface

Connects via RS-232C, USB, or PoweredUSB; supports standard command set for communication.

Ease of Use and Functionality

Easy-to-use thermal printer requires no ribbon; impact printer handles multi-part forms up to four plies.

Setting up the Printer

Getting Started

Read and understand sections before setup; follow presented sequence.

Choose a location

Place on level surface near host computer; avoid dusty or liquid-prone environments.

Unpack the Printer

Remove printer from packaging, ensure sufficient space for cables and covers.

Keep the Packaging

Save packing materials for protection and potential future use.

Check Packing List

Verify all included items against the list before installation.

Remove Internal Restraints

Remove internal packing restraints after placing printer in user position.

Installing New Receipt Paper

Paper Replacement Procedure

Replace paper when error light blinks; open cover, remove old roll, place new roll correctly.

Installing or Replacing Ribbon Cassette

Identifying Need for Replacement

Change ribbon if printing is light or inconsistent.

Replacing a Used Ribbon Cassette

Open front cover, pinch tabs, pull old cassette upward.

Installing a New Ribbon Cassette

Ribbon Cassette Installation

Open front cover, unwrap, tighten ribbon, position and snap cassette into place.

Connect the Cables

Cable Connection Points

Connections made at the back; caution with USB cable placement.

Cash Drawer Cables

Connect cash drawer cable to printer's cash drawer connector.

Communication Cables

Connect printer to host computer via RS-232C; turn off computer before connecting.

USB Communication Cable Installation

Plug printer end of USB cable into printer's USB port, then computer end into computer.

Powered USB Cable Installation

Connect Powered USB cable to the printer's Powered USB connector.

Power Supply Cable

Connecting the Power Supply

Connect power supply cable last; use shielded cables for warranty compliance.

Cable Routing

Cable Management and Strain Relief

Route cables to prevent accidental unplugging using strain reliefs.

Testing the Printer

Test Purpose and Benefit

Prints printer settings and cuts paper; useful for diagnostics and service representatives.

Test Procedure

Open receipt cover, hold paper feed button, close cover, release button to start printout.

Test Printout Details

Diagnostic Form Content

Displays model, firmware, hardware parameters, communication settings, and user tallies.

Printer Configurations

Paper Type Settings

Paper types and grades can be changed in configuration menu (e.g., Monochrome, Two-color).

Configuration Menu Overview

Settings pre-set at factory; accessible via receipt and scrolling instructions.

Configurable Parameters

Includes Communication Interface, Diagnostic Modes, Emulation/Software Options, Hardware Options, Paper Type.

Configuring the Printer

Entering Configuration Mode

Check paper, turn printer, set DIP switch 1 ON, press reset while holding paper feed button.

Navigating Configuration Menu

Follow printed instructions, use paper feed button for selections (short click for No, long click for Yes).

Saving Configuration Changes

Select 'Yes' to save, return DIP switch 1 OFF, press reset to apply settings.

Communication Interface Settings

Select 'Set Communication Interface' to change interface type (RS-232C, USB, Powered USB).

RS-232 C Serial Interface Settings

Adjust Baud rate, Parity, Flow control; data bits and stop bits are fixed.

Diagnostic Modes

Available Diagnostic Modes

Includes Normal, Datascope (hexadecimal output), Receipt test, Slip test, MICR test.

Enabling Data Scope Mode

Select 'Diagnostic Modes' and enable Data scope mode (prints hexadecimal dump of data).

Running Data Scope Mode

Exit config menu, run transaction; commands/data printed as hexadecimal characters.

Receipt Test Mode

Enabling Receipt Test Mode

Select 'Diagnostic Modes', enable Receipt test; push feed button to print two code pages.

Slip Test Mode

Running Slip Test Mode

Enable Slip test, exit config, insert slip, push feed button to print two code pages.

MICR Test Mode

Running MICR Test Mode

Enable MICR test, exit config, insert check; printer reads and prints characters.

Printer Emulations and Software Options

Printer Emulation Types

Select Native mode or A756 Emulation; determines available commands.

Printer ID Modes

Configure printer to send back specific ID (TH320, TH420, A758, A756).

Slip Options

Slip Eject at Receipt Select

When enabled, ejects slip when receipt is selected.

Setting Up the Printer

Printhead Setting

Set printhead energy rating to match mechanism; do not change unless replaced.

Color Density Adjustment

Adjust printhead energy for color printing or paper variations; use minimum necessary level.

Print Density (Monochrome)

Adjust energy for monochrome darkening or paper variations; slows down for high-density graphics.

Power Supply Wattage Options

Choose 48W, 55W, or 75W supply to match printer wattage.

Alternate Reset Feature

Allows reset by opening/closing front cover instead of dip switch or reset button.

Paper Low Sensor

User can enable or disable the paper low sensor functionality.

MICR Options

User can enable or disable MICR check reading.

MICR Dual Pass Option

Allows second MICR reading attempt if first is unsuccessful.

Using the Printer

Printing on Forms or Checks

Insert checks or forms for transactions like credit, returns, EFTs, or printing check details.

Front Insertion Method

Insert form from front, slide to right, until slip-in light turns on.

Dropin Method

Insert form from top/side, slide to right, until slip-in light turns on.

Proper Insertion of Multi-part forms

Insert multi-part forms glued-edge-first to prevent jams.

Verifying and Validating Checks (Optional)

Check Orientation and Preparation

Ensure checks are free of folds/wrinkles; insert face down with bottom edge to right.

Front Insertion Verification

Slide check forward until green slip-in light illuminates.

Completing MICR Process

Follow host instructions; check is fed, read, and backed out for endorsement.

Tips for Avoiding Problems

Prevent Printhead Overheating

Apply duty cycle restrictions; reduce coverage, printing time, or ambient temperature.

Allowable Duty Cycle Chart

Table shows duty cycle limits based on solid coverage percentage and ambient temperature.

Avoid Harsh Environments

Protect printer from airborne contaminants; consider harsh environments kit and regular cleaning.

Troubleshooting

Status Indicators Overview

On-line, paper status, error light indicates printer status; slip-in light indicates form insertion.

Typical Remedy Procedure

Cycle power, check lights, run test prints, identify problem printer (receipt or slip).

Printer Beeps

Single, double, triple beeps at power-on indicate electronics problem; beeps during operation depend on software.

Printer Will Not Print

Check paper, covers, knife, voltage, or print head temp; contact service if problem persists.

Power Issues

No power: check supply; power on but no print: check cables, DIP switches, or other causes.

On-line, Paper Status, Error Light Flashes

Indicates paper out, cover open, knife/carriage jam, or low paper.

Slip-in Light Not Operating

Ensure form/check is inserted properly; check orientation and alignment.

Check Print Quality Poor

Poor print quality may indicate communication error, software error, or form insertion issues.

Receipt Print Quality Poor

Poor receipt quality can be due to paper low, paper jams, dirty printhead, or defective ribbon cassette.

Slip Station and MICR Problems

Problems include skewing, jams, MICR misreads due to fraud or magnetic interference.

Knife Operation Issues

Receipt not cut indicates paper jam or other problems; clear jam or contact service.

Other Conditions Requiring Service

Service Representative Required

Problems like MICR reader failure, forms feeding issues, missing dots, illegible characters require qualified service.

Wincor Nixdorf TH320 Specifications

General IconGeneral
Printing MethodDirect thermal
Paper Roll DiameterUp to 83 mm
Power Supply24 V DC
TypeThermal Printer
Print TechnologyThermal
Print Resolution203 dpi
InterfaceUSB, Ethernet

Related product manuals