7
Installing the Gypsum Mounting Platform
NOTE: The installation and finishing of the gypsum panel requires knowledge and experience in finishing to a Level 5 finish. If you are
not familiar with this level of finish, consult with an experienced drywall installer.
Step 1 - ICS3-Backbox Attachment to Platform
NOTE: For SUB1 skip to Step 2. The SUB1 port tube connects
directly to the back of the mounting platform.
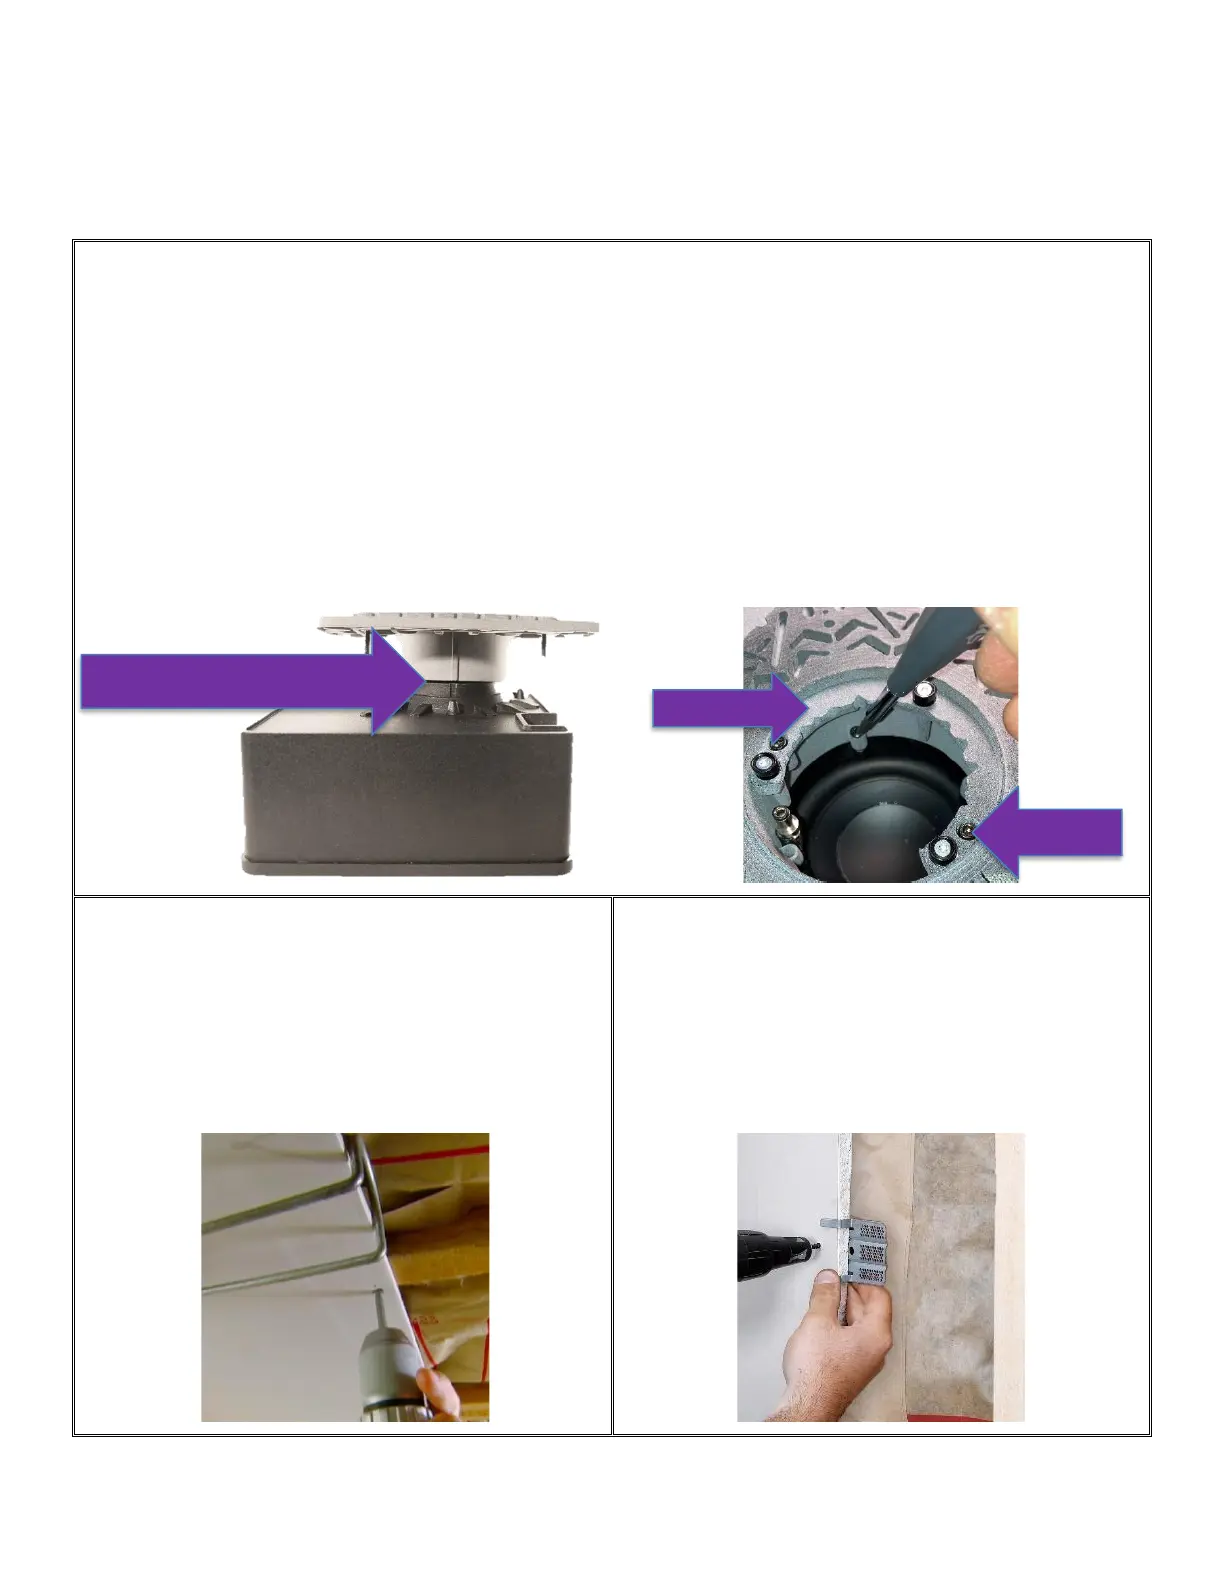
The ICS3-Backbox attaches to the Clamping Plate using 4 screws.
The back-box and the Mounting Plate have a keyed connection
and can only fit one way.
It is easiest to place the ICS3-Backbox on a table with the port
facing up and line up the mounting platform.
Remove the Sanding Guide and Paint Shield. These are held in
with magnets and are screwed to each other. Leave protective
tape in place!
DO NOT THROW AWAY THE SANDING GUIDE / PAINT SHIELD!
Locate the four screw locations on the mounting plate and line
them up to the four screw holes on the back box. Once in place,
secure with the screws included in the ICS3-Backbox.
NOTE: It may be easier to remove the SUB1 Grill Catch from the
Mounting Platform to gain access to all 4 screws, but it is not
necessary if you are careful!
Replace the Sanding Guide and Paint Shield. At this time, you
can install the complete assembly into the ceiling joists. Be
careful as the speaker system is heavier than it looks!
Have an assistant to hold the platform in place is helpful!!!
Step 2 - Fasten
Using three drywall screws per joist, fasten the mounting
platform to the framing. Be careful as the ICS3-Backbox can be
heavy. Support it properly until installed.
NOTE: If using the platform in conjunction with a SUB1
subwoofer, be sure to locate the opening of the platform within
12”(305mm) to 24” (610mm) of the SUB1 cabinet location.
Step 3 - Support or Trim
Place at least one of the provided patch clips on each of the sides
with unsupported drywall. Attach the patch clips to the panel
bracket using at least one 1-1/4” (32mm) drywall screw. Trim off
any unsupported drywall that does not have a patch clip
attached.
Align the ICS3 Back-box to the
Mounting Platform with this index


 To Next Page