International Customer Service Service Manual
Witschi Electronic Ltd Proofmaster S & M Page 2/4
Sensor Replacement - Proofmaster S and M
Sensor Proofmaster S Ref: SAV-31.21.701
Sensor Proofmaster M Ref.: SAV-31.20.701
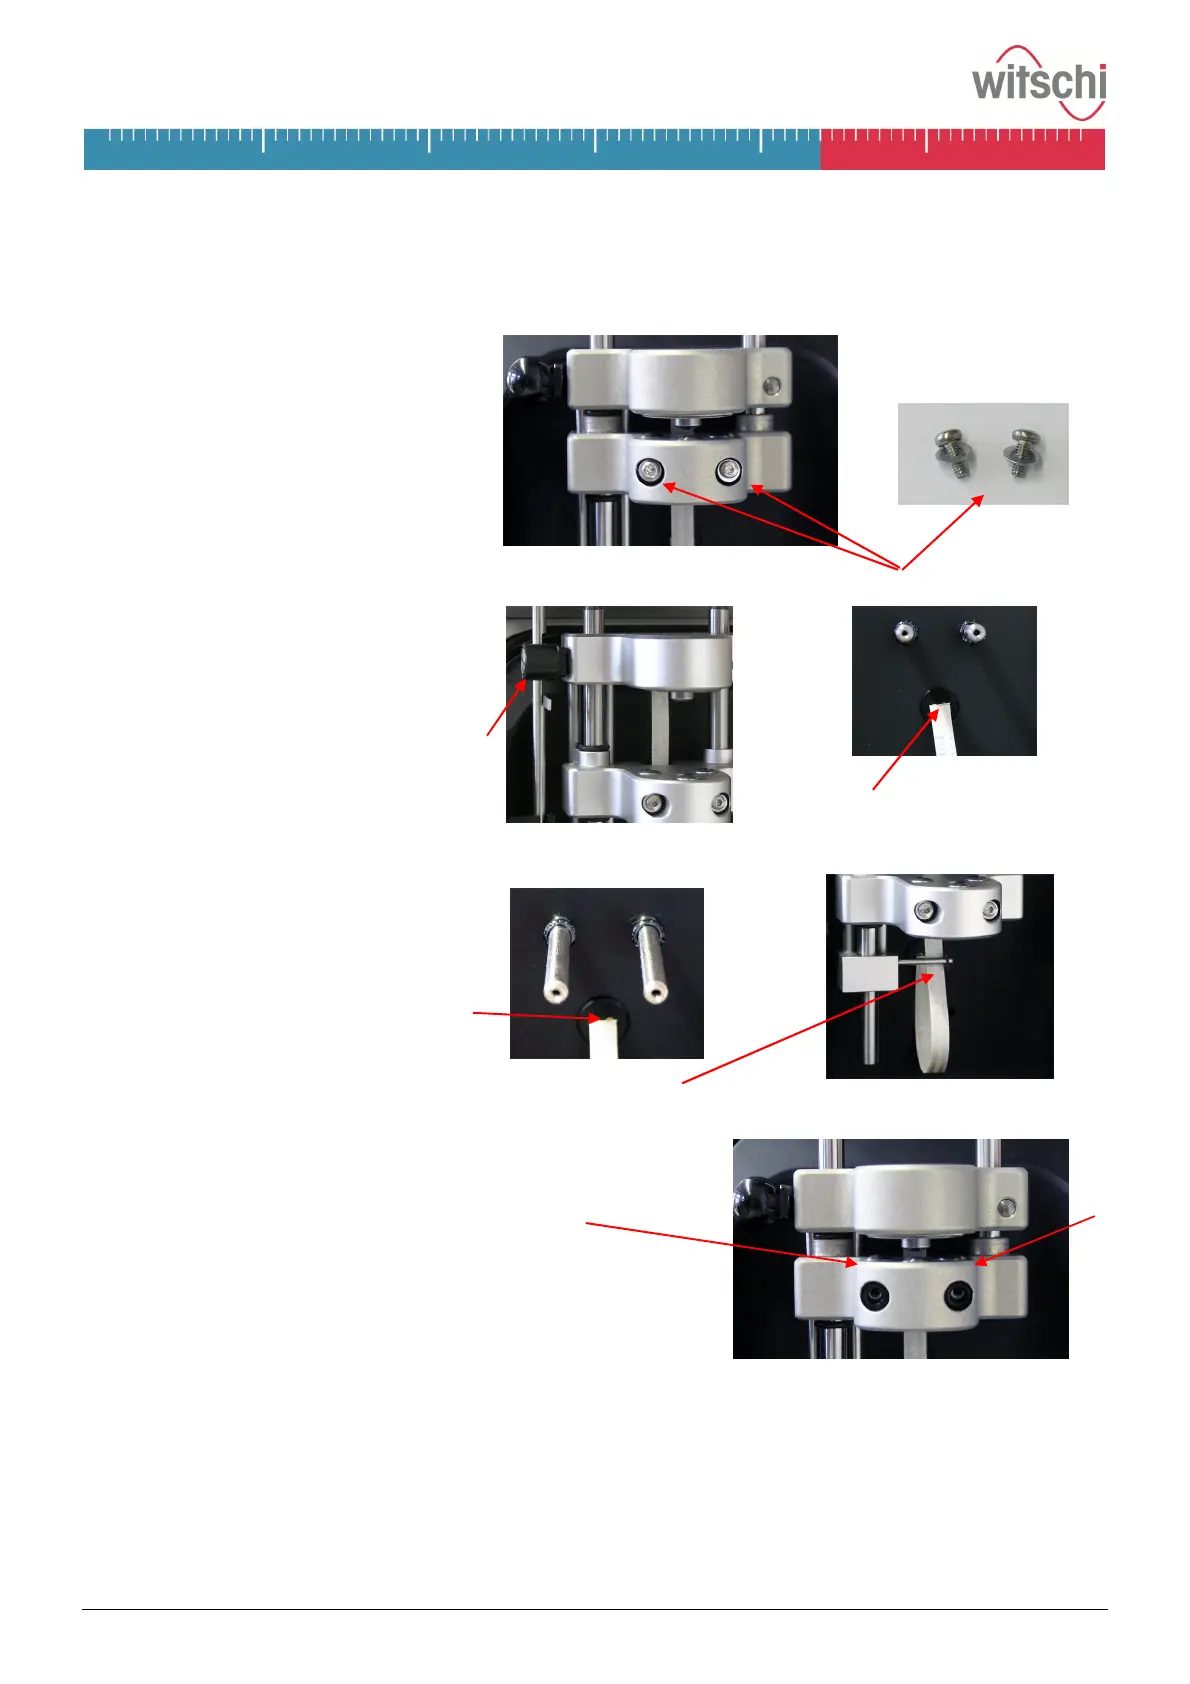
Remove Sensor
7. Loose the screws with the provided
torx wrench, and put screws with
washer aside.
8. Pull carefully the sensor forward
and the flat cable from the basis.
Important!
Proofmaster M: raise first the wheel
by hand, so that it does not rest
upon the sensor lifter. Flat cable
Mount Sensor
9. Check that the two O-rings sit in the
slots of the bars and not behind it.
10. Plug the flat cable into the basis
socket and make sure that it is led
behind the retainer pin.
11. Push the sensor carefully in, without shifting the O-rings.
Important!
Proofmaster M: the wheel must be above the sensor lifter.
12. Check that the O-rings are placed in the front of the sensor
table.
Tighten both screws with the washer.
Important
· The above specified steps must be implemented with care.
Witschi Electronic AG does not take over guaranteeing for damages on the equipment, caused by the
exchange of the sensor by the customer.
· Return defective sensor to the following address, by indicating the serial number of the Proofmaster:
Witschi Electronic AG
SAV department
Bahnhofstrasse 26
CH-3294 Büren a.A. / Switzerland
A note of credit will be transferred to you, if the Proofmaster is still under guarantee.
 Loading...