wolfappliance.com
|
9
Anti-Tip Bracket
To prevent the range from tipping forward, the anti-tip
bracket must be installed. To ensure the anti-tip bolt
engages the bracket, refer to the chart and illustration below
to determine proper placement.
ANTI-TIP BRACKET
A
30" Range
3
/16" (5)
36" Range
9
/16" (14)
48" Range
3
/16" (5)
60" Range
5
/16" (8)
INSTALL BRACKET
Drywall application: After properly positioning the anti-tip
bracket, mark holes, then use a Phillips screwdriver or a low
rpm power drill to drive the wall anchor into the surface of
the wallboard until ush. Pre-drill holes if needed. For hard
wallboard or double-board construction, use a
1
/4" drill bit.
For solid plaster, use a
7
/16" drill bit. Refer to the illustration
below. Use #8 screws and at washers to fasten the bracket
to the wall.
Wood oor application: After properly positioning the anti-
tip bracket, drill
3
/16" (5) pilot holes through the oor. Use
#12 screws and at washers to secure the bracket to the
oor.
Concrete oor application: After properly positioning the
anti-tip bracket drill
3
/8" (10) holes into the concrete a min-
imum of 1
1
/2" (38) deep. Use
3
/8" wedge anchors to secure
the bracket to the oor.
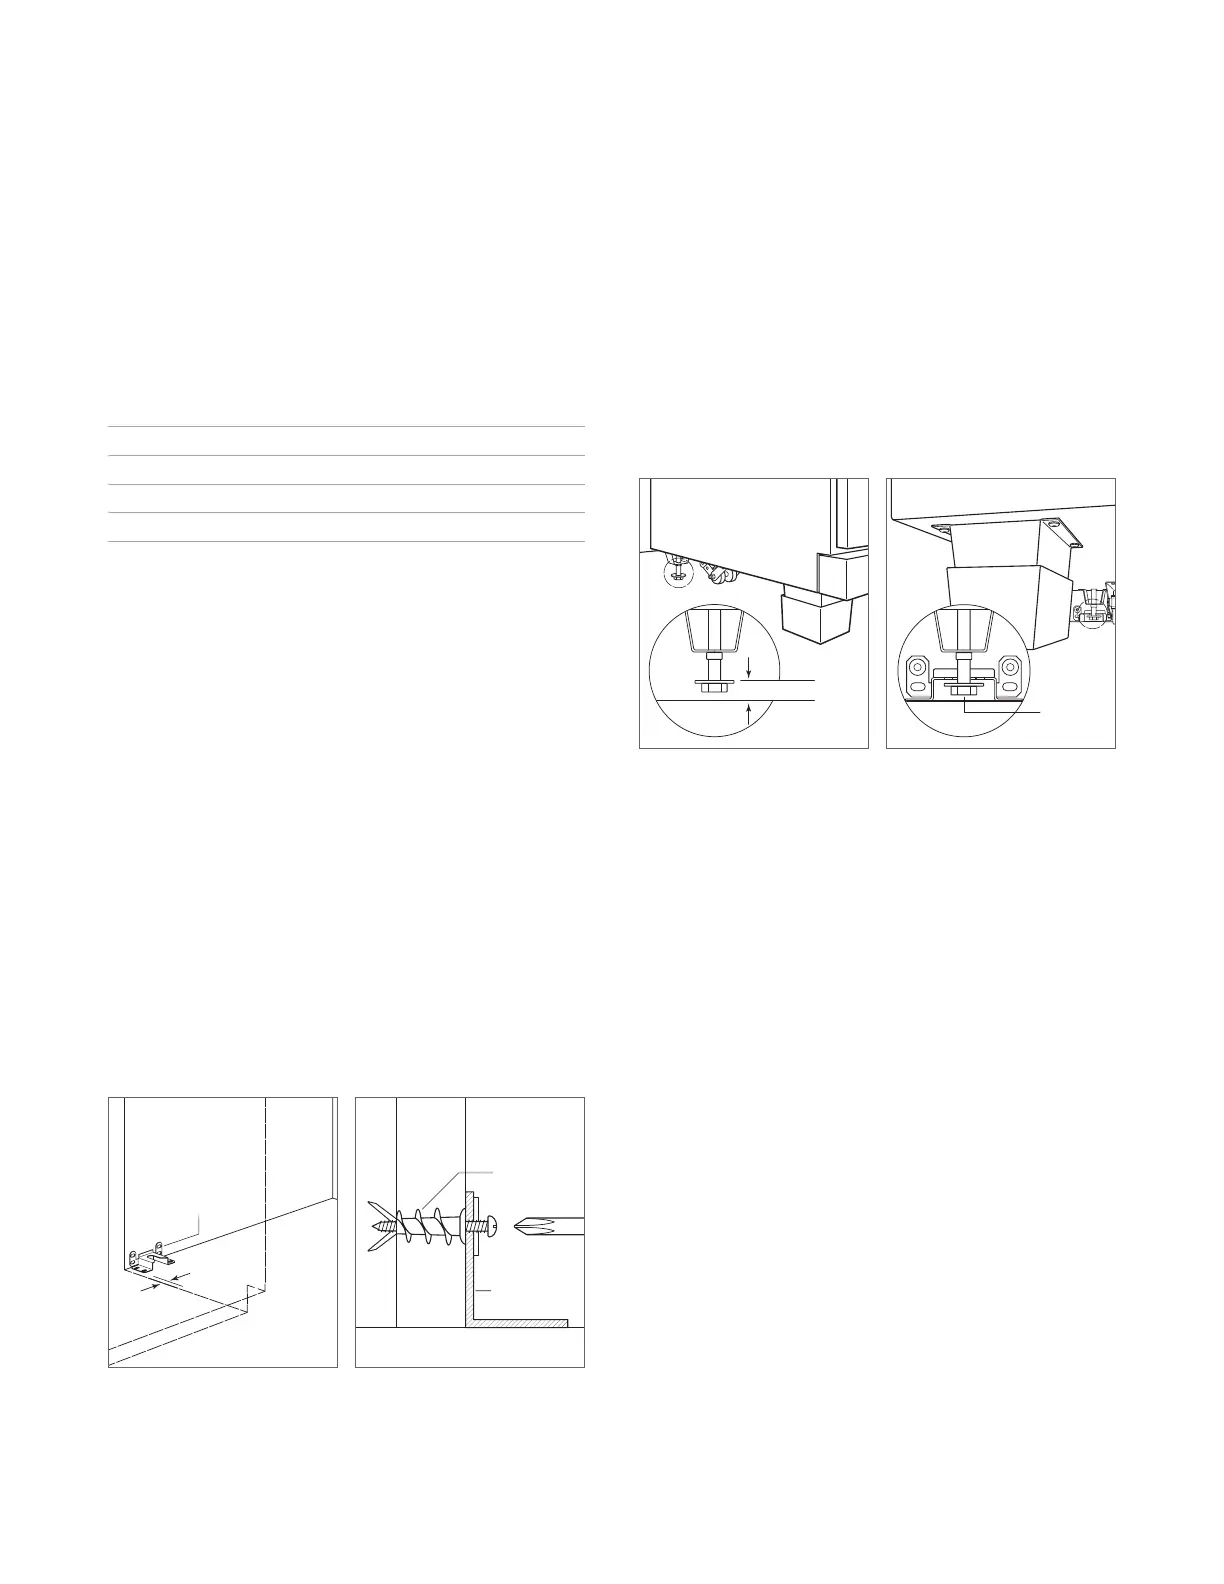
ANTI-TIP BOLT ADJUSTMENT
Once the bracket is secure, adjust the anti-tip bolt so the
top of the washer is
7
/8" (22) maximum from the oor. Slide
the range into the opening and verify the anti-tip bolt is
engaged. Refer to the illustrations below.
A
ANTI-TIP
BRACKET
ANTI-TIP
BRACKET
WALL
ANCHOR
Anti-tip bracket location
Wall anchor installation
INSTALLATION
7
/8" (22) MAX
ANTI-TIP
BOLT
ANTI-TIP
DEVICE
ENGAGED
Anti-tip bolt adjustment
Anti-tip bolt engaged