9
OVE N DOO R R E M O VA L
If removal of the oven door(s) is necessary,
follow these steps:
1)
Remove the lower kickplate assembly to
a
ccess the lower hinge retainer mounting
screws.
2)
Open the oven door to its fully opened
position and remove both upper and lower
hinge retainer mounting screws. The oven
gasket may have to be moved slightly to
access the bottom screws.
3)
After removing the mounting screws, move
the hinge retainer plate forward slightly.
The hinge retainer plate will remain on the
door hinge assembly after the mounting
screws have been removed.
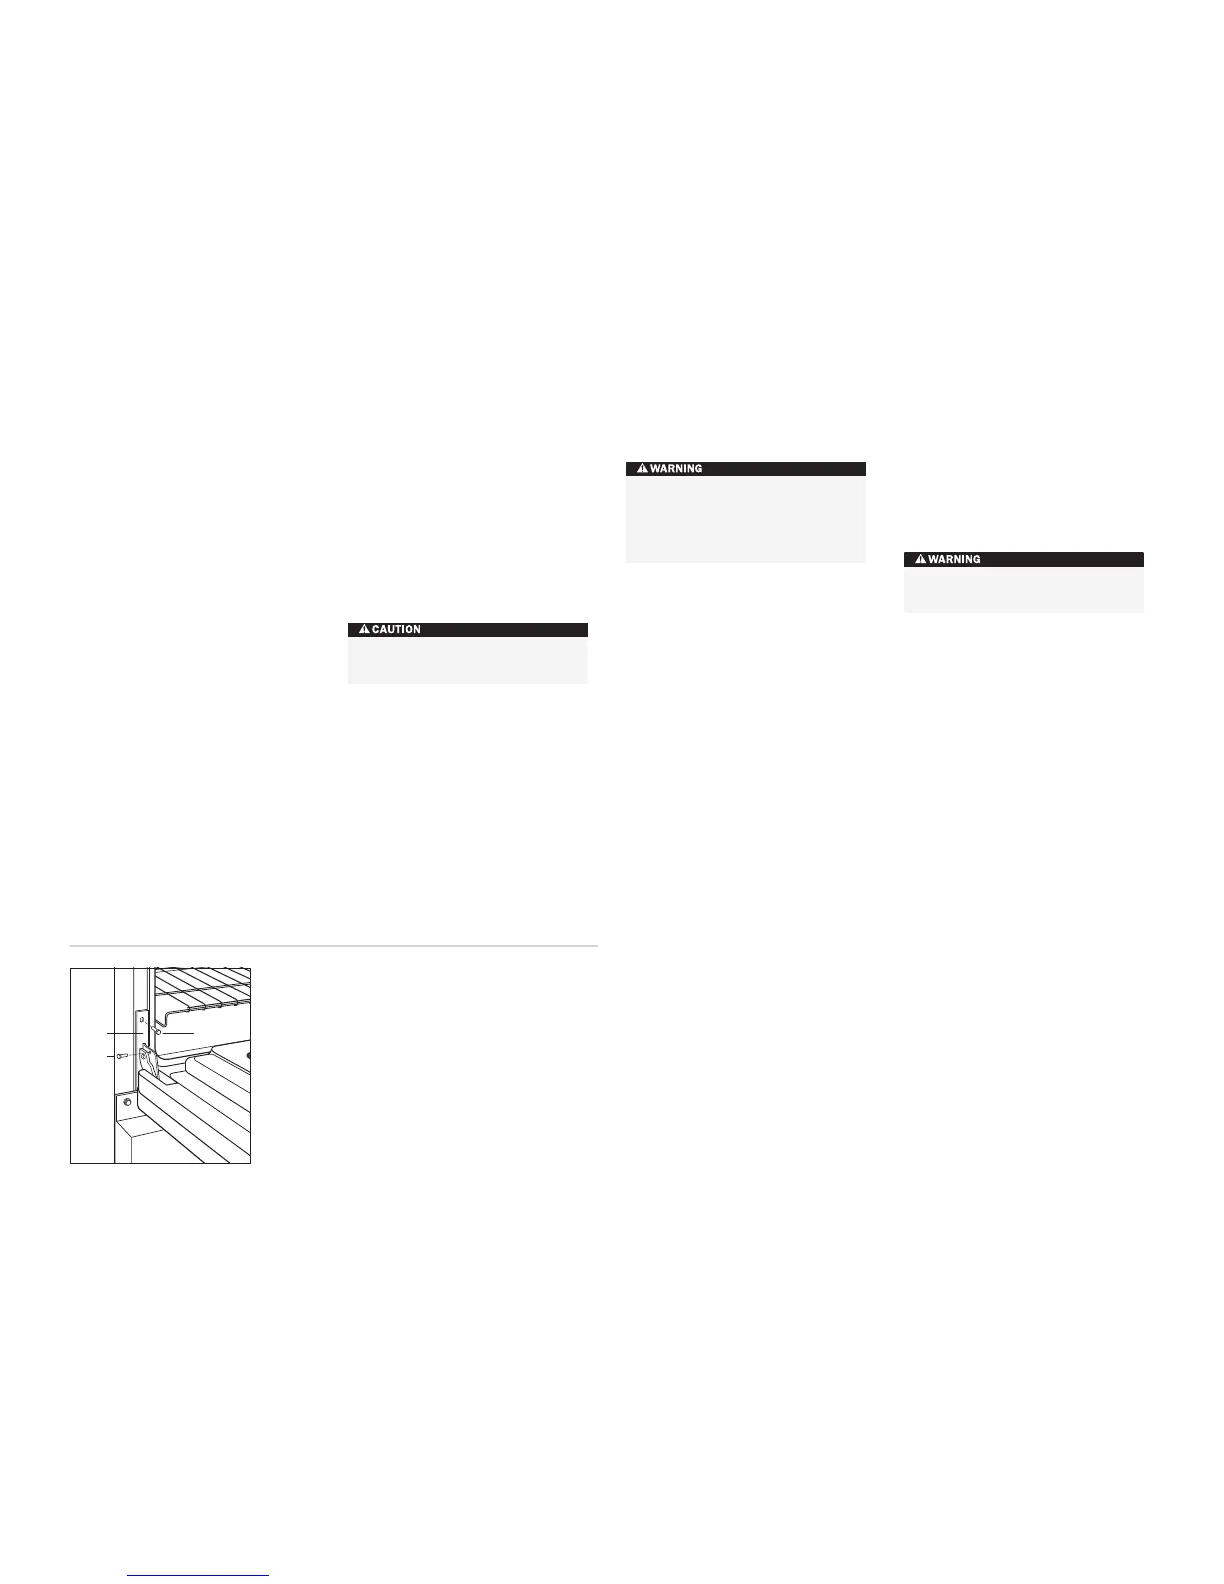
4)
Insert the supplied door hinge pin through
the hole in the appropriate hinge arm. Refer
to the illustration below.
5
)
C
arefully close the oven door to about a
60° angle from horizontal and lift the door
away from the oven. A slight rocking
motion may be required for removal.
6)
For 1219 mm and 1524 mm ranges,
complete these steps for both oven doors.
IMPORTANT NOTE:
The dual fuel range must
be connected to a regulated gas supply.
The rating plate, located at the far right of the
bottom of the control panel assembly just
above the oven door, has information on the
type of gas that should be used. If this infor-
mation does not agree with the type of gas
available, check with the local gas supplier.
A compatible ISO 7-1 gas inlet thread is
provided on all units. Please contact your local
Wolf dealer if an ISO 228-1 or other gas inlet
thread is required. Pipe joint compounds,
suitable for use with LP gas should be used.
For LP gas, piping or tubing size can be 13 mm
minimum. LP gas suppliers usually determine
the size and materials used on the system.
If local codes permit, a flexible metal appliance
connector is recommended for connecting this
range to the gas supply line. Do not kink or
damage the flexible connector when moving
the range.
If rigid pipe is used as a gas supply line, a
combination of pipe fittings must be used to
obtain an in-line connection to the range. All
strains must be removed from the supply and
gas lines so the range will be level and in line.
E
XPLOSION HAZARD—
S
ecurely tighten all gas connections.
Failure to do so can result in explosion,
f
ire or death.
G AS S UP PLY R E Q U I R E M E N T S G AS S UP PLY C O N N E C T I O N
IMPORTANT NOTE:
All connections to the gas
piping must be wrench-tightened. Do not make
connections too tight. Do not allow the pipes
t
o turn when tightening fittings as the tubing
in the burner box may bend and begin to leak.
I
N STA LL AT IO N
I
N S T RU C T I O N S