WBLOWER-90INT (805086) or
WBLOWER-120INT (804702)
Installation
IMPORTANT NOTE: Wolf recom-
mends installing the internal blower
to the rough-in plate assembly prior
to installing hood to the wall framing.
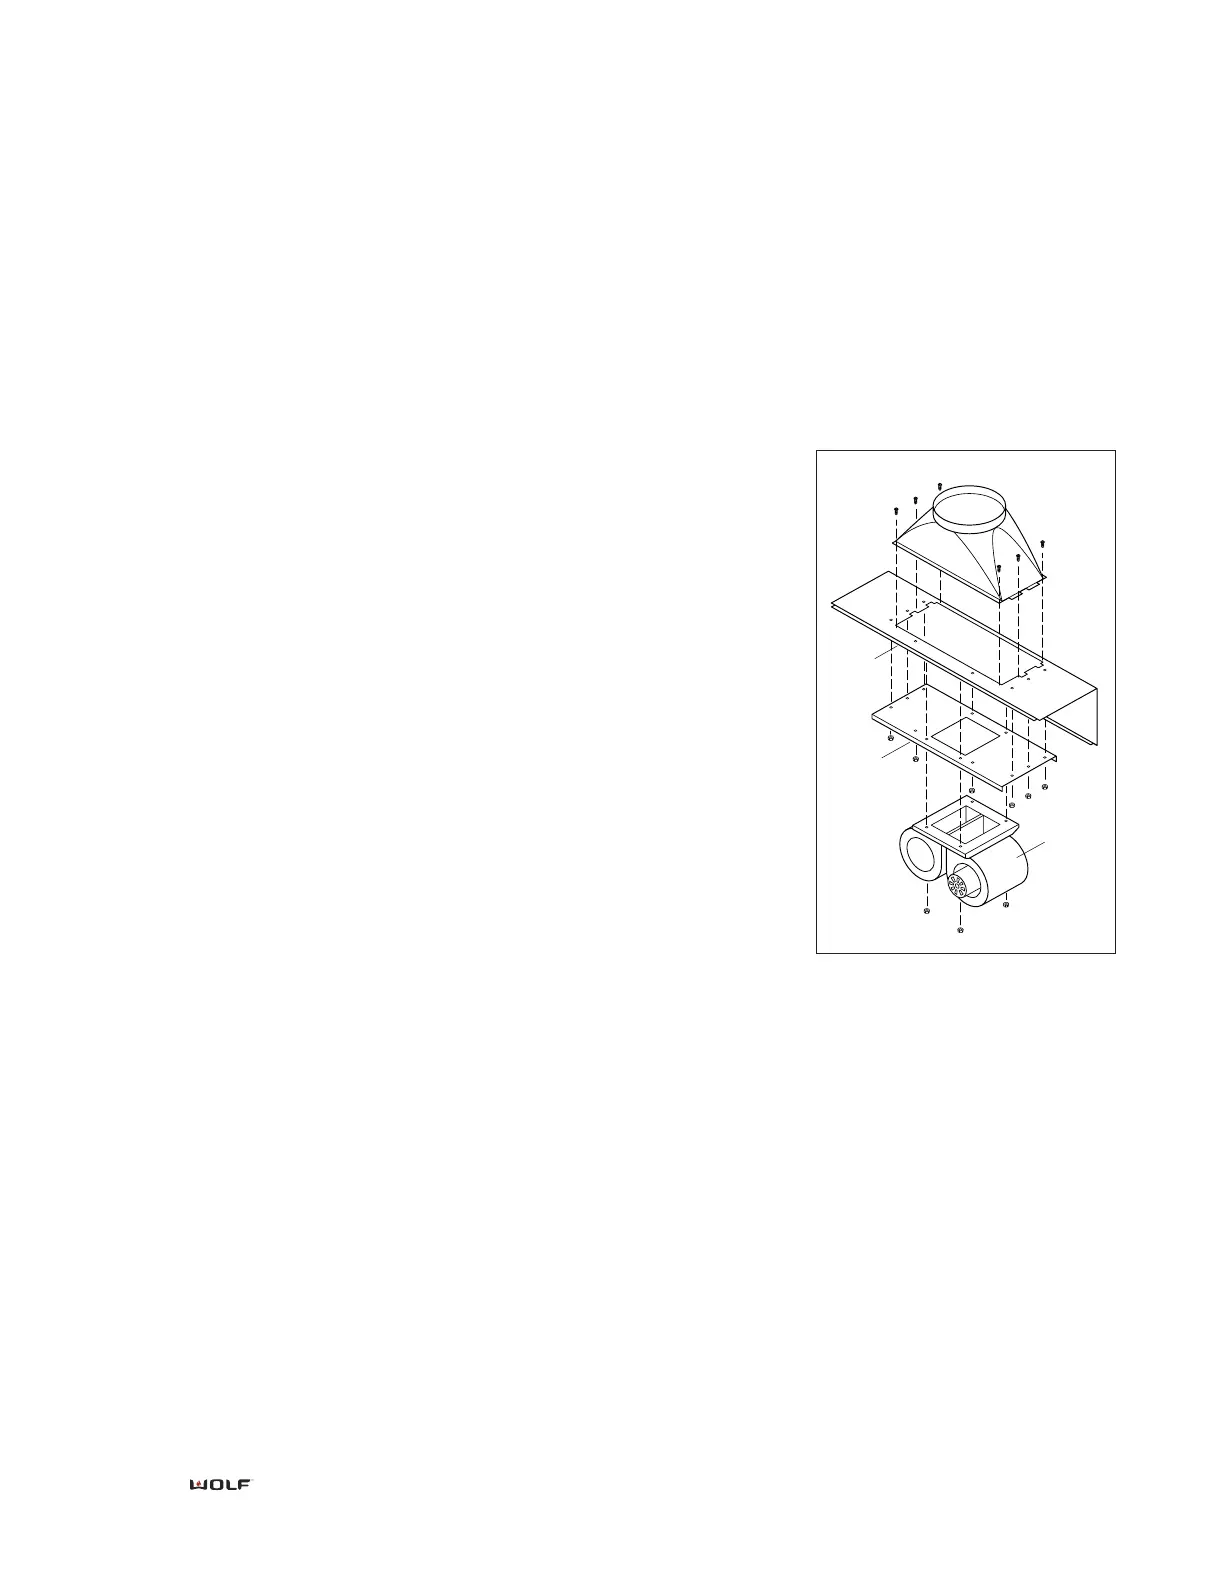
1) Assemble blower housing to
blower rough-in plate. Follow
installation instructions included with
the blower assembly for proper
installation.
2) Once blower is mounted to blower
rough-in plate, attach blower
assembly to hood rough-in plate
assembly by sliding blower rough-in
plate over weld studs and securing
with (8) nuts included in blower
mounting hardware kit.
3) Verify that blower discharge aligns
with hood back-plate discharge
cutout.
4) Once the blower is attached to the
hood rough-in plate, install the hood
rough-in plate to the wall. Be sure to
secure power cord(s) so as not to
damage or pinch while installing
hood shell. For all wall hoods follow
installation instructions beginning on
page 13. 27-inch Wall Hood Step 3:
Hood Preparation, Step 4: Install the
Rough-in Plate, Step 5: Install the
Hood, Step 6: Install Wiring and Step
7: Install Hood Filters and Drip Cups.
INTERNAL BLOWER
IMPORTANT NOTE: Before turning
the power on, make sure the blower
is in the "OFF" position. Use wire con-
nectors or wire nuts approved by UL
or C/UL. Refer to installation instruc-
tions provided with each blower to
verify wall or roof cut-outs.
5) Once hood installation is com-
plete, plug blower power cord(s) into
receptacle(s) located near the center
of the hood shell. Use clips on hood
interior to keep excess power cord
away from moving parts.
16
V ENTILATOR I NSTALLATION