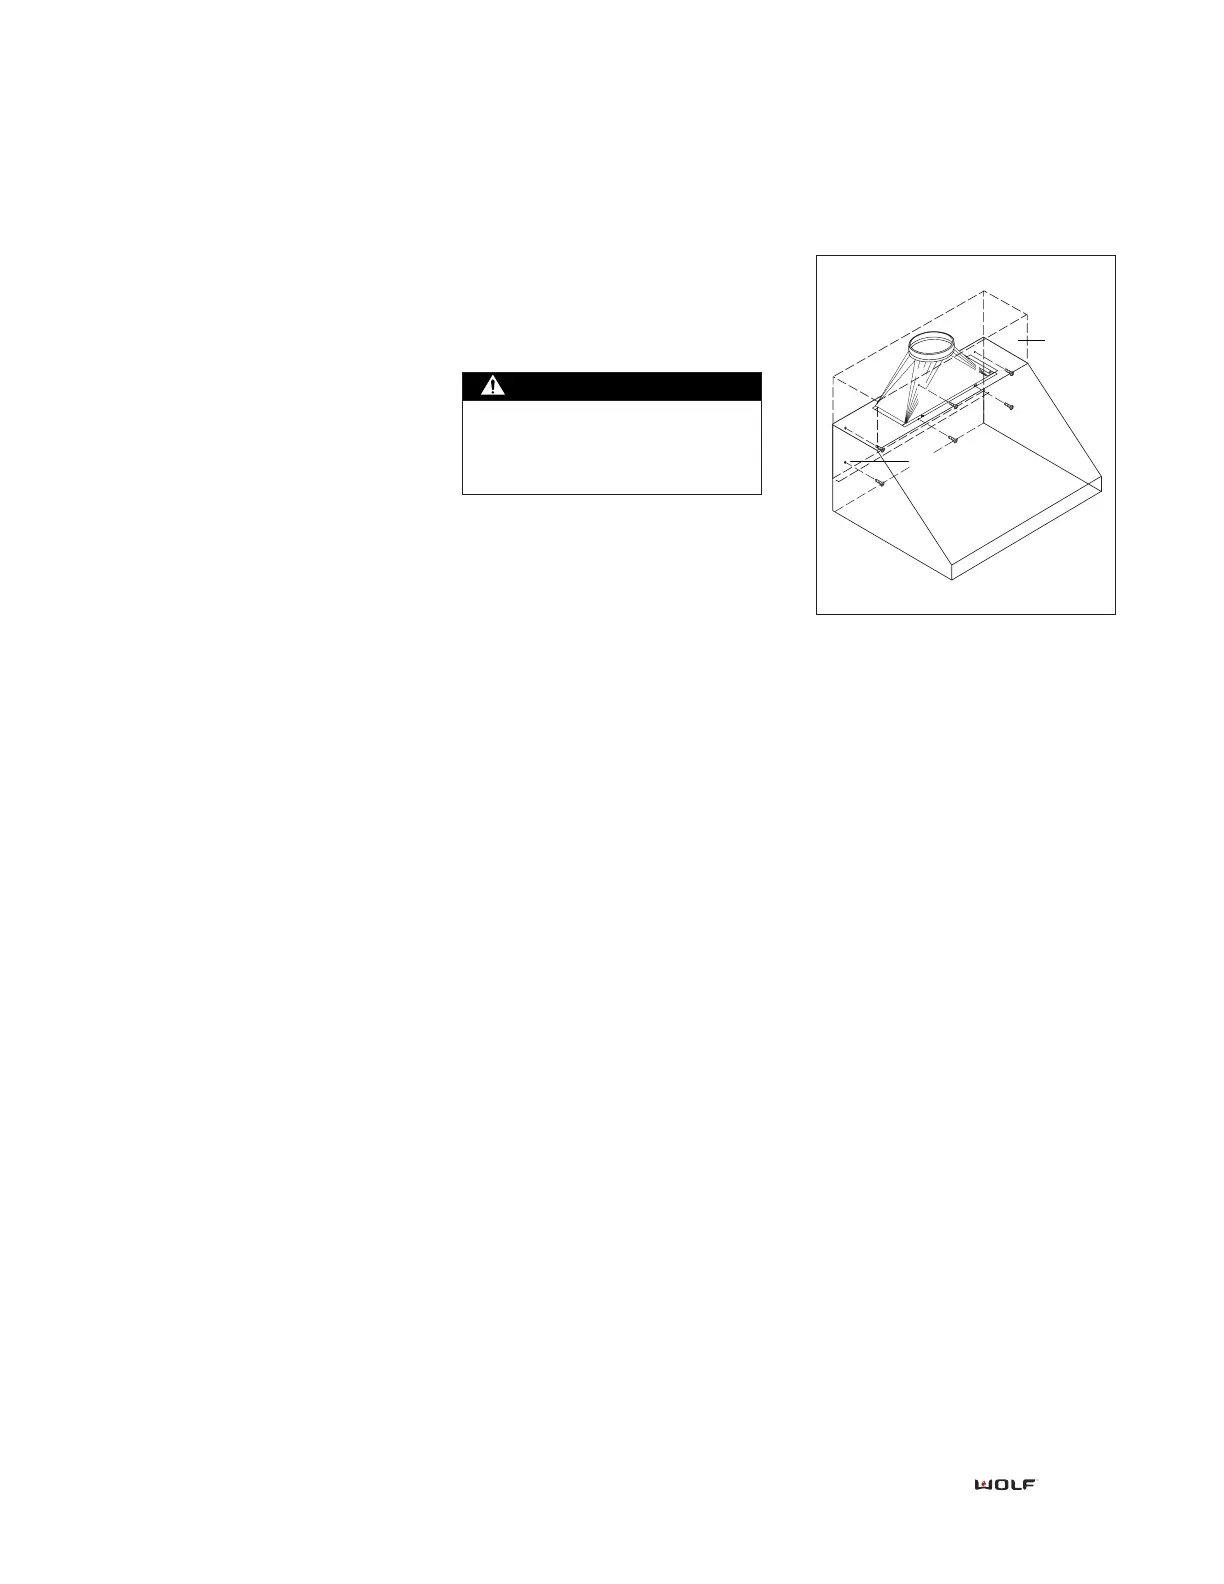
Step 4: Install the Hood
1) Align the hood assembly with the
marked location.
2) Install #10 x 2" screws through
rough-in plate mounting holes.
3) Attach transition to existing duct-
work with sheet metal screws. Use
duct tape or silicone to make all
joints secure and air tight.
4) If additional mounting holes are
required for adequate hood support,
drill additional mounting holes in
rough-in plate of hood and use these
holes to attach hood assembly to wall
framing.
5) Follow Step 6: Install Wiring, Step
7: Install Hood Filters and Drip Cups
and Final Installation on page 15.
Hood installation
Note the weight of the hood.
Three people may be required
for proper installation.
9
6) Re-attach rough-in plate/transition
assembly to hood shell with screws
removed in step 2.
7) If installing a remote blower,
drill 7/8" hole through the wood
framing for conduit wires. See
Connect Remote Blower on page 17
for overall dimensions and electrical
requirements. See installation instruc-
tions provided with blower for
mounting and installation informa-
tion.
IMPORTANT NOTE: Do not run
remote blower connects through
ductwork.
8) If installing internal blower
WBLOWER-90INT (805086) or
WBLOWER-120INT (804702) see
installation guidelines on page 16
and installation instructions provided
with blower.