4) Determine the discharge direction
for your installation and rotate back
panel accordingly. Your wall hood
back panel has been designed to
accommodate vertical or horizontal
discharge direction.
NOTE: Rear discharge is only
applicable on 22-inch wall hoods
(excluding W302210I and W362210I)
and 24-inch wall hoods used with a
WBLOWER-120INT (804702) or any
Wolf remote blower. WBLOWER-
90INT (805086) is not for use in rear
discharge applications.
8
22-INCH AND 24-INCH D EEP W ALL H OODS
5) Use rough-in plate assembly to
determine stud locations. Lift rough-
in plate onto desired wall location
and mark pre-drilled mounting holes
on wall surface.
Horizontal discharge requires a wall
cut-out. See illustrations for 22- and
24-inch deep wall hoods. The loca-
tion of the cut-out is determined by
the hood installation height.
If wall framing is not available,
wall anchors must be used.
Step 3: Hood Preparation
If installing a WBLOWER-90INT
(805086) or WBLOWER-120INT
(804702) see Installation for Internal
Blower on page 16.
IMPORTANT NOTE: Wolf recom-
mends installing the internal blower
to the rough-in plate assembly prior
to installing hood to the wall framing.
If installing a duct cover assembly, see
duct cover installation on page 18.
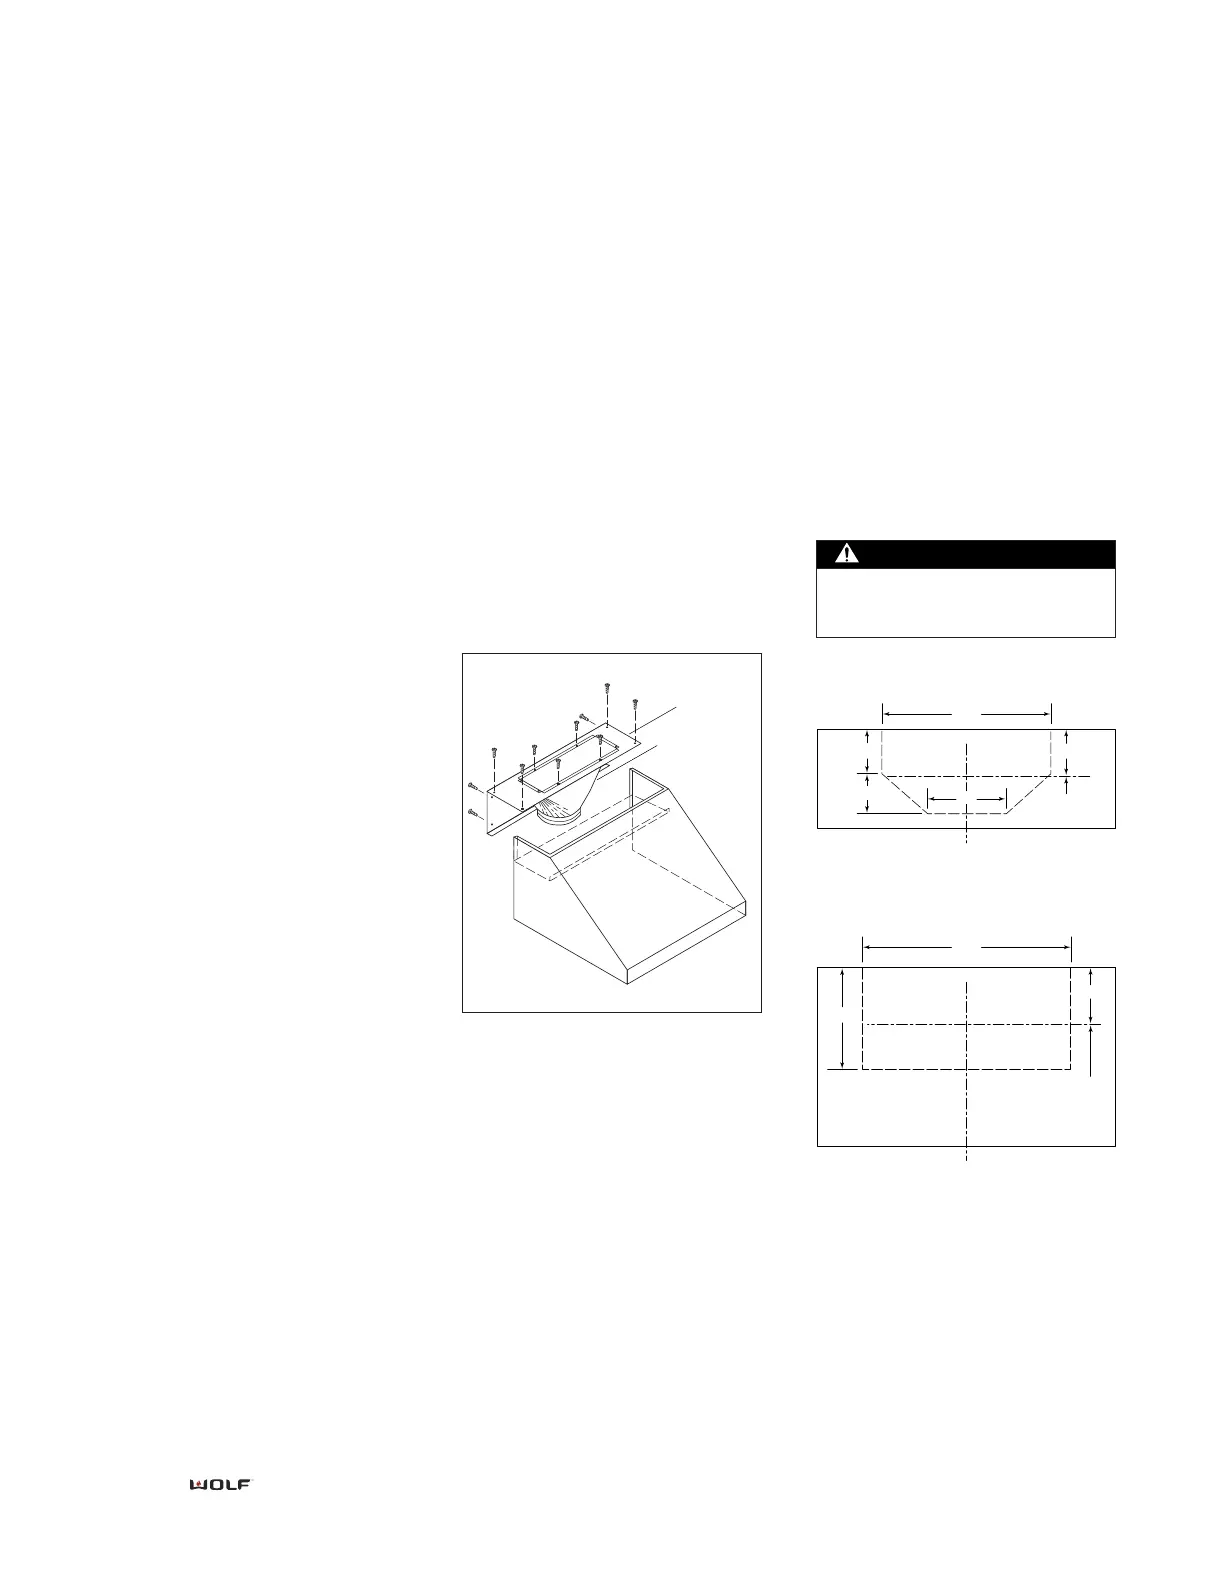
1) The hood assembly is shipped
with the rough-in plate and the tran-
sition attached. The transition is
shipped upside down in the top of
the hood assembly and must be
removed and reinstalled.
2) Detach the rough-in plate/transi-
tion from the hood assembly by
removing the four (4) screws on the
top and the four (4) screws on the
back of the rough-in plate/ transition
assembly.
3) Detach the transition from the
rough-in plate by removing the four
(4) screws. DO NOT DISCARD
SCREWS. Shipping screws are needed
for reinstallation of transition to the
rough-in plate.
Rough-in plate installation
ROUGH-IN
PLATE
HOOD
ASSEMBLY
SHIPPING
SCREWS
TRANSITION
17"
4
1
/2
"
4"
4
11
/16
"
C
L
AREA OF CUT-OUT ON WALL SURFACE
AREA OF CUT-OUT ON WALL SURFACE
8"
CENTERLINE
OF 8" ROUND
TRANSITION
CENTERLINE
OF 10" ROUND
TRANSITION
TOP OF 22" DEEP HOOD
21"
10
1
/4
"
5
13
/16
"
C
L
CENTERLINE OF HOOD
CENTERLINE OF HOOD
TOP OF 24" DEEP HOOD
Wall cut-out for 24-inch deep hood
Wall cut-out for 22-inch deep hood