7
Step 2: Wall Preparation
IMPORTANT NOTE: Do not use duct
smaller than 8".
IMPORTANT NOTE: Wolf recom-
mends that the hood be installed a
minimum of 30" and a maximum of
36" above the cooking surface.
1) Construct wood wall framing that
is flush with the interior surface of the
wall studs. Make certain that the
framing is centered over the desired
installation location.
2) Use the rough-in plate shipped
with hood to determine framing
location.
3) After wall surface is finished,
secure the hood to the wall surface.
NOTE: If additional mounting holes
are required for adequate hood
support, drill additional mounting
holes in rough-in plate and use these
holes to attach hood assembly to wall
framing.
Framing must be structurally
tied together and tied to ceiling
joists to provide enough
strength to support the weight
of the hood and the internal
blower, if applicable.
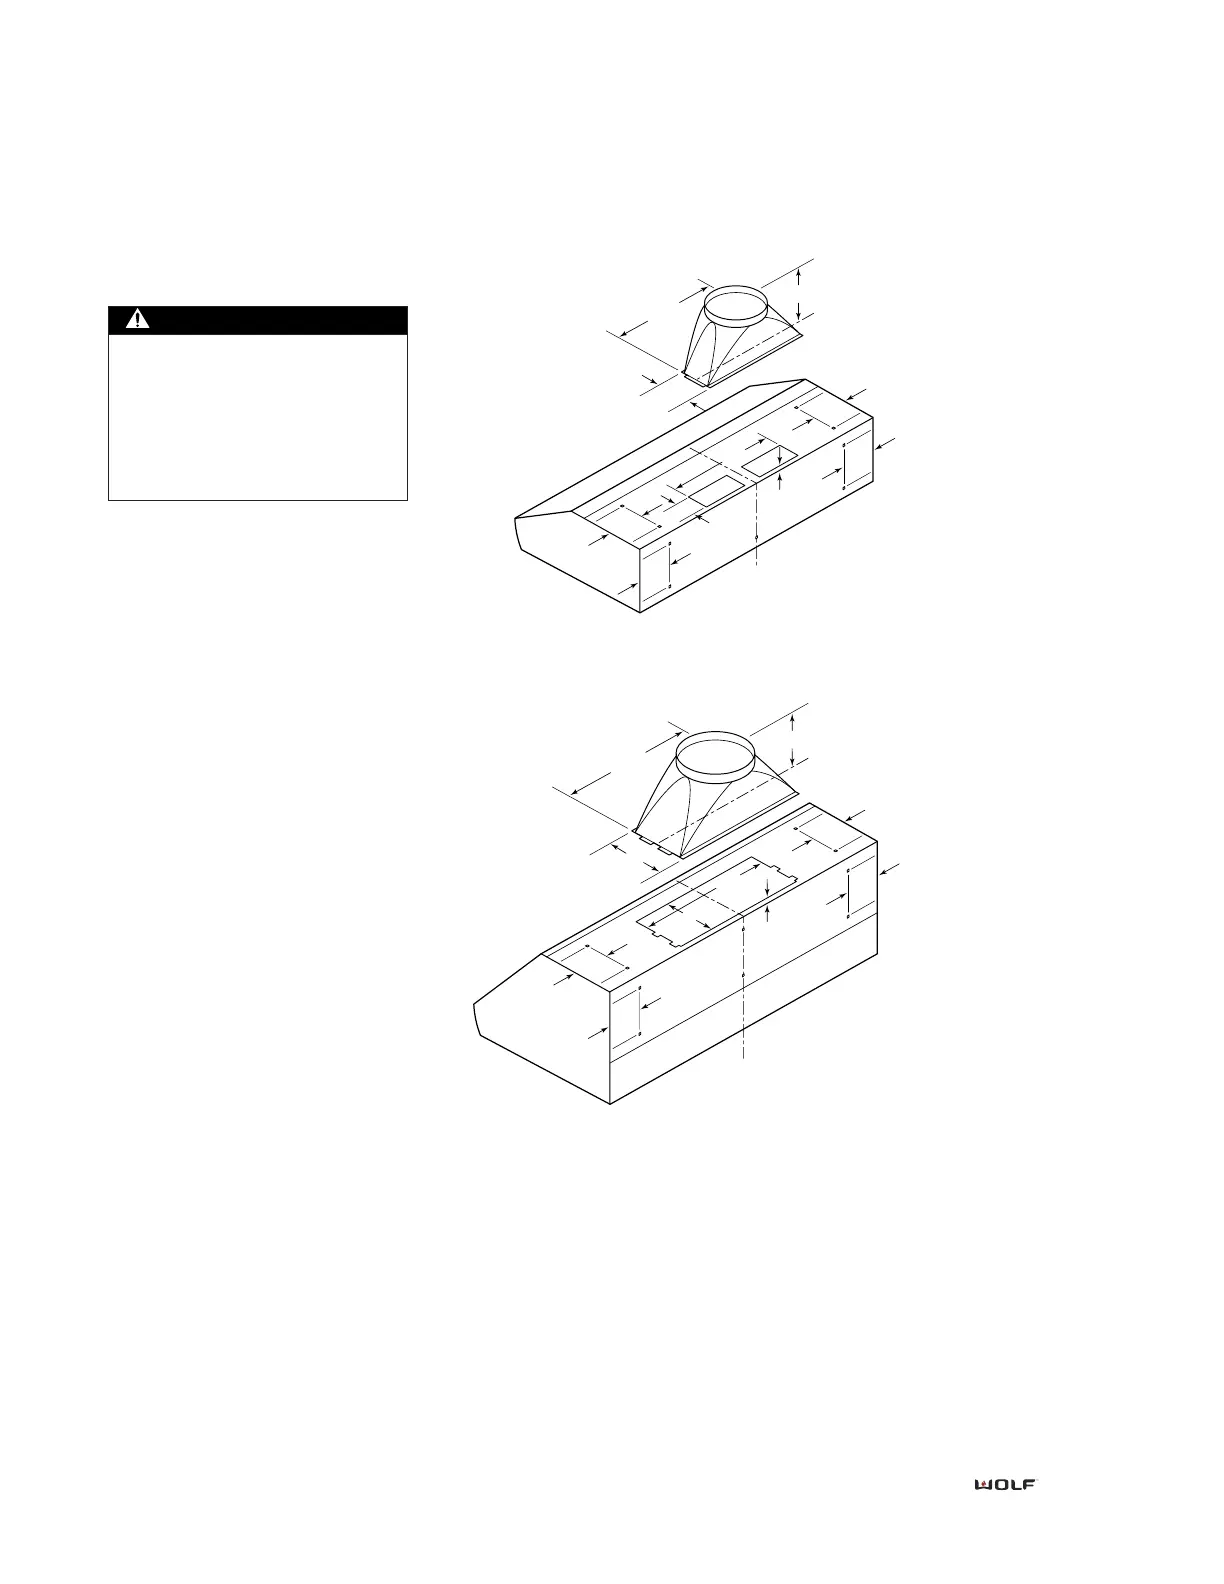
Location of mounting holes for 22-inch wall hood
Location of mounting holes for 24-inch wall hood