ee maker has been designed with a Pause & Pour
rom the unit and pour hot co
rewing cycle will be interrupted and no co
e on the warming plate to restart the brewing
removed during brewing or
or 2 hours unless it is turned OFF. Do not
e on heated warming plate.
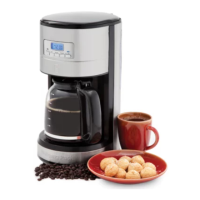
Place your drip co
ace, such as a
countertop. P
Lift the top cover of the coffee maker strai
ee maker comes equipped with a permanent co
lter;
however, a cone paper
lter may be used instead i
desired (8 to
12-cup size). To add co
ow to
determine the amount o
e with cold water up to the marked level
e into water reservoir.
Close the top cover o
ee maker. Place glass cara
our coffee maker if the filter basket doe
cold water; the automatic brewin
stem has been designed to work onl
ow hole is located at the back o
lling. Do not add water past the MAX line on indicated
on t
e water reservoir viewing win
OFF button once. The blue power indicator light wil
illuminate indicating that your co
ee maker has begun the brewin
you wish to use the timer to preset the co
section on “Using the Timer”. In a
When the brewing cycle is complete, your co
We recommend using coffee ground specificall
the amount to suit your own taste
As an added convenience, your co
ee maker has been designed with an
auto shuto
ter the brewing cycle is complete, th
ee maker will automatically shut itsel
Press the PROGRAM button until
ou see the CLOCK indicator displa
can hold the hour button down to scroll at a faster rate. Ensure that
ou
have the correct hour of the da
set as it relates to AM or PM. The AM or
PM indicator is displa
ed to the left of the time. For the minute setting
press the MINUTE button until
ou reach the desired time. You can hold
th
Once the correct time has been set, do not press an
buttons. After 15
seconds the clock will leave the “Set Time” mode, and the blue backli
the unit will reset the clock to 12:00
 Loading...