EasyManua.ls Logo

Wood-mizer 1992 LT30HD - User Manual

Wood-mizer 1992 LT30HD
140 pages
Print Icon
To Next Page IconTo Next Page
Loading...
Wood-Mizer
®
Sawmill
Safety, Setup, Operation
& Maintenance Manual
1992 LT30HD rev. C7 - F7
1992 LT40HD rev. C7 - F7
Safety is our #1 concern! Read and understand all
safety information and instructions before operating, set-
ting up or maintaining this machine.
October 1996
Form #625
!

Table of Contents

Questions and Answers

  • D
    Diane EdwardsSep 23, 2025
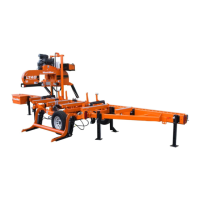
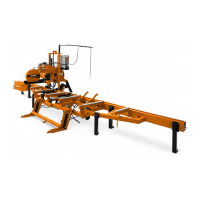
    Why Wood-mizer 1992 LT30HD Saw battery will not stay charged?
    • E
      emillerSep 23, 2025
      Turn the switch OFF when not in use if the key switch is left ON. Visually check for bare wires and/or have checked if there is a short in system. Have the system checked by an authorized Onan dealer if the charging system is not functioning. Check fluid levels and add proper solution if there are bad cells. Adjust low end RPM if the idle is improper. Check for a loose wire and replace the light if necessary if the alternator light is burned out.
  • L
    Lisa Tucker DDSAug 25, 2025
    Why Wood-mizer 1992 LT30HD blade does not track right?
    • N
      nataliespencerAug 25, 2025
      If the Wood-Mizer Saw blade does not track right, readjust on the Drive Wheel if the cant adjustment is incorrect. Replace B-57 belts if the belts are flat or worn.
  • K
    Kathryn WilliamsAug 25, 2025
    How to prevent Wood-mizer 1992 LT30HD Saw blades from dulling quickly?
    • S
      Steven EricksonAug 26, 2025
      To prevent blades from dulling quickly on your Wood-Mizer Saw, clean or debark logs, especially on the entry side of the cut. When grinding teeth, grind just enough metal to restore sharpness and use water/coolant while sharpening. Also, ensure proper sharpening techniques, making sure the tip is being sharpened completely.
  • E
    ellisjimmyAug 27, 2025
    Why do Wood-mizer 1992 LT30HD Saw blades break prematurely?
    • R
      richardthompsonAug 27, 2025
      To avoid premature blade breakage on your Wood-Mizer Saw, replace worn rubber belts on blade wheels (B-57) if the blade contacts the metal pulley. Ensure proper sharpening techniques. Also, tension the blade to the recommended specifications.
  • T
    tholdenAug 27, 2025
    What to do if Wood-Mizer Saw lumber is not square?
    • A
      Anita SawyerAug 27, 2025
      If your Wood-Mizer Saw lumber is not square, adjust the side supports so they are square to the bed. Adjust the bed rails to be parallel to the blade. Remove any sawdust or bark between the cant and bed rails. Resharpen and reset the blade to address tooth set problems.
  • G
    garrettdianeSep 13, 2025
    Why fluid leaks from Wood-mizer 1992 LT30HD cylinder piston ram?
    • T
      Tyler DawsonSep 13, 2025
      If there are fluid leaks from around the cylinder piston ram on your Wood-Mizer Saw, replace the seals in the cylinder if they are worn. Check the piston ram for abrasive weld that may be causing premature seal failure.
  • A
    Austin JonesSep 12, 2025
    Why Wood-mizer 1992 LT30HD Saw hydraulic turner goes up too early?
    • J
      Justin PetersonSep 12, 2025
      If the hydraulic turner goes up before or at the same time as the side supports on your Wood-Mizer Saw, remove the sequence valves and clean thoroughly with kerosene if there is dirt in the sequence valve. NOTE: Be sure to reassemble the valve and install it in its original position on the cylinder. Replace the sequence valve if the retainer in the sequence valve is worn. Allow fluid to warm up if the air temperature is low. Synthetic fluids are available that allow for hydraulic operation in cold weather conditions (Mobil SHC 526).
  • C
    connerjeremySep 12, 2025
    Why Wood-Mizer Saw hydraulic side supports go down too early?
    • L
      lewisnancySep 12, 2025
      If the hydraulic side supports go down before or at the same time as the log turner on your Wood-Mizer Saw, remove the sequence valves and clean thoroughly with kerosene if there is dirt in the sequence valve. NOTE: Be sure to reassemble the valve and install it in its original position on the cylinder. Replace the sequence valve if the retainer in the sequence valve is worn. Allow fluid to warm up if the air temperature is low. Synthetic fluids are available that allow for hydraulic operation in cold weather conditions (Mobil SHC 526).
  • B
    blackdanielSep 4, 2025
    How to stop Wood-mizer 1992 LT30HD sawdust buildup on track?
    • J
      justin12Sep 4, 2025
      If you notice sawdust building up on the track of your Wood-Mizer Saw, do not oil the track. Adjust the wipers to firmly contact the track if they are worn. Clean the track with solvent and apply silicone spray if the track is sticky.
  • A
    amanda50Sep 2, 2025
    Why Wood-mizer 1992 LT30HD pump motor runs with no response from cylinders?
    • R
      Rachael MurraySep 2, 2025
      If the pump motor runs with little or no response from the cylinders on your Wood-Mizer Saw, test the battery and recharge or replace as necessary. Clean the pressure relief valve (Revisions C7 - E6 Only). Check the fluid level and add an all-season hydraulic fluid until the level is 4 - 4 1/2" from the bottom of the reservoir with all cylinders retracted. Adjust the pressure relief valve. Allow fluid to warm up if the air temperature is low.

Summary

SECTION 1 SAFETY & GENERAL INFORMATION

1.1 Blade Handling

Safe handling of bandsaw blades, including protective gear and keeping others away.

1.2 Sawmill Setup

Safety precautions for setting up the sawmill, including chocking wheels and incline limits.

1.3 Sawmill Operation

Critical safety warnings for operating the sawmill, covering guards, blade, and personnel safety.

1.4 Belt Sizes

Table of belt sizes and Wood-Mizer part numbers for LT30HD/40HD models.

1.5 Blade Sizes

Recommended blade types and sizes for different wood types and engine/motor configurations.

1.6 Cutting Capacity

Log size capacities and production capacity data for LT30HD/LT40HD sawmills.

1.7 Engine;Motor Specifications

Details on available engine/motor types, manufacturers, and specific model numbers.

1.8 Overall Dimensions

Specifications for the overall length, width, height, and weight of LT30HD/LT40HD sawmills.

1.9 Components

Identification of major sawmill components with a visual diagram.

1.10 Hydraulic Schematic

Diagrams of the hydraulic system, showing circuits for different revisions.

1.11 Hydraulic Components

List of hydraulic components with part numbers, manufacturers, and descriptions.

1.12 Hydraulic Hoses

Detailed list of hydraulic hoses, including color codes, applications, and part numbers.

SECTION 2 SETUP & OPERATION

2.1 Stationary Sawmill Setup

Instructions for setting up the sawmill on firm footing and ensuring it is level.

2.2 Portable Sawmill Setup

Steps for setting up a portable sawmill, including outrigger adjustments and safety.

2.3 Preparing The Sawmill For Operation

Procedures for preparing the sawmill for operation, including TUV trailer steps.

2.4 Replacing The Blade

Step-by-step guide on how to safely remove and install a bandsaw blade.

2.5 Tensioning The Blade

Instructions on how to properly tension the blade using the tension gauge and handle.

2.6 Tracking The Blade

Procedure for adjusting the blade to ensure it runs correctly on the wheels.

2.7 Starting The Engine (or Motor)

Safety precautions and steps for starting the sawmill's engine or motor.

2.8 Hydraulic Control Operation

Explanation of how to use the hydraulic control levers for log handling (Revisions E7+).

2.9 Loading, Turning, And Clamping Logs

Detailed steps for loading, turning, and clamping logs onto the sawmill bed.

2.10 Clamp Extension

Instructions on using the clamp extension for clamping small cants or logs.

2.11 Up;Down Operation

How to operate the up/down switch to raise and lower the cutting head.

2.12 Blade Guide Arm Operation

How to adjust the outer blade guide arm for optimal blade support during cuts.

2.13 Clutch;Brake Operation

Procedure for engaging and disengaging the blade using the clutch/brake lever.

2.14 Power Feed Operation

How to use the power feed system for carriage movement and speed control.

2.15 Cutting The Log

Step-by-step guide for performing standard log cutting operations.

2.16 Edging

Instructions for edging boards to achieve clean, straight edges.

2.17 Blade Height Sight Gauge

How to use the sight gauge to determine the correct first cut position on a log.

2.18 Blade Height Scale

Explanation of the blade height scale and indicator for precise cutting measurements.

2.19 Water Lube Operation

How to use the water lube system to keep the blade clean during sawing.

2.20 Preparing The Sawmill For Towing

Steps to secure the sawmill for safe transport and towing.

SECTION 3 MAINTENANCE

3.1 Wear Life

Estimated life expectancy of common replacement parts with proper maintenance.

3.2 Blade Guides

Procedures for lubricating and checking blade guide rollers for wear.

3.3 Hydraulic Log Loader

Instructions for cleaning debris around velocity fuse valves on the log loader.

3.4 Blade Housing

Steps for cleaning sawdust from blade wheel housings and checking blade screw.

3.5 Carriage Track, Wiper & Scrapers

Cleaning and lubricating the carriage track, wipers, and scrapers.

3.6 Track Rollers

Procedure for lubricating greasable track roller bearings every fifty hours.

3.7 Vertical Mast Rails

Cleaning and lubricating the vertical mast rails every 50 hours.

3.8 Drum Switches

Lubricating drum switch contacts in the control panel every fifty hours.

3.9 Miscellaneous Lubrication

Lubrication points for blade guide arms, clamp mechanisms, and chains.

3.10 Blade Tensioner

Lubricating the tensioner system chrome rods and screw handle.

3.11 Blade Wheel Belts

Checking blade wheel belts for wear and rotating them for longer life.

3.12 Brake Strap Adjustment

Checking and adjusting the brake strap for proper blade stopping performance.

3.13 Hydraulic System

Checking hydraulic fluid level, replacing filter, and servicing drive motor.

3.14 Drive Bearing

Refilling fluid in the drive-side cylinder bearing housing every 1000 hours.

3.15 Up;Down System

Greasing the up/down gear reducer shaft bearing and adjusting the belt.

3.16 Power Feed

Adjusting the power feed belt and chain tension for proper operation.

3.17 Miscellaneous Maintenance

Checking mill alignment, safety decals, and electrical connections.

SECTION 4 TROUBLESHOOTING GUIDE

4.1 Sawing Problems

Common sawing issues, their causes, and solutions for better performance.

4.2 Electrical Problems

Troubleshooting common electrical issues with motors, switches, and battery.

4.3 Power Feed Problems

Diagnosing and resolving issues related to the power feed system's performance.

4.4 Power Feed Circuit Troubleshooting

Interpreting LED lights on the power feed circuit board for diagnostics.

4.5 Hydraulic Problems

Troubleshooting common issues with the hydraulic system, pump, and valves.

4.6 Engine;Motor and Drive Pulleys Alignment

Steps for aligning engine/motor and drive pulleys for optimal belt performance.

4.7 Power Feed Variable Speed Switch Test

Testing the power feed variable speed switch for proper response and function.

4.8 Power Feed Preliminary Test

Performing a test to determine if power feed problems are mechanical or electrical.

4.9 Power Feed Mechanical Test

Detailed steps for mechanically testing the power feed system components.

4.10 Hydraulic Pressure Test

Procedure to check hydraulic pressure on E7+ revision LT30HD/LT40HD mills.

SECTION 5 SAWMILL ALIGNMENT

5.1 Pre-Alignment Procedures

Overview of steps to align the sawmill for accurate and square cuts.

5.2 Frame Setup

Instructions for setting up the sawmill frame on firm, level ground.

5.3 Blade Installation And Alignment

Steps for installing a blade and aligning the blade wheels for proper tracking.

5.4 Saw Head Slide Pad Adjustment

Adjusting the nylon pads for proper spacing between the saw head and mast.

5.5 Adjusting The Lower Track Rollers

Adjusting lower track rollers for square cuts and accurate board dimensions.

5.6 Adjusting Main Bed Rails To Blade

Procedure to adjust main bed rails to be parallel with the blade.

5.7 Blade Guide Arm Vertical Adjustment

Adjusting the vertical tilt of the blade guide arm for proper blade support.

5.8 Blade Guide Arm Horizontal Adjustment

Adjusting the horizontal position of the blade guide rollers relative to the blade.

5.9 Aligning The Blade Guides

Steps for aligning blade guides, including deflection, tilt, spacing, and horizontal tilt.

5.10 Blade Deflection

Steps to achieve proper blade deflection using the blade guides.

5.11 Blade Guide Vertical Tilt Adjustment

Checking and adjusting the vertical tilt of the blade guide.

5.12 Blade Guide Spacing

Adjusting the spacing of the blade guides relative to the blade's back edge.

5.13 Horizontal Tilt Adjustment

Tilting the blade guides horizontally to ensure proper roller alignment.

5.14 Horizontal Adjustment Of Side Supports

Adjusting side supports horizontally to clamp flats square for cuts.

5.15 Vertical Adjustment Of Side Supports

Adjusting side supports vertically to ensure they are perpendicular to bed rails.

5.16 Clamp Stop Adjustment

Adjusting the clamp stop to touch a string across the side supports.

5.17 Aligning The Pivot Bed Rails

Adjusting pivot bed rails to be level with main bed rails for cutting long cants.

5.18 Sight Gauge Adjustment

Adjusting the sight gauge to accurately show blade position over bed rails.

5.19 Saw Head Tilt

Compensating for saw head drop on wide logs by adjusting lower track rollers.

5.20 Blade Height Scale Adjustment

Calibrating the blade height scale indicator for accurate measurements.

Wood-mizer 1992 LT30HD Specifications

General IconGeneral
BrandWood-mizer
Model1992 LT30HD
CategorySaw
LanguageEnglish

Related product manuals