EasyManua.ls Logo

Wood-mizer MP260 - User Manual

Wood-mizer MP260
94 pages
Print Icon
To Next Page IconTo Next Page
Loading...
Wood-Mizer
®
Safety, Setup, Operation
and Maintenance
MP260 rev. A1.00
Safety is our #1 concern! Read and understand all
safety information and instructions before operating,
setting up or maintaining this machine.
Form# 2333
!
Original Instructions
Please keep for future reference

Other manuals for Wood-mizer MP260

Questions and Answers

  • J
    Joann BowersAug 12, 2025
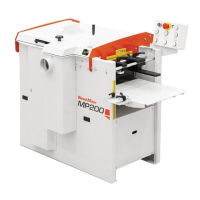
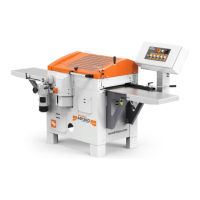
    Why is the width of the machined board different when using my Wood-mizer MP260?
    • M
      Mary HarringtonAug 13, 2025
      The width of the machined board may differ due to several reasons. The workpiece might be moving away from the side fences because the right-side fences are set incorrectly, so adjust them according to the instructions. It could also be that the locking handle of the movable cutter hasn't been tightened—pull it tight before planing/moulding. Incorrectly set pressure rollers, a stiff spring mechanism in the pressure rollers (clean and lubricate them), a workpiece that's too small, or a stationary side cutter removing too much wood (decrease feeding speed or takeoff) can also be culprits.
  • C
    Calvin CastilloAug 16, 2025
    How to fix in-and out-feed marks on my Wood-mizer MP260?
    • A
      Adrian GeorgeAug 16, 2025
      In-and out-feed marks can occur if the in- and out-feed tables are incorrectly adjusted; ensure they're at the same height as the machine table and aligned or slightly higher at the outer ends. Also, butt workpieces end-to-end when feeding to maintain consistent pressure. Check that the feeding pressure of the feed rollers is sufficient and balanced. If the workpiece is bent, slightly lift the back end during feeding to help the rollers press it flat. Finally, check for play in the machine table's suspension; if wobbly, see Leveling the machine.
  • E
    ericmccallAug 20, 2025
    What to do if the thickness of the board does not correspond to the setting of the scale on my Wood-mizer MP260?
    • A
      Arthur McclainAug 20, 2025
      If the board thickness doesn't match the scale setting, it could be due to incorrectly set takeoff of the knives in the upper cutter. Set the takeoff of the planing knives to 1 mm using the setting block or a straightedge. Alternatively, the pointer of the height scale might be incorrect. Machine a test board, measure it, and set the pointer to that measurement. Use the rotating scale of the height-adjusting crank for fine-tuning.
  • J
    Janet AllenAug 25, 2025
    Why is the entire surface fuzzy after using my Wood-mizer MP260?
    • J
      Jared JohnsonAug 25, 2025
      A fuzzy surface can result from high moisture content in the workpiece, so dry the timber before machining. Another cause could be that the knives have lost their sharpness, so grind the knives, especially when machining soft or moist wood.
  • R
    Robert LopezAug 27, 2025
    Why is the surface of the workpiece’s right side below par when using my Wood-mizer Planer?
    • R
      Rachel JimenezAug 27, 2025
      If the surface of the workpiece’s right side is below par, it might be that the locking handle of the movable side cutter has not been tightened. Ensure you pull the handle tight before planing or moulding.
  • C
    Christopher JohnsonAug 31, 2025
    What causes a fuzzy surface around knots on my Wood-mizer MP260 Planer?
    • J
      jeffreygreenAug 31, 2025
      A fuzzy surface around knots where the direction of the fibers can vary may be due to high moisture content in the workpiece, so dry the timber before machining it. It could also be that the knives have lost their sharpness, so grind the knives, especially when machining soft or moist wood. Additionally, the workpiece might be of a too soft sort of wood, so choose another material, or sand the workpiece after it has been machined.
  • R
    rogersdillonSep 4, 2025
    Why are the edges of the molding knives visible in the machined moulding profile of my Wood-mizer Planer?
    • P
      powelljamesSep 4, 2025
      If the edges of the molding knives are visible, it could be because the planing knives do not cut away enough wood. Set the takeoff of the planing knives to 1 mm, using the setting block supplied, or a straightedge. Alternatively, the moulding knives might be ground incorrectly. Regrind the moulding knives so that their edges do not protrude over the level of the planing knives, or use adjustable, short knife clamping gibs to adjust the moulding knives correctly.
  • J
    Joseph DavisSep 8, 2025
    What to do if splinters are being battered out of the workpiece when it reaches the movable side cutter on my Wood-mizer MP260 Planer?
    • E
      Ernest HarrisonSep 8, 2025
      If splinters are being battered out of the workpiece, it could be due to too much takeoff. Plane the workpiece into size before the final machining. It may also be that the chip deflector is incorrectly mounted. Mount the chip deflector so that it presses against the workpiece in front of the cutter.

Summary

Safety

2.1 Safety Symbols

Explanation of warning symbols and their meaning for user safety.

2.2 Safety Instructions

Essential safety rules and procedures for operating and maintaining the machine safely.

Setup

3.1 MP260 Moulder Assembly

Step-by-step guide for assembling the main components of the MP260 Moulder.

3.2 Planer;moulder setup

Prerequisites and conditions required before initial setup and operation of the machine.

3.3 Setup of upper and lower cutter heads

Instructions for correctly installing and aligning the primary upper and lower cutter heads.

Leveling lower cutter straight planer knives

Procedure for precise adjustment of lower cutter straight planer knives for optimal cut quality.

Initial setup of upper cutter

Steps for the initial installation and alignment of the machine's upper cutter assembly.

Leveling the upper cutter straight planer knives

Guide to accurately adjust the upper cutter straight planer knives for perfect finish.

Replacing cutter straight planer knives

Detailed instructions on how to safely remove and replace straight planer knives.

3.4 Side cutter setup

Procedures for installing, adjusting, and setting the side cutter heads.

Operation

Maintenance

5.11 Sharpening Knives

Methods and importance of maintaining sharp knives for optimal cut quality and machine life.

5.14 Electrical lockout procedures (US Market only)

Mandatory procedures for safely de-energizing equipment during maintenance and repair.

Troubleshooting

6.1 Operation problems

Common operational issues encountered with the planer/moulder and their solutions.

6.2 Mechanical or electrical problems

Troubleshooting guide for resolving mechanical faults and electrical system issues.

Wood-mizer MP260 Specifications

General IconGeneral
BrandWood-mizer
ModelMP260
CategoryPlaner
LanguageEnglish

Related product manuals