Do you have a question about the Woodhaven 8715 and is the answer not in the manual?
Slide the larger gauge on the 2" leg and the smaller gauge on the 1-1/2" leg of your framing square.
Ensure the top inside edge of the gauge is pressed against the outside edge of the framing square.
Use ruler markings on the square to set RISE with the small gauge and RUN with the large gauge.
Remove the One Track attachment hardware from each slot if not using the 24" One Track.
The inside facing corners index against the work, aligning with the top inside facing edges.
Slide the T-slot of the 24" One Track onto the head of the bolt in each gauge's slot.
Position the One Track along the work edge and tighten the knobs to secure it.
Use the top plates to mark the adjacent RUN or RISE for a short distance (1 to 1-1/4").
Slide the framing square/gauges along the work edge to reposition for the next layout.
The Woodhaven 8715 Deluxe Stair Gauges are a precision tool designed to assist in laying out stair stringers and other angled cuts with accuracy. This owner's manual provides detailed instructions for assembly, use, and features of the device.
The primary function of the Deluxe Stair Gauges is to provide a reliable and repeatable method for marking consistent rise and run measurements on a framing square, which is then used to lay out stair stringers. By attaching the gauges to a framing square, users can quickly and accurately transfer specific rise and run dimensions to a workpiece, ensuring uniformity in stair construction. The gauges are particularly useful for repetitive marking tasks, enhancing efficiency and precision in carpentry projects.
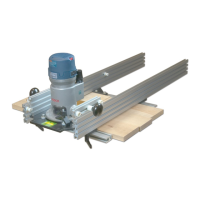
The Deluxe Stair Gauges are designed to be compatible with framing squares that have both 2-inch and 1-1/2-inch wide legs. A critical compatibility specification is the thickness of the framing square legs, which must be no more than 0.095 inches. The kit includes two main gauge assemblies: one 2-inch Deluxe Stair Gauge (part number 8715B1) and one 1-1/2-inch Deluxe Stair Gauge (part number 8715B2). Both gauges come with necessary hardware. The brass bolts used in the gauges are designed not to harm the surface of a steel square, though a cautionary note advises against using them on aluminum squares due to potential damage. The gauges are capable of working with stair angles as low as 26 degrees, which corresponds to an approximate rise of 6 inches and a run of 12-1/4 inches. An optional but highly recommended component is the 24-inch One Track (part number 4224), which serves as a fence and provides additional stability and accuracy for longer layouts or when working near damaged areas of a board.
The manual does not explicitly detail maintenance features beyond the initial assembly and proper use. However, based on the design and materials: