EasyManua.ls Logo

Woodward ProTech-GII 8237-1596 - User Manual

Woodward ProTech-GII 8237-1596
207 pages
Print Icon
To Next Page IconTo Next Page
Loading...
®
Product Manual 26709
(Revision F, 10/2016)
Original Instructions
ProTech-GII Overspeed Protection Device
with Voted Inputs
8237-1594, -1595, -1596, -1597, -1598, -1599,
-1600, -1601, -1656, -1660
Installation and Operation Manual

Table of Contents

Questions and Answers

  • C
    Crystal DeckerAug 12, 2025
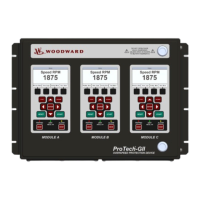
    How to troubleshoot power supply input alarm on Woodward ProTech-GII 8237-1596 Security Sensors?
    • N
      Nicholas MayAug 12, 2025
      If the Woodward Security Sensors power supply inputs aren't working and a power supply input alarm is present, check the wiring and terminal block connections to ensure they are secure. Verify that the breaker or fuse for the power source is not open. Confirm that you have at least two power supplies connected. On the front panel, press the VIEW button under the ALARM LED and check for Power Supply 1 or 2 Fault. Check the input voltage level to ensure it's within the acceptable range according to the electrical specifications, and verify the power supply has the appropriate rating to power the ProTech-GII.
  • W
    weisskevinAug 15, 2025
    What to do if trip relays are not working on Woodward Security Sensors?
    • T
      Tommy MitchellAug 16, 2025
      If the trip relays on your Woodward Security Sensors are not working, check the wiring and terminal block connections. Using the Programming and Configuration Tool or front panel, verify that the trip configuration is set correctly, considering that energize-to-trip versus de-energize-to-trip inverts the polarity on the relays. Check the power supplies that provide voltage to the relay output. If you are using the 24 V EXT available from the ProTech-GII, measure the voltage between terminals 80 and 81 to ensure it is 24 V ±10%. If it is not, remove the wiring from the 24 V EXT to unload the output and measure again to verify the voltage is not being overloaded.
  • C
    cummingsbobbyAug 20, 2025
    How to fix Woodward Security Sensors speed input not working?
    • M
      Malik HurleyAug 20, 2025
      If the speed input on your Woodward Security Sensors is not working, verify the wiring and terminal block connections. On the front panel, check the Speed Input Configure Menu to ensure all configuration options are correctly selected. Verify there are no alarms or faults indicating a setup problem, such as open wire trip, speed lost, or speed fail. Ensure the input signal levels are within the electrical specifications and check the shield connections. If using an active probe, disconnect it and measure the voltage from terminals 69 to 71; it should be 24 V ±10%. Reattach the probe and measure again to verify it is not overloading the voltage provided by the ProTech-GII.
  • E
    Elizabeth HernandezAug 23, 2025
    Why is the alarm relay output not working on Woodward ProTech-GII 8237-1596?
    • B
      bmartinAug 25, 2025
      If the alarm relay output on your Woodward Security Sensors is not working, check the wiring and terminal block connections. Inspect the power supplies that provide voltage to the relay output. If you're using the 24 V EXT available from the ProTech-GII, measure the voltage between terminals 80 and 81 to verify it's 24 V ±10%. If it is not, remove the wiring from the 24 V EXT to unload the output and measure again to verify the voltage is not being overloaded.
  • N
    Nicole WalshAug 27, 2025
    What causes dedicated discrete input malfunction in Woodward Security Sensors?
    • C
      Colin SosaAug 27, 2025
      If a dedicated discrete input (Start, Reset, or Speed Fail Override) on your Woodward Security Sensors is not working, verify the wiring and terminal block connections. On the front panel, check the Dedicated Discrete Inputs Monitor Menu and ensure the logic state is correct. Check the signal level to confirm it's within the acceptable range per the electrical specifications. Measure the voltage from terminal 1 to terminal 81; it should be 23 V ±2 V. If it is out of range, return the unit to Woodward.
  • M
    Melissa LewisAug 31, 2025
    How to troubleshoot analog output issues on Woodward ProTech-GII 8237-1596 Security Sensors?
    • S
      Sharon KellyAug 31, 2025
      If the analog output on your Woodward Security Sensors is not working, verify the wiring and terminal block connections. On the front panel, check the Monitor Analog Output Menu and ensure that the analog output is reading an expected output value. Measure the current from terminal 64 and verify it corresponds to the previous step. Verify the load on the analog output is within the electrical specifications. Using the PCT or front panel, verify the scaling is correct.
  • R
    Richard StevensonSep 3, 2025
    What to check if MODBUS is not functioning on Woodward ProTech-GII 8237-1596 Security Sensors?
    • V
      Vicki SolisSep 4, 2025
      If MODBUS is not working on your Woodward Security Sensors, verify the wiring and terminal block connections. Specifically, ensure the HI and LO wires are terminated to the correct terminals for RS-485, and likewise for TXD and RXD for RS-232. Also, verify the termination jumpers are installed for RS-485 mode. Using the PCT or front panel, verify the correct settings are selected.
  • M
    Mr. Christopher HoffmanSep 7, 2025
    How do I fix a Programming and Configuration Tool issue with Woodward ProTech-GII 8237-1596?
    • A
      amy04Sep 8, 2025
      If the Programming and Configuration Tool is not working with your Woodward Security Sensors, verify that the cable plugged into the DB9 port is not a crossover cable; a straight-through cable is required. Check that power is applied to the ProTechTPS module and that the service tool is connected. Verify the correct COM port is selected when establishing communications and that Auto Detection BAUD rate is selected.

Summary

Warnings and Notices

Important Safety Definitions

Defines safety alert symbols like DANGER, WARNING, CAUTION, NOTICE, and IMPORTANT.

Regulatory Compliance

Special Conditions for Safe Use

Chapter 1. General Information

Description

Overview of the ProTech-GII as an overspeed safety device for turbines and engines.

Chapter 2. Installation

Hardware Installation Procedure

Step-by-step instructions for mechanical and electrical installation of the ProTech-GII.

Module Removal and Installation-Bulkhead Mount Package

Procedure for safely removing and installing modules in bulkhead-mounted enclosures.

Module Removal and Installation-Panel Mount Package

Procedure for safely removing and installing modules in panel-mount enclosures.

Power Supply Requirements

Information on input power sources, voltage ranges, current limits, and wiring constraints.

Input;Output Specifications

Specifications for speed inputs, relay outputs, discrete inputs, analog outputs, and serial ports.

Chapter 3. Functionality

Features

Highlights fault-tolerant design, triple modular redundancy, and hot-replacement capabilities.

Inputs and Outputs

Details input redundancy options and the functions of speed sensors and discrete inputs.

Overspeed and Over-Acceleration Detection Logic

Explains how the device detects overspeed and over-acceleration events and generates trip commands.

Speed Redundancy Manager

Configuration options for managing multiple speed signals for increased reliability.

Acceleration Redundancy Manager

Configuration options for managing multiple acceleration signals for redundancy.

Start Logic

Details the functions for starting the unit, including speed fail detection and override logic.

Chapter 4. Front Panel Interface

Passwords

Details the two password levels (Test and Config) and their usage.

Overspeed;Acceleration Log Page

Displays a log of sensed overspeed or over-acceleration events and associated information.

Trip Log Page

Logs the last 50 trip events, including description, time, first-out, and test indication.

Alarm Log Page

Logs the last 50 alarms, including description, time, and test indication.

Chapter 5. Configuration of the ProTech-GII via Front Panel

Editing Configuration Settings from the Front Panel

Procedure for changing parameter settings via the front panel keypad after password entry.

Configuration Procedure

Step-by-step guide to changing configuration settings, requiring a tripped state.

Configure Speed Input Page

Settings for speed probe type, gear teeth, gear ratio, overspeed trip, and sudden speed loss.

Configure Acceleration Page

Settings for enabling and configuring acceleration trip functions.

Configure Start Logic Page

Configuration of speed fail setpoint, trip, alarm, and timeout functions.

Configure Speed Redundancy Manager Page

Settings for selecting speed signal sources and redundancy modes.

Configure Acceleration Redundancy Manager Page

Settings for selecting acceleration signal sources and redundancy modes.

Configure Trip Latch Page

Configuration of trip relay action (de-energize/energize) and latch output mode.

Configure Test Modes Page

Configuration for temporary overspeed trip, timeouts, and test mode permissives.

Configure Auto-Sequence Test Page

Settings for enabling and configuring the automatic sequence test routine.

Configure Modbus Page

Configuration settings for Modbus communication mode, baud rate, parity, and slave address.

Configuration Copy Page

Verifies and copies configuration settings between modules.

Password Change Menu Page

Allows changing the Test Level and Config Level passwords.

Chapter 6. Test Routines

Test Modes Menu

Provides access to all ProTech-GII tests, initiated from the front panel.

Temporary Overspeed Setpoint Test

Temporarily adjusts the overspeed setpoint for testing purposes.

Manual Simulated Speed Test

Manually adjusts internal frequency generator for overspeed trip function testing.

Auto Simulated Speed Test

Automatically ramps simulated speed to test overspeed trip function.

Auto-Sequence Test

Automatically tests modules A, B, and C sequentially at a configured interval.

Chapter 7. Programming and Configuration Tool

General

Methods for configuring the ProTech-GII using front panel or PCT software.

Levels of Operation of the Programming and Configuration Tool (PCT)

Describes the three operating levels: Isolated (Off-Line), Test Level (On-Line), and Config Level (On-Line).

Using the Programming and Configuration Tool (PCT)

Steps to execute for using the PCT, including connecting and logging in.

On-Line Menu

Accessing configuration data and logs when the PCT is connected to the ProTech-GII.

View Trip and Alarm Log

Lists recent trips and alarms detected and logged in the ProTech-GII.

View Overspeed;Acceleration Log

Displays a log of recent overspeed trips and associated speed/acceleration data.

Off-Line Menu

Accessing configuration settings and files without being connected to the ProTech-GII.

Configuration of the ProTech-GII - PCT

Configuring parameters online or offline using the PCT settings editor.

On-Line Configuration

Setting or changing parameters while the ProTech-GII is operational via serial link.

Load Settings File to Device

Uploading a saved configuration file from the PC to the ProTech-GII.

Configuration Settings - PCT

Parameters configurable via online or offline configuration using the PCT settings editor.

Chapter 8. Modbus Communications

Introduction

Overview of ProTech-GII's Modbus communication capabilities with control systems and panels.

Chapter 9. Safety Management

Safe State

Describes configurations for de-energize-to-trip and energize-to-trip safe states.

SIL Specifications

Details SIL-3 requirements for PFD, PFH, and SFF based on IEC61508.

Proof Testing (Functional Test)

Periodic proof testing procedure to ensure no undetected dangerous faults.

Chapter 10. Troubleshooting

Introduction

General approach to troubleshooting the ProTech-GII control using front panel features.

I;O Troubleshooting

Table of common I/O problems, possible causes, and suggested troubleshooting actions.

Trip Indications

Table of trip indications, descriptions, possible causes, and suggested actions.

Alarm Indications

Table of alarm indications, descriptions, possible causes, and suggested actions.

Chapter 12. Product Support and Service Options

Appendix. Modbus Ethernet Gateway Information

Woodward ProTech-GII 8237-1596 Specifications

General IconGeneral
CategorySecurity Sensors
Power Supply24 VDC
Communication ProtocolModbus RTU
TypeOverspeed Monitor
OutputsRelay outputs
Operating Temperature Range-40°C to +70°C

Related product manuals