SERVICING
& SPARES
INSTALLATION & SERVICING INSTRUCTIONS
36
REPLACEMENT PARTS
6-720-611-730b (12.05)
REPLACEMENT PARTS
IMPORTANT: Any service work must be
carried out by competent registered
engineers, such as British Gas or Corgi
registered personnel.
DRAINING THE APPLIANCE:
Turn off the heating flow and return valves at
the appliance.
Remove cap from drain valve on the tank and
replace with hose connector.
With a suitable hose fitted to the connector
open the drain tap.
Close the drain tap when the flow from the
appliance has stopped and replace cap.
DHW CIRCUIT:
Turn off the mains cold water supply at the
appliance.
Open a hot tap below the level of the appliance
to drain the domestic hot water from the
appliance.
NOTE: A small quantity of water may remain in
some components even after the appliance has
been drained. Protect any electrical components
when removing items from the water circuits.
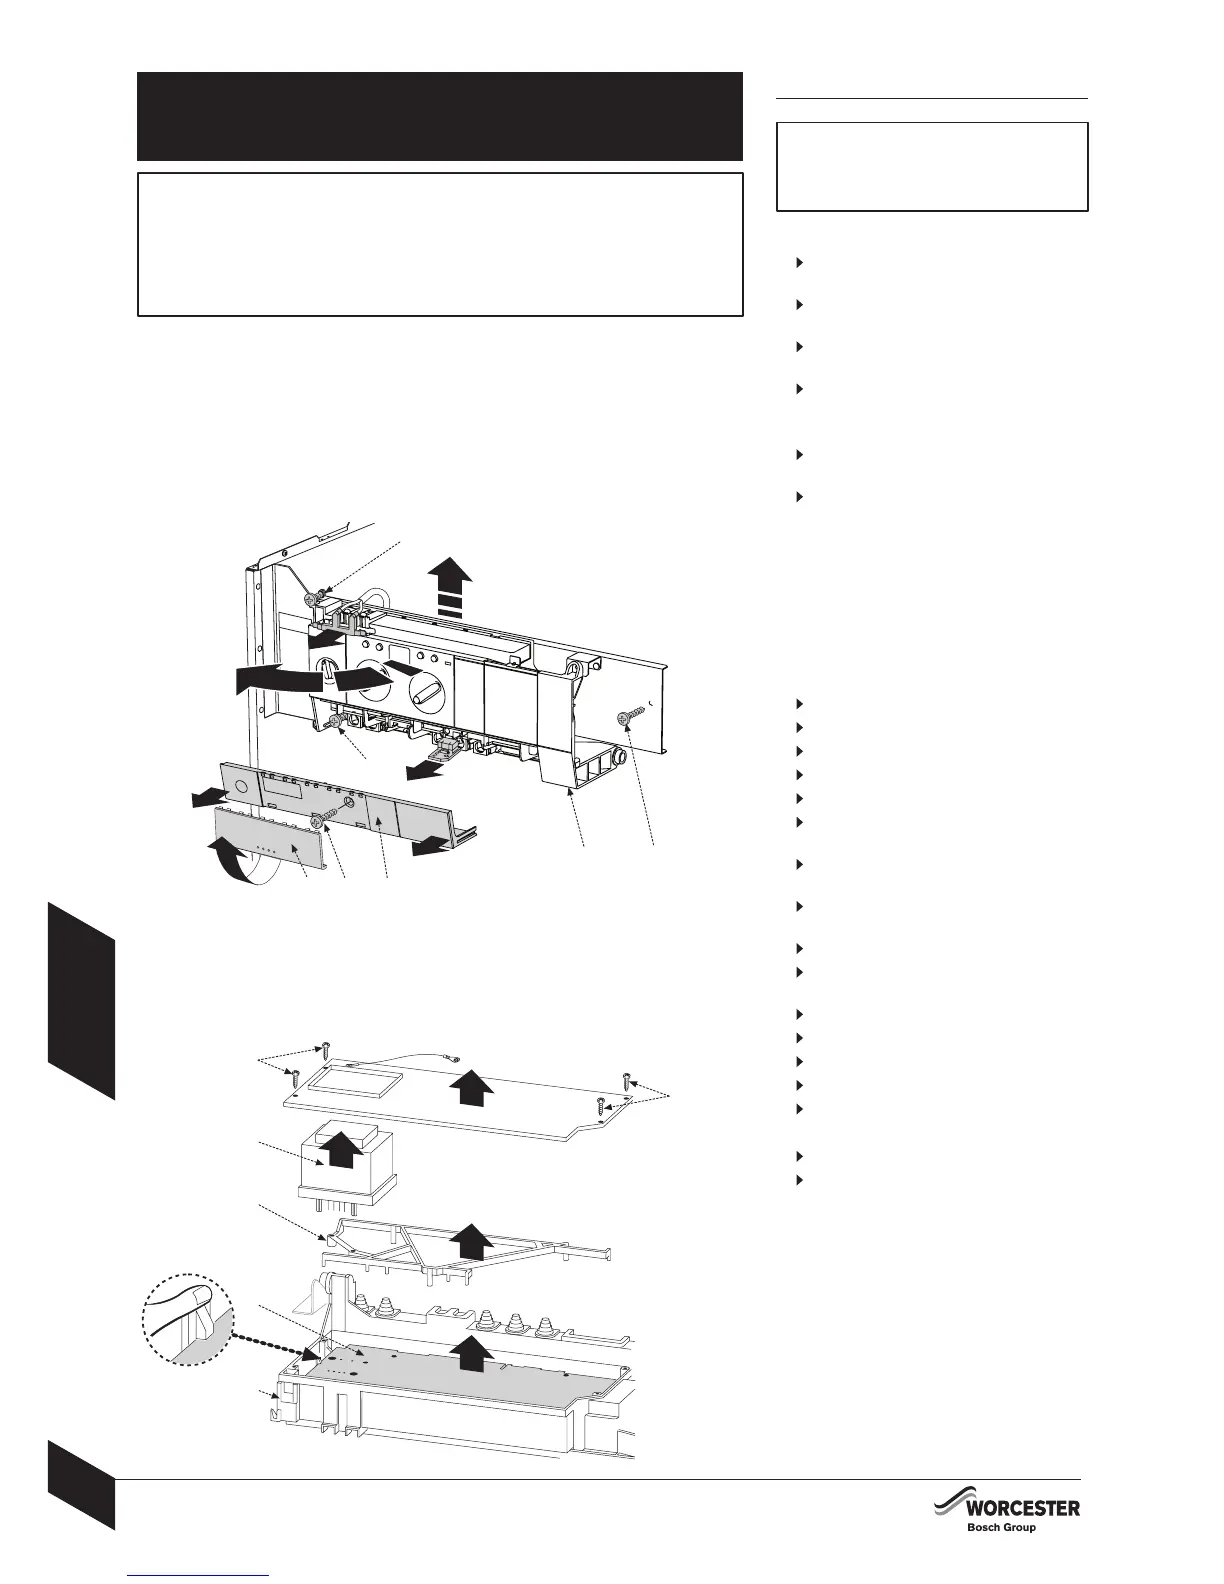
PCB CONTROL BOARD & TRANSFORMER:
Switch off and electrically isolate the boiler.
Remove boiler front panel.
1 Unclip cover (B).
Remove securing screw (C).
Slide cover (D) from control box (A).
2 Unplug all connectors from the control box,
including the code plug.
Slacken screw (E) and remove the power
connector earth lead.
3
Remove retaining screw (F) to swing control
panel assembly (A) outwards to its full extent.
Unscrew earth lead.
4 Remove retaining screw (G) and lift control
panel assembly (A) away from the support hinge.
5
Unscrew fixing screws (H) from cover plate.
Prise off cover plate (J).
Pull off transformer (K).
Remove PCB holder (L).
Remove the PCB control board (M).
Fuses:
Remove the connections cover.
The fuses are located adjacent to the mains
connector block and connector ST18.
Fuse, item 312, is only replaceable by removing
the PCB. Spare fuses are fixed to the
connections cover. A fuse pack is available:
Part No. 8 744 503 010 0.
CAUTION: TURN OFF THE GAS SUPPLY AND ISOLATE THE MAINS SUPPLIES BEFORE
STARTING ANY WORK AND OBSERVE ALL RELEVANT SAFETY PRECAUTIONS.
DRAIN THE BOILER/SYSTEM WHERE NECESSARY AND PROTECT ANY ELECTRICS
FROM WATER INGRESS DURING COMPONENT REPLACEMENT.
IMPORTANT: Refit or replace any components removed from the appliance in the reverse
order using new gaskets/'O' rings/sealant/heat transfer paste where necessary.
Any 'O' ring or gasket that appears damaged must be replaced. Always check that any
electrical connections are correctly made and that all screws are tight.
AFTER REPLACEMENT OF ANY COMPONENTS ALWAYS CHECK FOR GAS SOUNDNESS
WHERE RELEVANT AND CARRY OUT FUNCTIONAL CHECKS AS DESCRIBED IN THE
COMMISSIONING SECTION.
C
H
2
4
1
F
3
5
H
A
2
B D
E
G
J
K
L
A
 Loading...


