R
E
L
E
A
S
E
G
R
I
P
3
/
8
”
(
1
0
m
m
)
9
Fig.H
Tungsten carbide drill bits should always be used
for concrete and masonry. When drilling in metal, only
use HSS drill bits in good condition. Always use a
magnetic bit holder (not included) when using short
screwdriver bits. When screw-driving, apply a small
quantity of liquid soap or similar to the screw threads
to ease insertion.
10. Tool Protection System
The tool will automatically stop during operation if the
tool and/or battery are placed under one of the
following conditions:
Overloaded: The tool is operated in a manner that
causes it to draw an abnormally high current. In this
situation, release the Trigger Switch on the tool and
stop the application that caused the tool to become
overloaded. Then pull the Trigger Switch again to
restart.
Overheated: Under the condition above, if the tool
does not start, the Battery are overheated. In this
situation, let the Tool and Battery cool before pulling
the Trigger Switch again.
Low battery voltage: The remaining Battery
capacity is too low and the tool will not operate. In
this situation, remove and recharge the Battery.
PROBLEM SOLUTION
1. Why Does The Drill Not Turn On When You Press
The Switch?
The forward/reverse rotation control, which is on top of
the trigger, is positioned in the lock function. Unlock the
forward/reverse rotation control by putting it into the
required rotation position. Push the trigger and the drill
will start to rotate. Or if the LED light flashes at the
same time you press the Switch, please charge the
battery.
2. The Drill Stops Before The Screw is Completely
Tightened. Why?
Verify the torque position of the torque adjusting ring,
you can find the torque-adjusting ring between the
chuck and the drill body. Position 1 is the lowest torque
(screw driving force) and position 18 is the highest
torque (screw driving force). Position is for drill
operation. Regulate the torque adjusting ring to a
higher position to reach the best result.
3. Reasons for Different Battery Pack Working Times
Charging time problems, as above, and having not
used a battery pack for aprolonged time will reduce the
battery pack working time. This can be corrected after
several charge and discharge operations by charging &
working with your drill. Heavy working conditions such
as large screws into hard wood will use up the battery
pack energy faster than lighter working conditions. Do
not re-charge your battery pack below 40° F and above
104° F as this will affect performance.
9. Drilling
When drilling into a hard smooth surface, use a center
punch to mark the desired hole location. This will
prevent the drill bit from slipping off center as the hole
is started. Hold the tool firmly and place the tip of the
bit at the point to be drilled. Depress the switch trigger
to start the tool. Move the drill bit into the workpiece,
applying only enough pressure to keep the bit rotating.
Do not force or apply side pressure to elongate a hole.
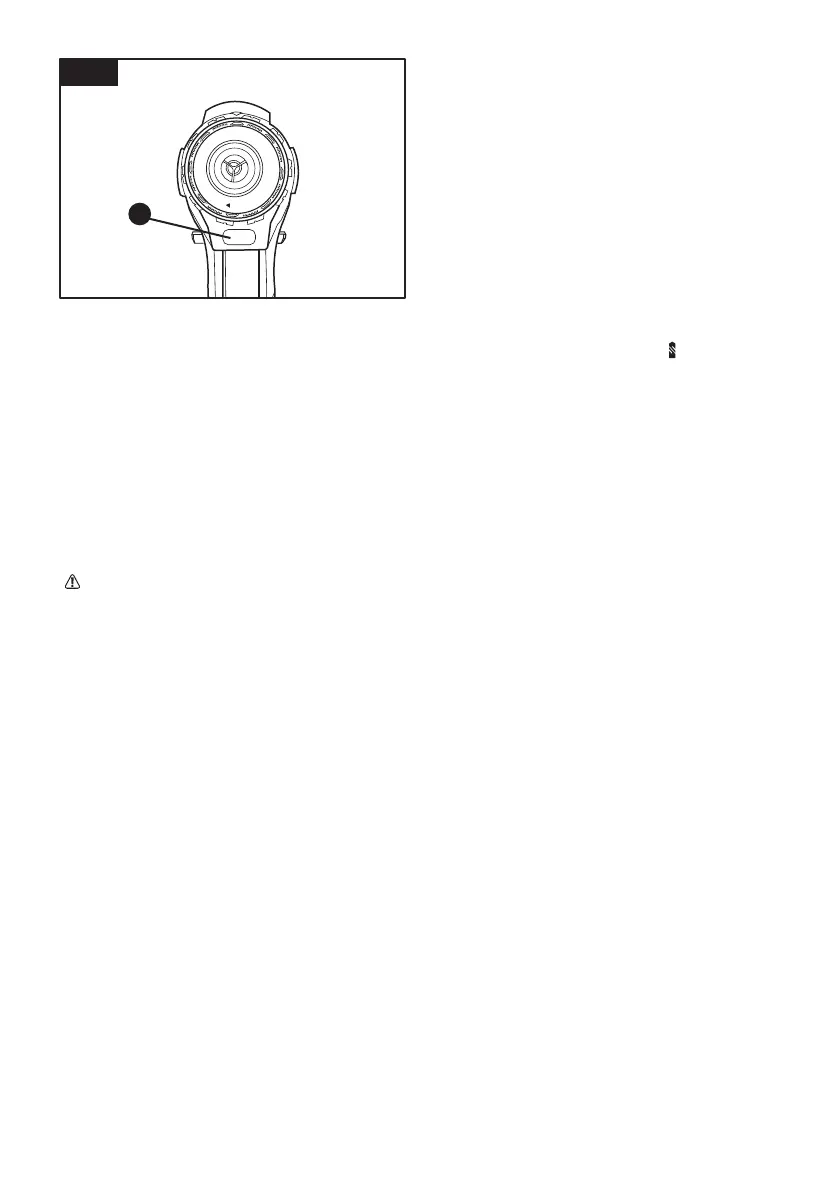
8. Using The LED Light (Fig. H)
The LED light allows you to keep a clear view under
less illuminated circumstances. To turn on the light
simply press the on/off switch. When you release the
on/off switch, the light will go out.
10