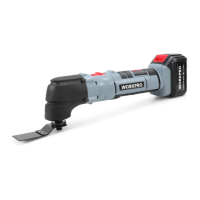
6. OPERATION
WARNING: Make sure you have read all safety
instructions. This tool comes completely assembled.
There is no assembly required. Make sure tool is
powered off before any of operations.
6.1 Operation
1. Make sure tool is powered off.
2. The staple gun has a bottom load staple magazine.
Turn tool upside down and squeeze pusher
assembly (Fig 2).
3. Pull pusher assembly out until it stops to reveal the
staple magazine (Fig 3).
4. Place stick of staples in bottom channel so legs are
pointing up(Fig 4).
For narrow flat crown, cable, brads and pin, place
only on left side. Push slide closed, making sure
that latch engages.
5. For brads, Be sure nail heads are pointing down.
For pin, be sure the flat end are pointing down, and
the sharp tip are pointing up. Push slide closed,
making sure that latch engages.( (Fig 5)
STAPLES: Place staples into magazine with the
points facing up and out of the tool (Fig 6). Never
attempt to completely remove pusher assembly as
this may damage the tool and void the warranty.Close
pusher assembly until it snaps into place. On very
hard surfaces,firing recoil may interfere with
nail/staple penetration.Enhance driving power by
firmly placing one hand on top of cap.(Fig 7)
6.2 Firing your tool
1. To fire your tool, make sure tool is powered on.
place down on your workpiece depressing the
contact safety on the front of the tool. Once the
contact safety is depressed, push the trigger to fire
your staple. You must pick up the front of the tool
and reactivate the contact safety for each shot. The
tool will operate in low temperatures down to 32°F
(0°C) and in higher temperatures up to 104°F (40°C).
6.3 How to determine proper staple leg size
In choosing the proper staple leg length for a job,
there are two basic things to consider:
1. Thickness of material to be stapled.
2. Hardness of the wood. As a general rule, in
hardwood, approximately 3/16” to 1/4”penetration
into the wood is sufficient...and for softwood, up to
approximately 3/8”should be sufficient. The staple
should be flush with the underlying surface, as
shown in (Fig 8b). However, if the staple used is not
flush with the underlying surface, as shown in (Fig
8a)– this means that too long a leg length has been
used. In that case, we recommend the next shorter
leg length for desired results.
GB
7. CLEANING AND MAINTENANCE
The tool is virtually maintenance free. Keep tool clean
and free of dust. Wipe clean with a dry cloth; do not
use harsh chemicals to clean. There are no parts
inside the equipment which require additional
maintenance.
8. STORAGE
Store the equipment and accessories in a dark and
dry place at above freezing temperature. The ideal
storage temperature is between 41°F(5°C) and 86°F
(30°C). Store the electric tool in its original packaging.
9. DISPOSAL AND RECYCLING
The equipment is supplied in packaging to prevent it
from being damaged in transit. The raw materials in
this packaging can be reused or recycled. The
equipment and its accessories are made of various
types of material, such as metal and plastic. Never
place defective equipment in your household refuse.
The equipment should be taken to a suitable
collection center for proper disposal. If you do not
know the whereabouts of such a collection point, you
should ask in your local council o ces.
Consult your local waste authority for
information regarding available recycling
and/or disposal options. Discharge your
battery pack by operating your tool, then
remove the battery pack from the tool housing and
cover the battery pack connections with heavy-duty
adhesive tape to prevent short circuit and energy
discharge. Do not attempt to open or remove any of
the components.
This product has been marked with a symbol
relating to removing electric and electronic
waste. This means that this product shall not
be discarded with household waste but that it
shall be returned to a collection system. It will then be
recycled or dismantled in order to reduce the impact on
the environment. Electric and electronic equipment can
be hazardous for the environment and for human health
since they contain hazardous substances.
To preserve natural resources, please recycle or
dispose of the battery pack properly. This battery pack
contains Li-ion batteries.
DISPOSAL OF AN EXHAUSTED BATTERY PACK
10
ENVIRONMENTAL PROTECTION
 Loading...