EasyManua.ls Logo

Worldline ingenico Move/5000 - User Manual

Default Icon
7 pages
Print Icon
To Next Page IconTo Next Page
Loading...
Move/3500 User Guide
Page 1
Quick Start Guide
Move/5000
GETTING STARTED
Set up your base unit in a convenient location close to a power
source and an Ethernet socket.
To connect the Ethernet cable, connect one side to your
Ethernet socket or router and the other side to the socket
located on the rear of your base unit.
To connect the base unit to a telephone point, remove the back
panel as shown in the diagram. Connect one end of the
telephone cable to the modem socket on your base unit
CONNECTIVITY
The Move/5000 is a Multi-Comms terminal meaning you can
connect via Ethernet, Mobile Network or WiFi/Bluetooth.
To setup a mobile connection on the terminal, you simply need
to insert the SIM card into the back of the Terminal and reboot
using the dot key and yellow key.
FUNCTION KEYS
Virtual Function Keys: These appear on the Touchscreen interface
when they may be used as shortcuts eg. F1 to print a duplicate
receipt.
Menu key: To enter the application menus press the Menu key from
the idle (READY) screen. Pressing the key again moves to the next
menu (if available).
Correction keys: When entering numbers or letters, the yellow
key deletes one character at a time; while the red key deletes the
entire line (this key also cancels transactions). Confirmation key:
The green key is used to confirm anything that has been typed
into the terminal.
Paper feed key: To test the feeding of the paper through the
printer press and hold the paper feed key.
Question and Answer IconNeed help?

Do you have a question about the Worldline ingenico Move/5000 and is the answer not in the manual?

Overview

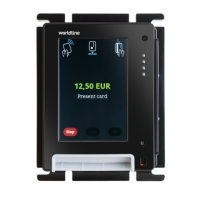
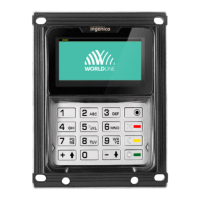
The Ingenico Move/5000 is a multi-comms payment terminal designed for efficient and secure transactions. It supports various connectivity options and offers a user-friendly interface with both physical and virtual function keys.

Function Description:

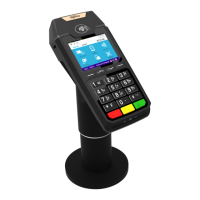
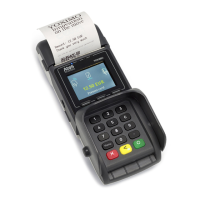
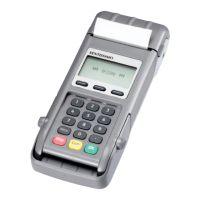
The Move/5000 serves as a point-of-sale (POS) terminal capable of processing Chip & PIN, contactless, and mail order transactions. It can connect to an acquirer for authorization via Ethernet, mobile network (SIM card), or Wi-Fi/Bluetooth. The terminal is designed to be paired with a base unit, which provides the necessary telephone and Ethernet connections. It supports the insertion of SIM cards for mobile connectivity and SAM (Secure Access Module) cards for enhanced security. The device features a built-in printer for generating transaction receipts and a touchscreen display for user interaction. It also includes a chip card reader for processing EMV (Europale, Mastercard, Visa) cards and supports contactless payments.

Important Technical Specifications:

  • Connectivity: Ethernet, Mobile Network (SIM card), Wi-Fi, Bluetooth.
  • Card Readers: Chip card reader (EMV), Contactless reader.
  • Display: Touchscreen interface.
  • Input: Physical keypad, Virtual function keys (F1-F4 on touchscreen).
  • Security: PCI DSS v2 Wireless Guidance compliance for Wi-Fi networks.
  • Power: Requires connection to a power source.
  • Base Unit: Connects to telephone and Ethernet sockets.
  • SIM/SAM Slots: Supports SIM cards for mobile connectivity and SAM cards for security.

Usage Features:

  • Getting Started: The base unit should be set up near a power source and an Ethernet socket. Ethernet and telephone cables connect to the rear of the base unit.
  • Connectivity Setup:
    • Mobile: Insert a SIM card into the back of the terminal and reboot using the dot key and yellow key.
    • Bluetooth Base Setup: Terminals are typically pre-paired. To associate a terminal to a Bluetooth base, navigate through 'Control Panel' > 'Terminal Settings' > 'Communication means' > 'Bluetooth' > 'Base' > 'Association' > 'New Base'.
    • Wi-Fi Setup: Access 'Control Panel' > 'Terminal settings' > 'Communication Means' > 'WiFi' > 'Scan Networks'. Choose a network and enter the password. The Wi-Fi icon will turn green upon successful connection.
  • Function Keys:
    • Virtual Function Keys (F1-F4): Appear on the touchscreen for shortcuts (e.g., F1 for duplicate receipt).
    • Menu Key: Enters application menus from the idle (READY) screen; pressing it again navigates to the next menu.
    • Correction Keys:
      • Yellow Key: Deletes one character at a time when entering numbers or letters.
      • Red Key: Deletes the entire line and cancels transactions.
    • Confirmation Key (Green Key): Confirms typed input.
    • Paper Feed Key: Tests paper feeding through the printer when pressed and held.
  • Supervisor Password: The default password is 01483. Users are required to change this before processing transactions.
  • Chip Card Reader Usage: Insert customer cards with the chip upwards into the slot below the keypad. Follow on-screen instructions. Do not remove the card until prompted. If a "BAD READ" message appears, check orientation and retry. After three bad reads, the terminal may prompt to swipe the card.
  • Transaction Processing:
    • Chip & PIN Sale: Insert card, enter amount, press green key. Customer enters PIN. Terminal connects for authorization. Prints merchant and customer receipts.
    • Chip & PIN Refund: Press menu, select "REFUND," enter Supervisor password, confirm with green key. Insert card, enter refund amount, press green key. Terminal connects for authorization. Prints merchant copy (customer signs), then customer copy.
    • Contactless Sale: Enter sale amount, press green key. Cardholder presents card/payment device against the contactless symbol. Terminal prints merchant receipt.
    • Mail Order Transactions (Sale/Refund): Press menu, select "MAILORDER." Choose "SALE" or "REFUND." Enter card number, expiry date, start date (if required), issue number (if required), CSC, postcode numbers, address numbers, and sale/refund amount. Press green key after each entry. Terminal connects for authorization. Prints two receipts.
  • End of Day Reports:
    • Access via menu > "REPORTS." Enter Supervisor password, press green key.
    • END OF DAY: Prints both "Z REPORT" and "BANKING" report. Must be done daily.
    • BANKING: Shows total value of processed transactions, confirmed by acquirer.
    • X REPORT: Provides a breakdown of transactions for reconciliation.
    • Z REPORT: Same as X REPORT but resets totals for the next day's trade.
  • Referrals: If "CALL AUTH CENTRE" or "PLEASE WAIT" appears with a phone number, refer the transaction and call for authorization.
  • PIN Tries Exceeded: If this message appears, the card's PIN is locked. The cardholder must contact their issuer or use an ATM to unlock it.
  • Duplicates: To print a duplicate of the last transaction, press the menu key three times, then select "DUPLICATE" and press green key.

Maintenance Features:

  • Changing the Paper Roll:
    1. Securely hold the terminal.
    2. Lift the printer cover release with two fingers and fully open the cover.
    3. Remove the old paper roll.
    4. Unstick the end of the new roll, leaving it free.
    5. Place the new roll into the printer compartment.
    6. Close the printer cover firmly until it locks.
    7. Press and hold the paper feed key to ensure correct feeding.
    • Important: Only open the printer cover as shown; do not force it.

The Move/5000 is a robust and versatile payment solution, designed to facilitate a wide range of secure transactions with ease of use and comprehensive reporting capabilities.

Worldline ingenico Move/5000 Specifications

General IconGeneral
BrandWorldline
Modelingenico Move/5000
CategoryPayment Terminal
LanguageEnglish

Related product manuals